

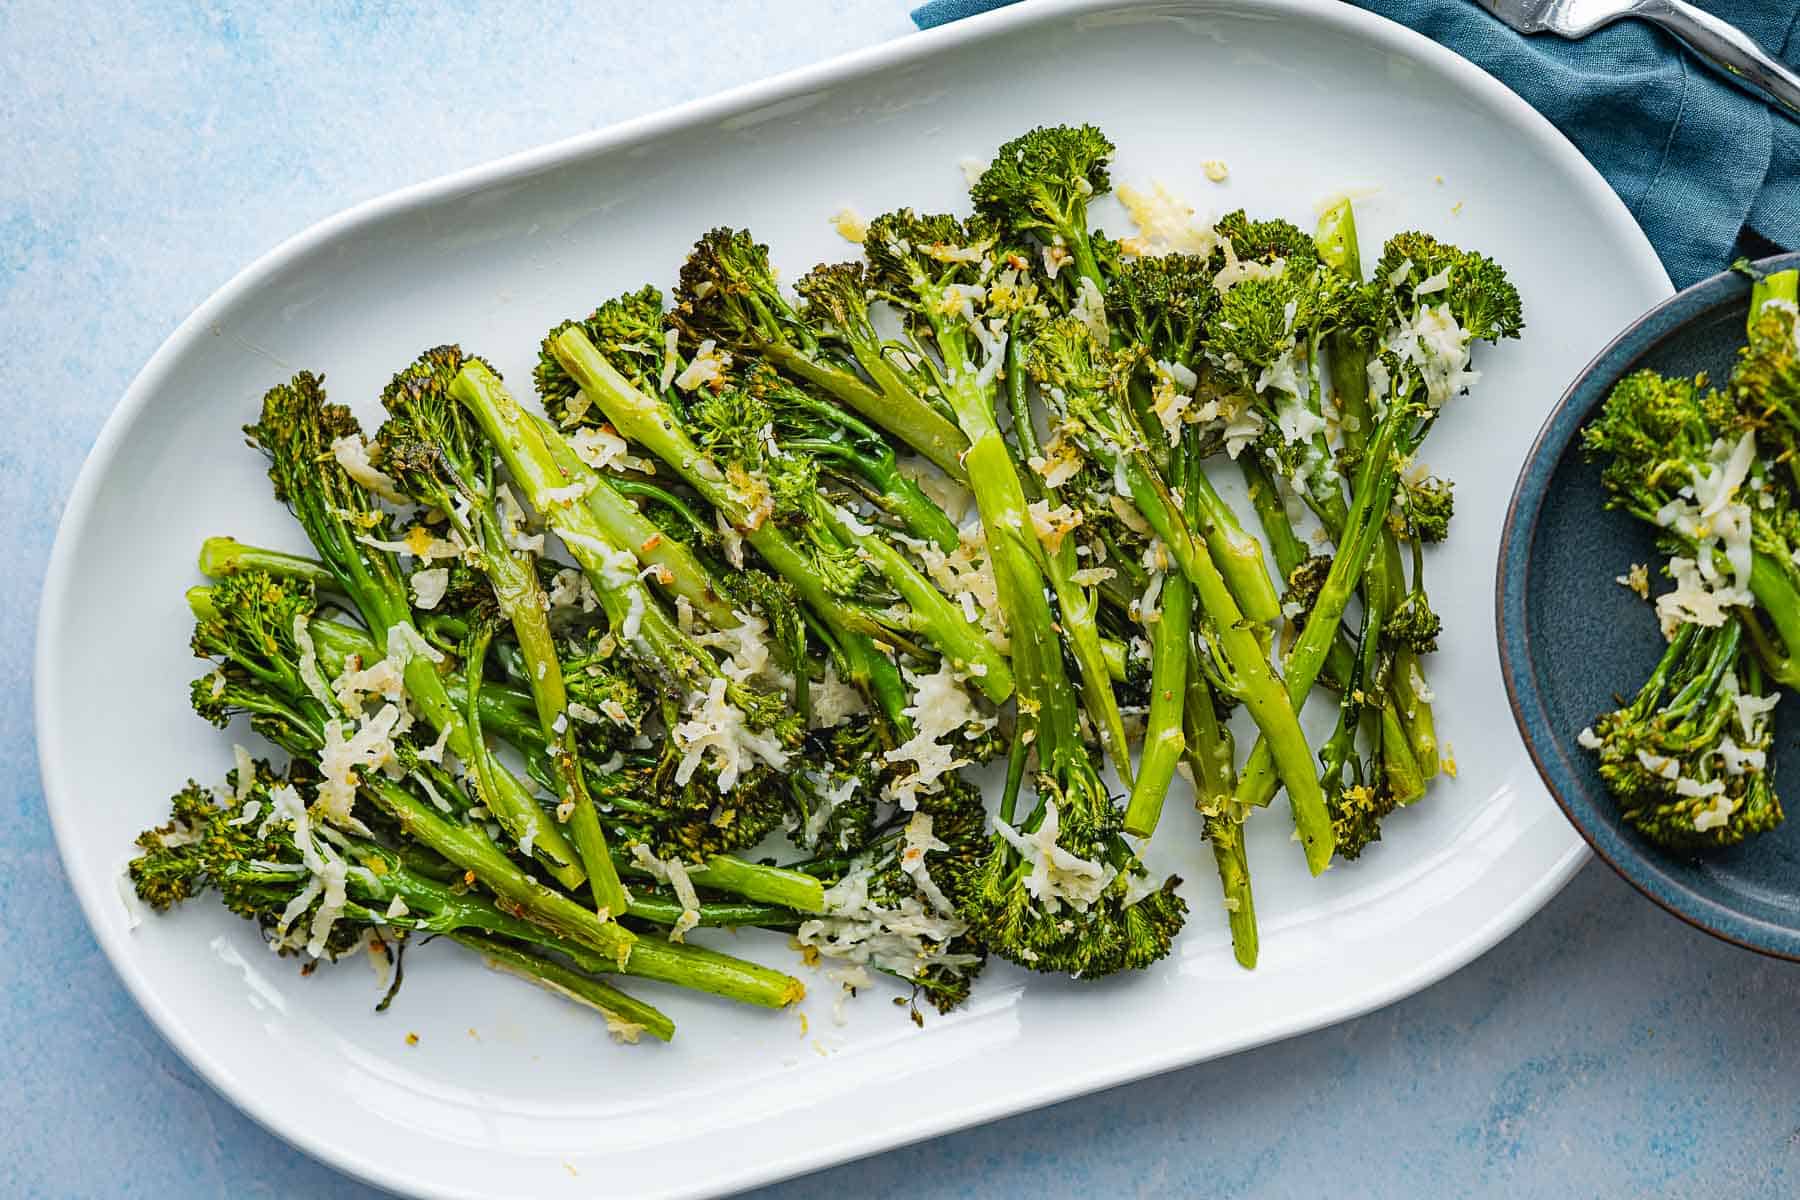
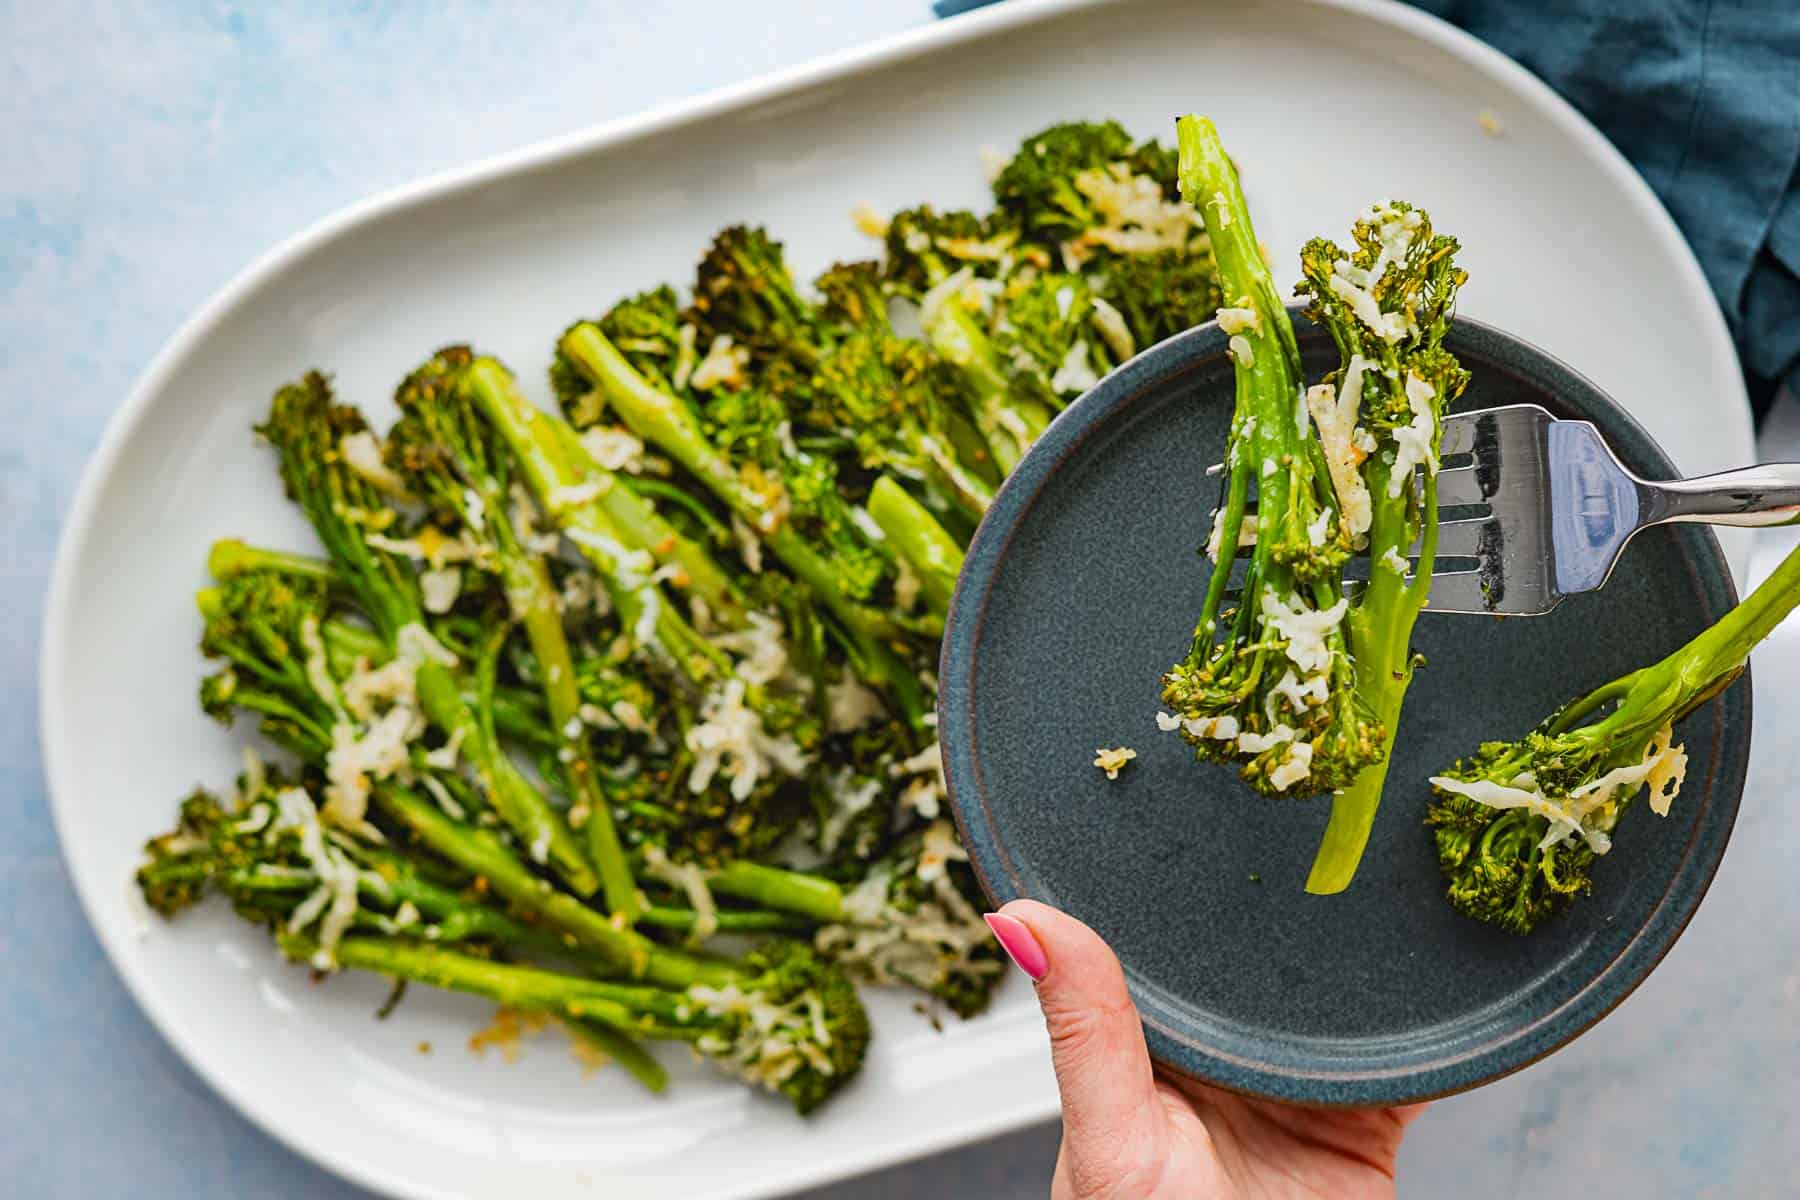
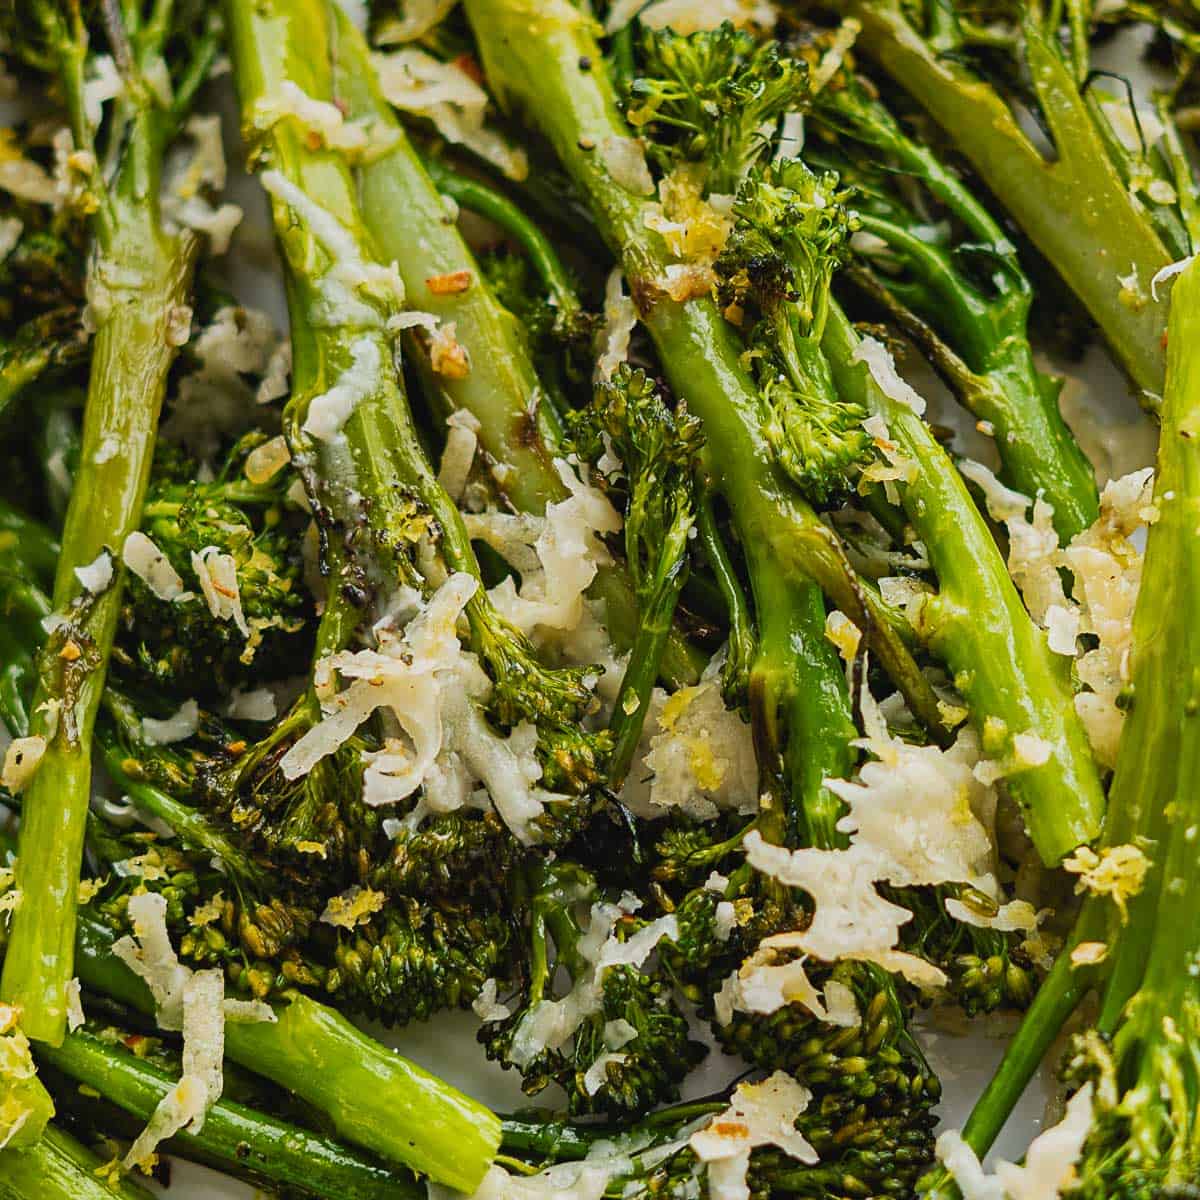
This easy roasted broccolini recipe is a side dish that makes a midweek dinner feel like you put more effort in than you did (it’s ready in just over 15 minutes). As a bonus, it goes with literally any main dish. Say goodbye to floppy, mushy veggies! These are crisp-tender stems of broccolini with the perfect amount of char on the florets that have been slathered in olive oil and garlic, and topped with melty parmesan cheese and fresh lemon zest.
Now, if you’ve ever made roasted veggies only to end up with a sad steamed side dish, I’m spilling all the tips + tricks I learned straight from culinary school to keep your veggies tender with a slight bite, instead of mushy and bland. This broccolini is quick and easy to make while you’re cooking something else on the stovetop. It can be roasting in the oven, freeing you up to get the rest of dinner together. Talk about a weeknight wonder!
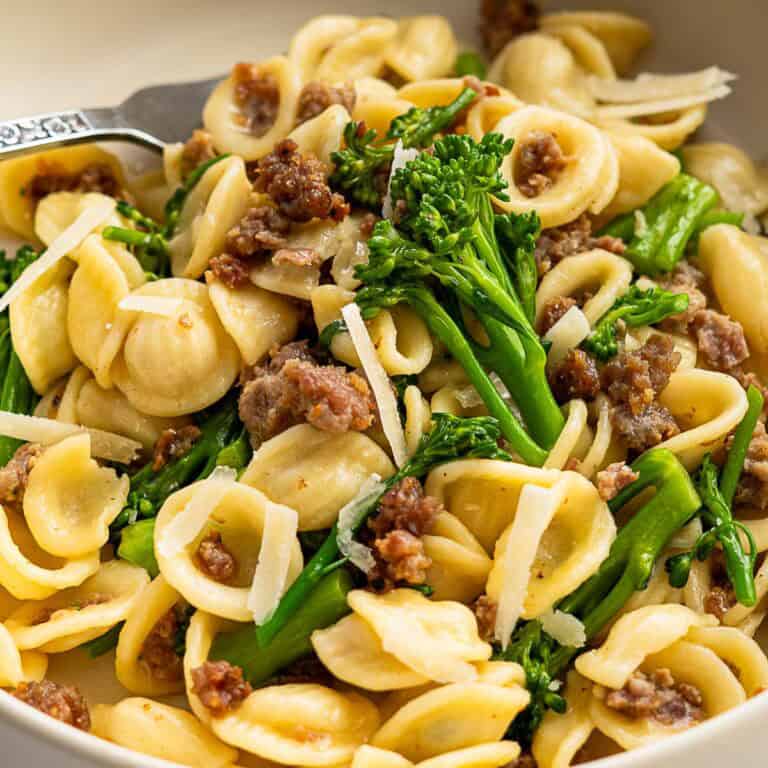
It works super well with any protein like crispy pan fried chicken, Italian meatballs, pot roast…you name it! It’s also the perfect mix-in to any pasta recipe that could benefit from an additional veggie, and yeah, you can even lightly roast it and use it to top pizza too! 😛
👀 the secret sauce…
✨ the flavor: This recipe layers on The Pop and The Oomph Flavor Factors! Acidity from the lemon zest adds a pop of brightness that highlights the flavor of seasonal broccolini, and the deep umami flavor of parmesan cheese adds a layer of interest and richness to an otherwise one-note dish.
🎯 the method: Rinse and prep your broccolini, then toss with olive oil + spices before roasting quickly at a high temperature. Finish it off with some parmesan cheese and lemon zest and you’re set for serving!
🏆 the win: You get an easy-to-make side dish that goes with basically everything for a minimal effort, maximum payoff veggie!
what are The Flavor Factors?
The Flavor Factor Framework is my lil set of “flavor guideposts” for cooking with confidence! Less following recipes to a tee, more trusting your instincts, getting creative in the kitchen, and becoming a more intuitive cook! 👩🏻🍳
📚the backstory of developing this recipe
(aka everyone’s favorite part of food blogs!)
Yeah, I know. It’s broccolini. How complicated can it be?! But it can be tough to get restaurant quality side dishes at home for a lot of home cooks, so if that’s true for you, here’s the scoop. 👀
I’ve adapted this recipe from Ina Garten who despite what many people think, prizes simplicity in most of her recipes. In fact, her recipe is so simple that all it contains is broccolini, olive oil, salt, and pepper. While I do agree with Ina that a good seasonal veggie at peak freshness doesn’t need a whole lot of doctoring up to taste good, I prefer to add a bit more flavor to my roasted broccolini. Plus, I’ve always been a little extra. 💁🏻♀️ A generous dusting of shredded Parmesan cheese adds saltiness and a deep umami flavor that really rounds out the taste of the roasted broccolini, garlic plays up the sweetness of broccolini, and lemon zest really adds a pop of flavor.
After tons of trial and error at home, I’ve found a few things need to happen to be able to nail the perfect roasted veggie side dish at home. The first is getting the oven temperature right (and regulated). The second is giving the veggies enough space to actually roast without taking a steam bath. See, when veggies are heated at a high temperature, moisture evaporates. This means that steam WILL be created, so you want to be sure to give the veggies enough space between them that the steam can escape without becoming trapped.
In order to achieve the famed Maillard-style reaction from roasting (the caramelized, roasty, toasty flavor compounds that give OOMPH and depth), you need a high, dry, even heat. Steam totally disrupts that process. Vegetables like broccolini aren’t particularly high in protein (a key component in creating the Maillard reaction), but they do have starches, sugars, and some amino acids, which help create a similar flavor profile when roasting.
And if you want to go the extra mile, try sprinkling on some homemade Italian breadcrumbs for an extra bit of crunchiness. It’s a good fun way to level up this simple side dish into something worth sharing with friends and family!
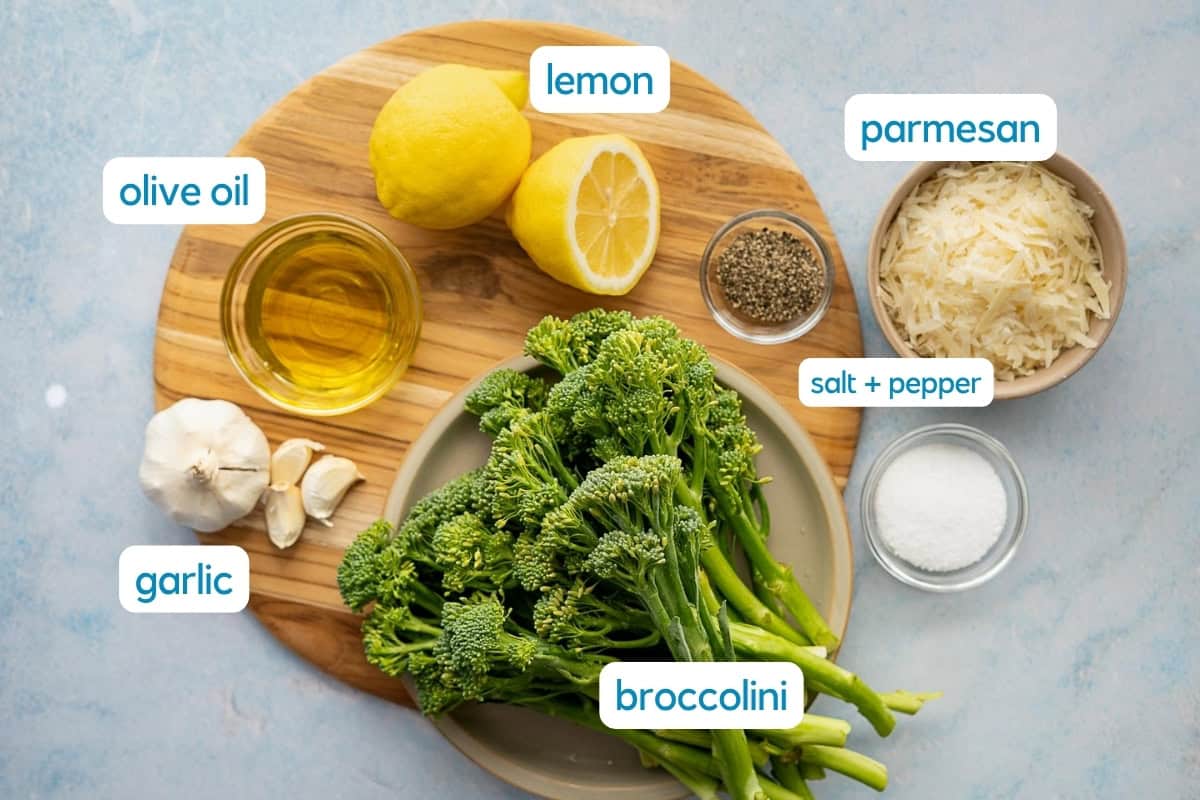
🛒 ingredients needed for roasted broccolini
🥦 broccolini 101
🍳 how to make perfectly roasted broccolini

1: Wash and dry broccolini, then trim to remove the lower 1-2 inches of stalks.
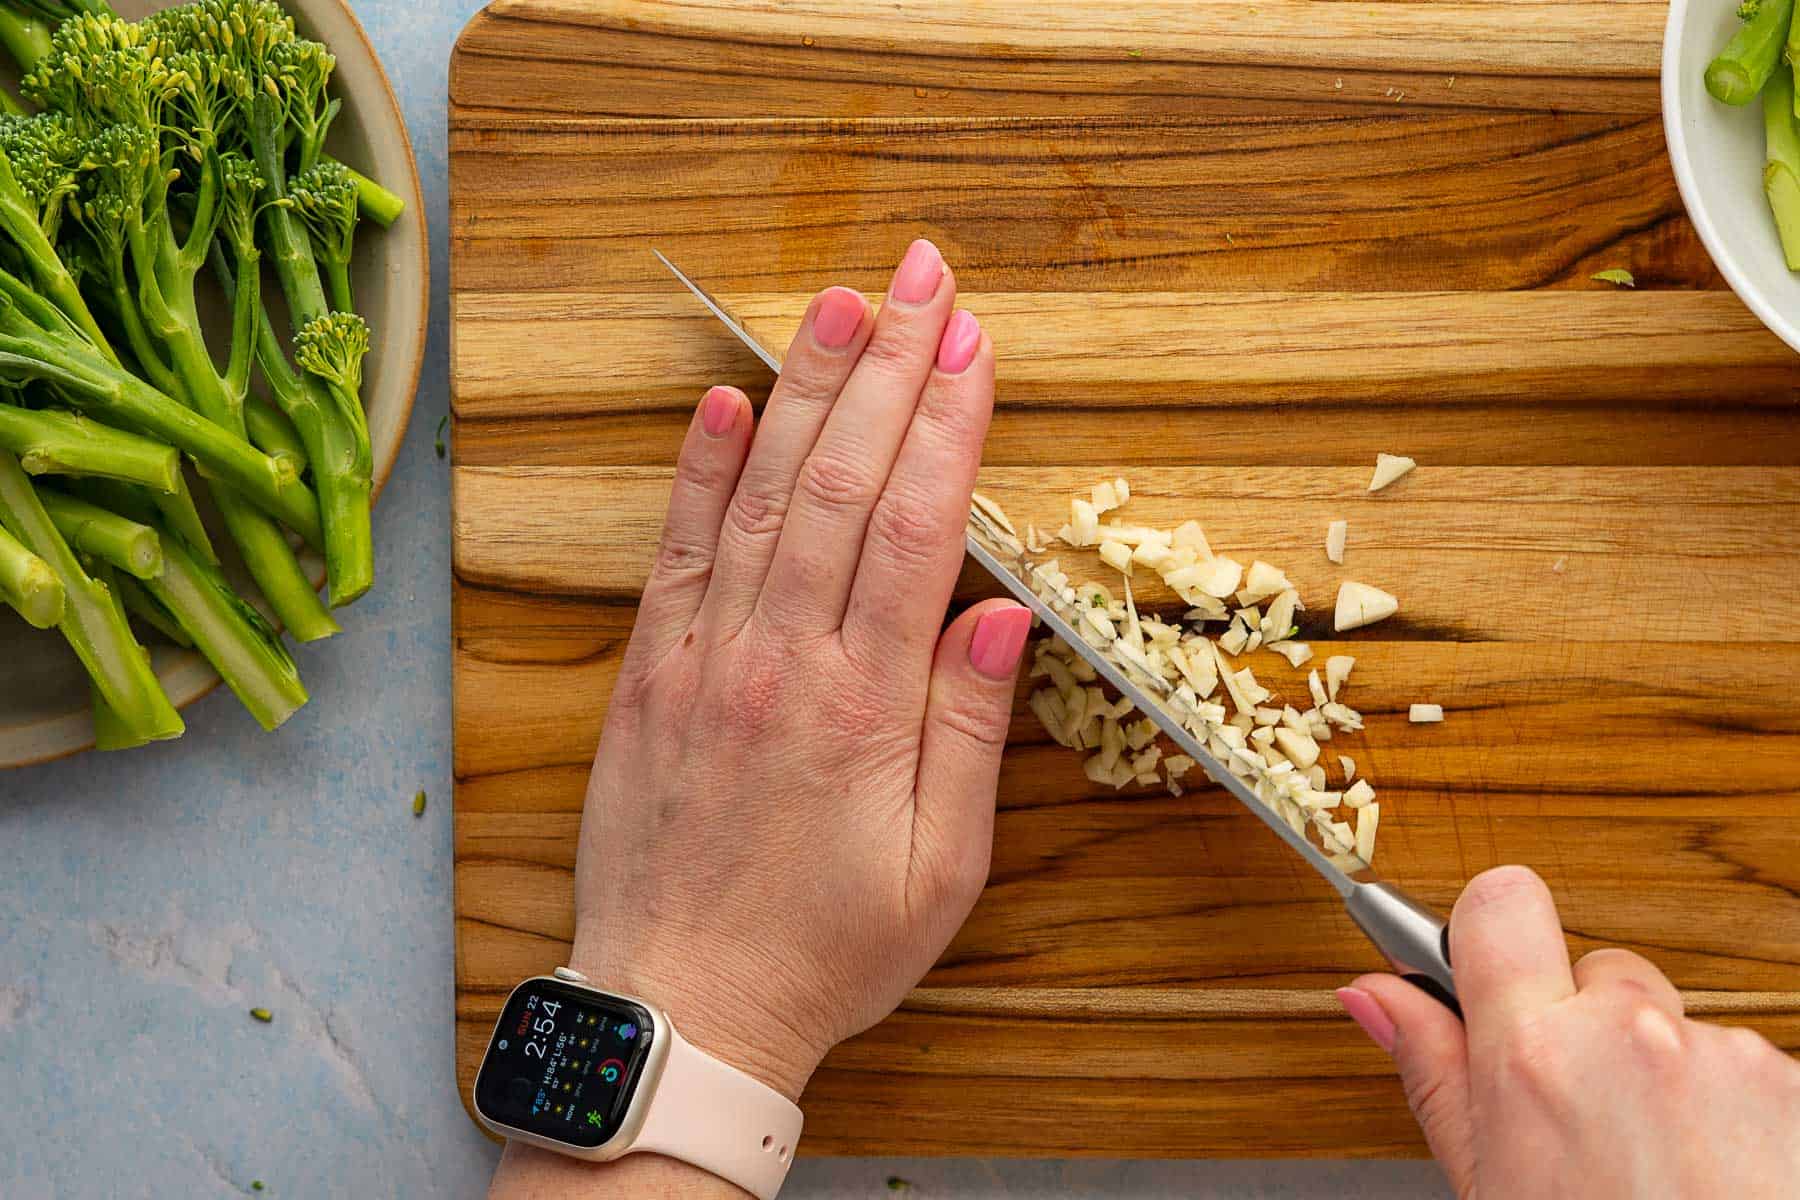
2: Rough-chop garlic, keeping it chunky so it roasts, not burns.

3: Drizzle with olive oil then season with salt and pepper, and toss in garlic.
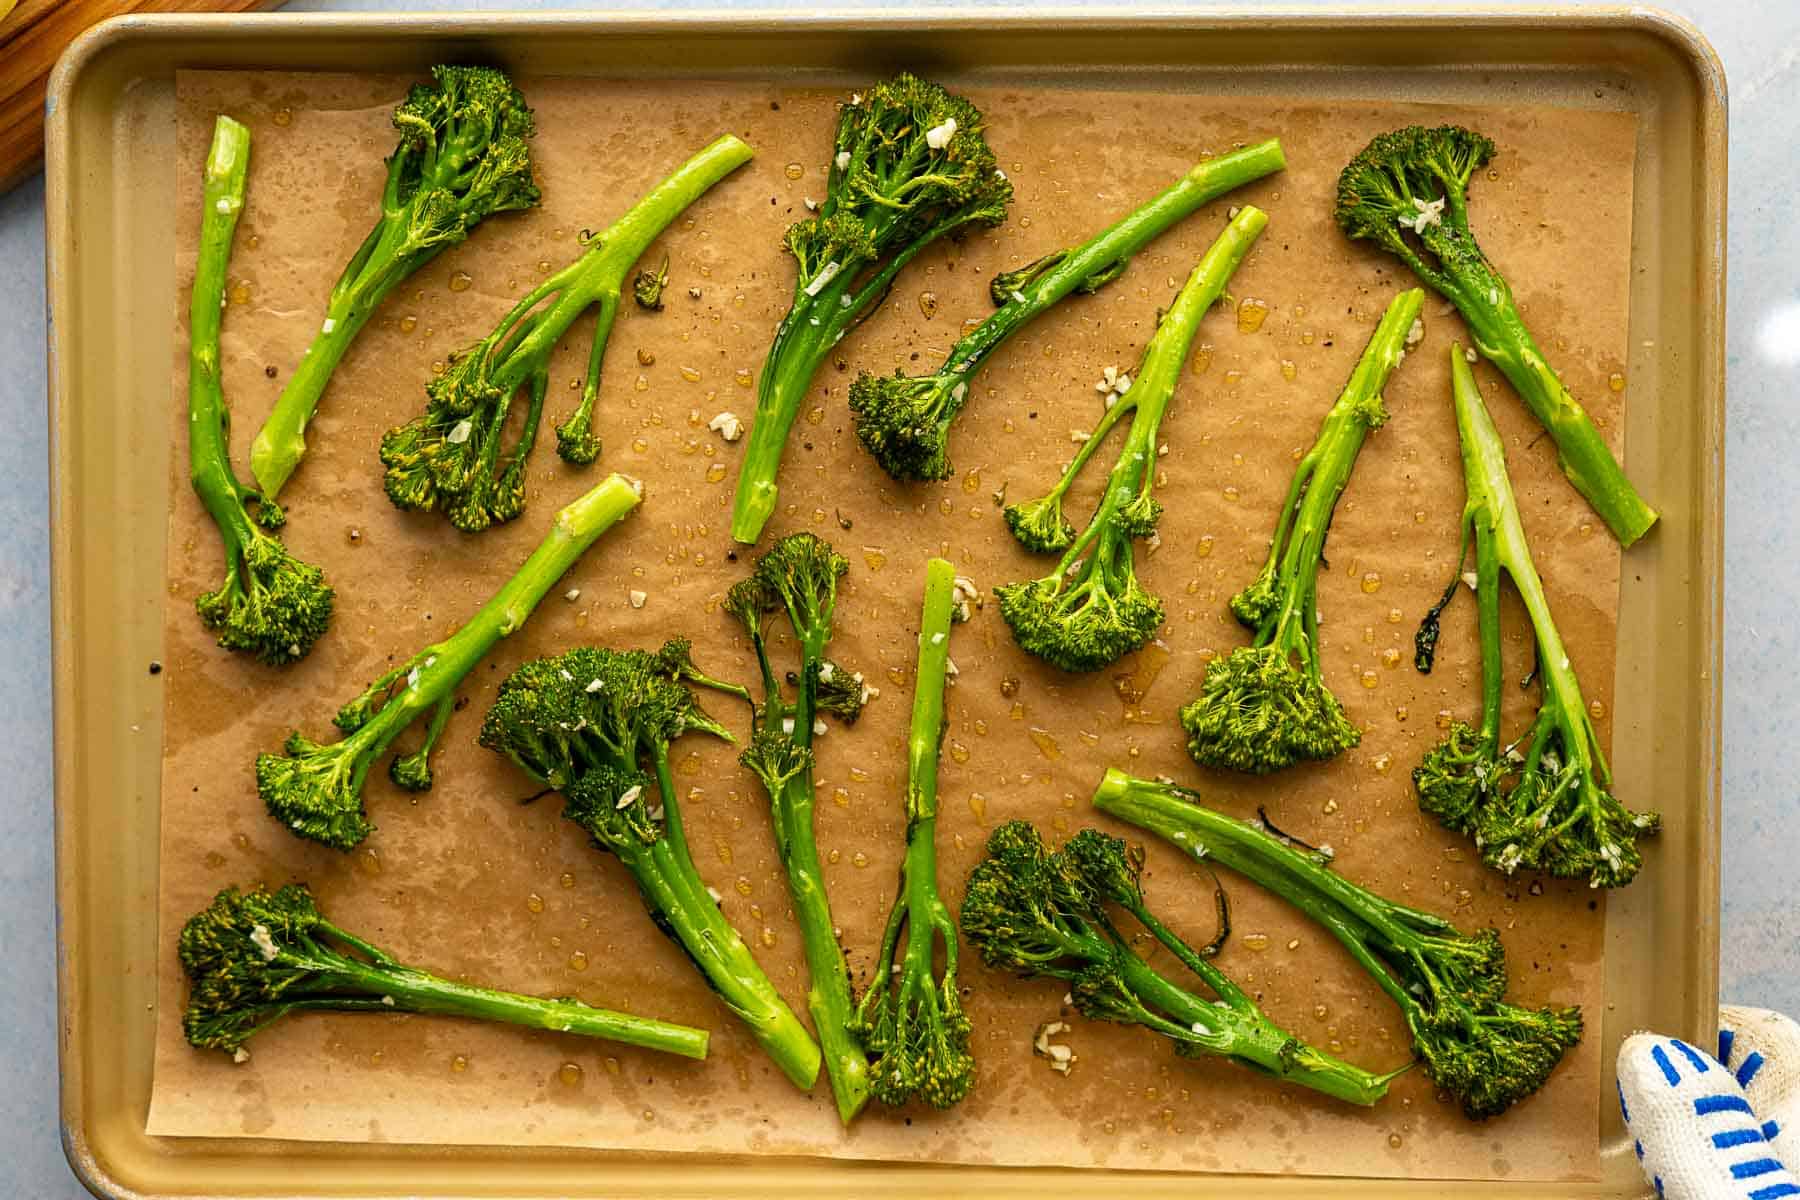
4: Roast until crisp-tender + starting to brown (about 8 – 10 minutes).
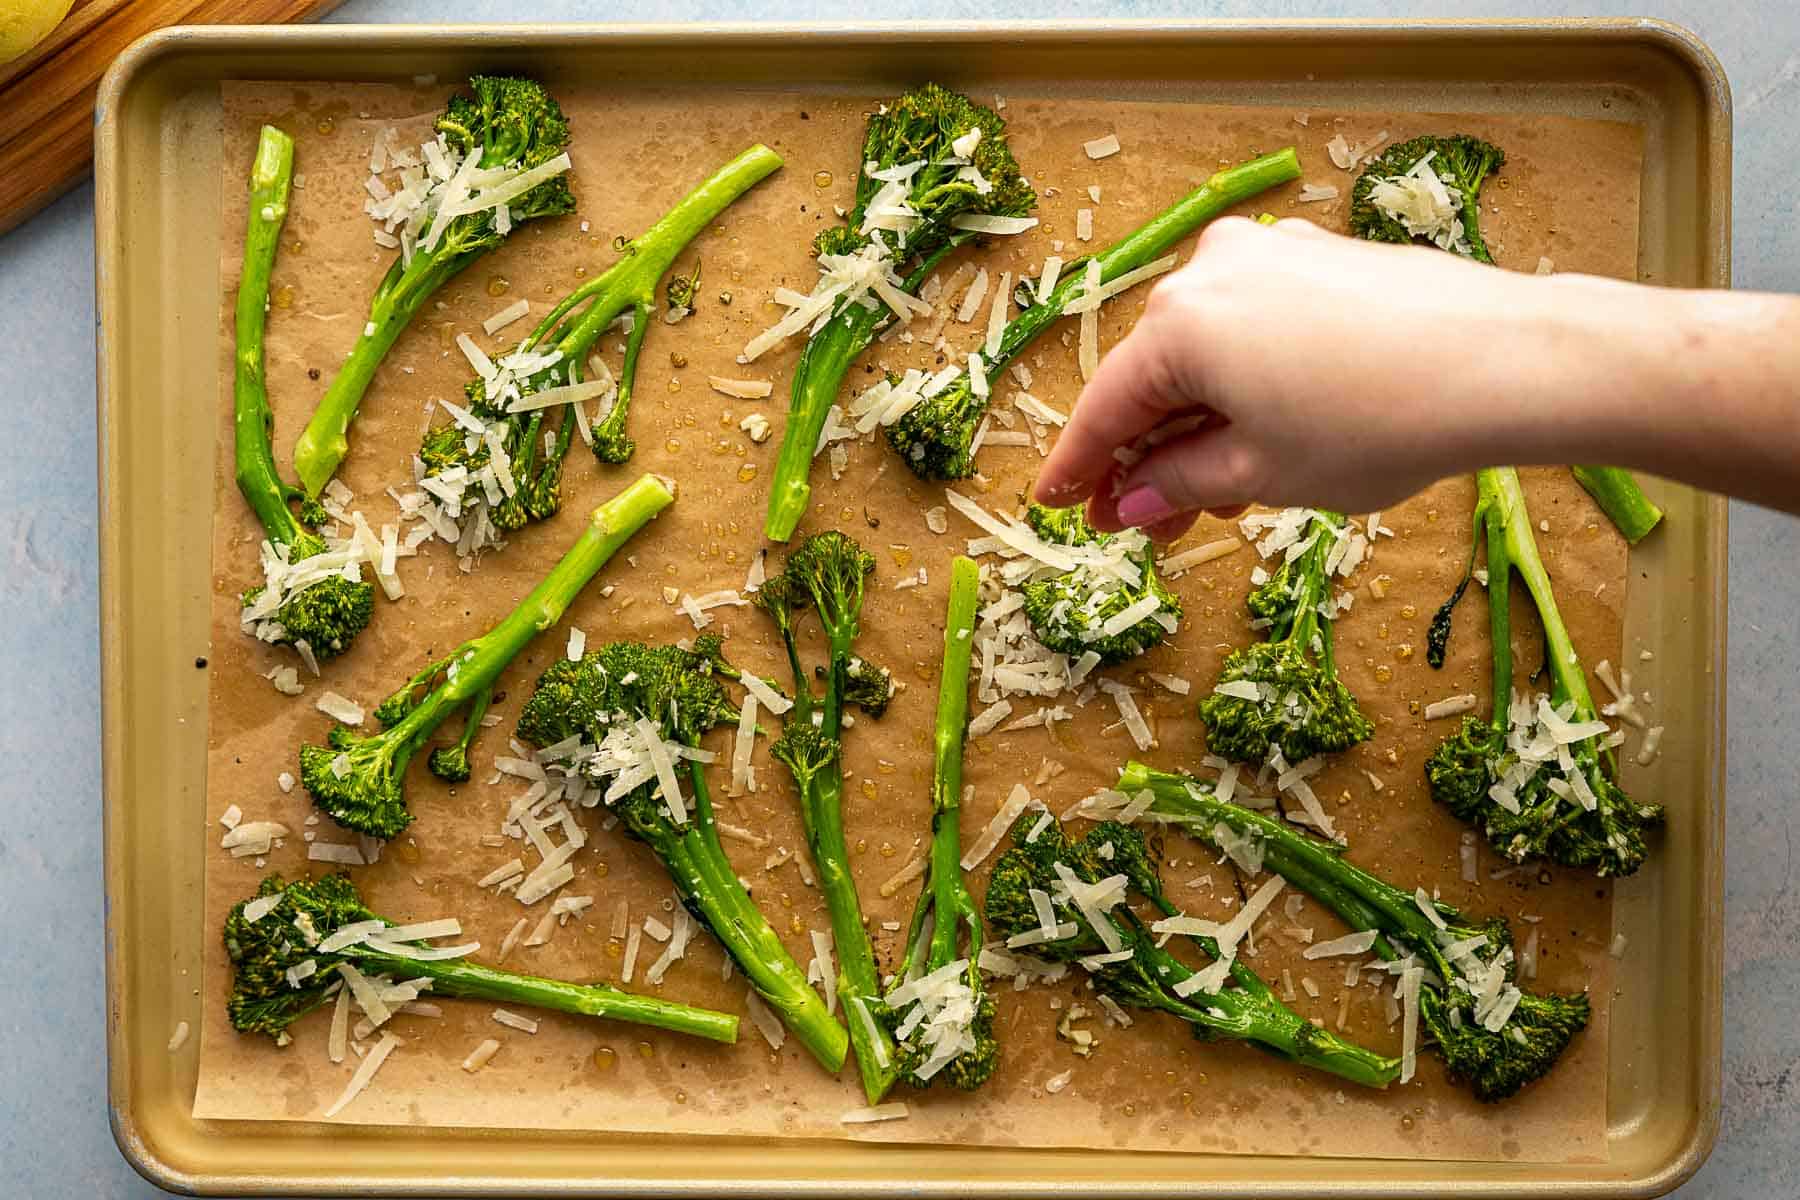
5: Add parmesan + finish roasting until melty + browned (about 3–5 minutes).
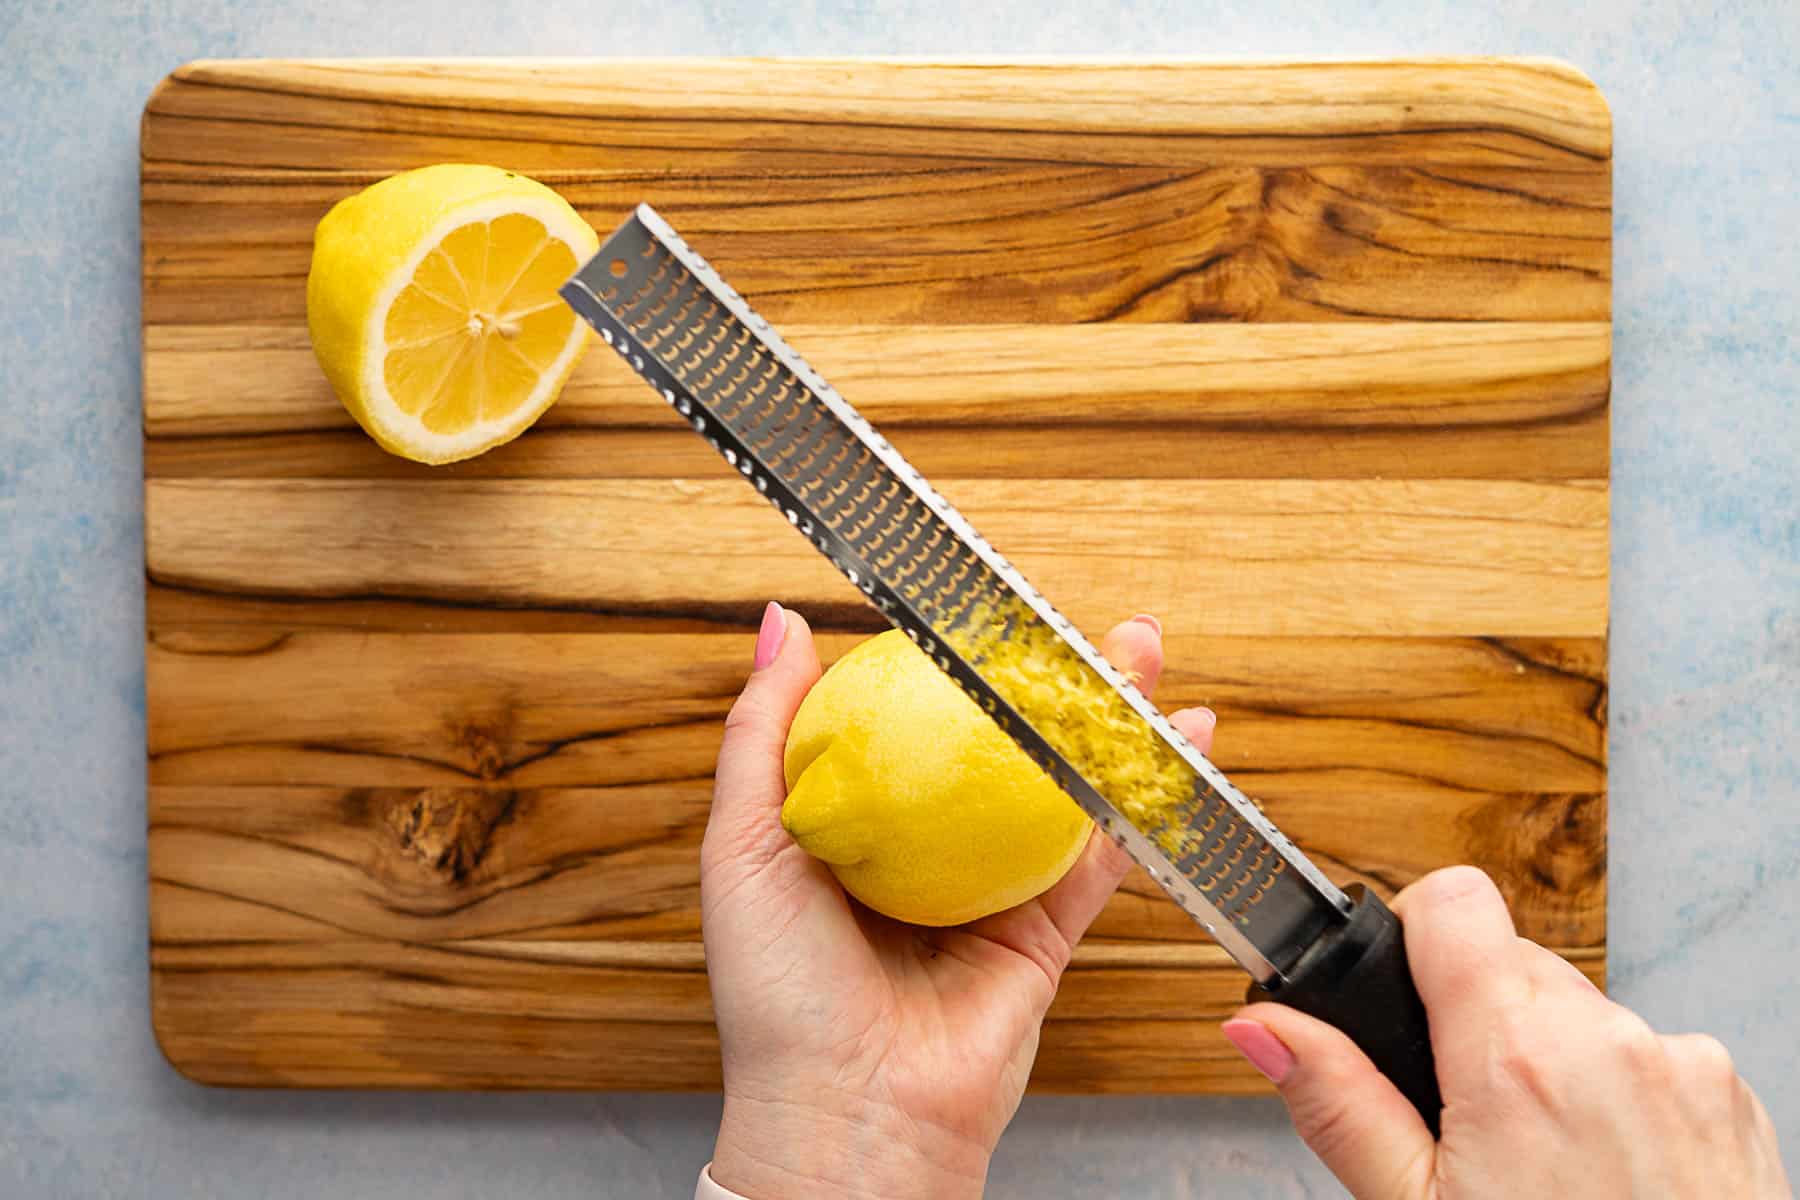
6: Top with lemon zest + serve immediately.
Wanna save this recipe for later? 📬
💡tips & tricks for getting it right
ℹ️ troubleshooting tips
- dry, dry, dry – make sure that your broccolini is totally dried off after prepping it to remove as much moisture from the equation as possible. Moisture = the enemy in roasting veggies! This is the number one reason you end up with soggy veg compared to flavorful, crispy, tender roasted veggies.
- get the right temperature – if you don’t have an oven thermometer, get one. Just like my love for kitchen scales, my love for oven thermometers runs deep. All too often, household ovens are not accurate in reporting their temperatures, so this little tool is the perfect way to guarantee you’re cooking at the right temp. You can even be crazy like me and get multiple thermometers to put on both sides of your oven to help you learn about the hotspots in your appliance. Sure, it’s extra, but it really helps you learn the ins and outs of cooking at home, so you know if and when you should rotate your pans for even cooking.
- burnt garlic – don’t chop your garlic too small or you risk burning it. Chopping your garlic into larger bits (aka a rough chop vs. a mince) is the key to getting nicely roasted bits of garlic that are flavorful without being torched. The pieces will keep their garlicky flavor the larger they are. Burned garlic is not the vibe! It will taste bitter and scorched instead of quickly roasted and sweetened.
- even roasting – slice larger broccolini stalks in half to help them roast quickly and evenly. Larger stalks will take longer to roast, and you risk burning the florets while the stalks remain undercooked. Additionally, you’ll want to be sure to not overcrowd the pan so the florets roast. Moisture will evaporate from the broccolini as it cooks, so keep them from touching to avoid steaming.
🍽️ how to serve your broccolini
- perfect side dish – I love serving this broccolini on the side of crispy baked chicken cutlets, flavorful Italian chicken limone, or even just served on the side of some dutch oven shredded chicken topped with my favorite seasonal vinaigrette.
- mix-into other recipes – mix this roasted broccolini into other recipes like your favorite summer pasta dish, such as pesto linguini or pasta salad!
- top salads, grain bowls, or pizzas – chop up the stalks of broccolini and add them to your favorite salads, power bowls, or scatter them on top of pizza! I love using chopped broccolini like this on top of four cheese pizza or a meatball pizza with ricotta!


♻️ customize your oven roasted broccolini
- use another veggie – I’ve also made this recipe using conventional broccoli. Just make sure to chop up the pieces evenly so they roast evenly. You can also use frozen broccoli, but be extra careful to not overcrowd the pan! Frozen broccoli has even more moisture because of ice crystals, and this can cause the veggies to steam if placed too close together.
- preserved lemon – you can also use preserved lemon instead of lemon zest chop up a bit of preserved lemon peel, then toss it with everything before roasting. It adds an even more robust flavor thanks to the salty preserved lemons.
- spice it up – want a kick of spice? Add a generous pinch of crushed red pepper or garlic chili oil for a bold punch of flavor.
🧰 equipment needed & storage tips
🫙 how to store leftovers
Store any leftover broccolini in an airtight storage container in the fridge for up to 5 days. I prefer to heat it up in the toaster over or a saucepan on the stovetop so it crisps back up and get back to the toasty goodness, it can get a little soggy in the microwave. Of course, you can also eat it straight from the fridge!!
If you make this recipe, please leave a review in the comments and a star rating!
⭐️⭐️⭐️⭐️⭐️
I read every single comment, and each rating is helpful to other readers, too! 🥹
I also love connecting on social media, so snap a pic and hashtag it #myrecipeforfun and tag me on YouTube, TikTok, Threads, or pin this recipe on Pinterest!
Oven Roasted Broccolini with Garlic, Parmesan, and Lemon
Wanna save this recipe for later? 📬
Equipment
- 2 sheet pans half-sheet size
- 1 knife & cutting board
Ingredients
- 440 g broccolini about 2 bunches, trimmed
- 10 g garlic rough-chopped, about 3 cloves
- 50 g olive oil not dries out
- 3 g kosher salt about 1 tsp, to taste
- ¼ tsp black pepper to taste
- 20 g parmesan cheese freshly shredded, about 1/3 cup.
- 2 g lemon zest about 1 tsp, finely grated.
Instructions
- Preheat oven. Preheat the oven to 400°F.
- Prep broccolini. Trim 1–2 inches off the ends and remove most large leaves.
- Chop garlic. Rough-chop the garlic so it roasts quickly without burning.
- Spread on pans. Divide broccolini and garlic between 2 half-sheet pans (or 1 large 3/4-sheet pan). Leave space so it roasts, not steams.
- Oil + season. Drizzle with olive oil and toss to coat. Season with salt and black pepper.
- Roast. Roast for 8–10 minutes, until just starting to wilt and brown.
- Add Parmesan. Remove pans from the oven and sprinkle Parmesan over the florets.
- Finish + serve. Return to the oven for 3–5 minutes, until the cheese is melty and the florets are browning. Top with lemon zest and serve immediately.
Notes
ℹ️ troubleshooting tips
- dry, dry, dry – make sure that your broccolini is totally dried off after prepping it to remove as much moisture from the equation as possible. Moisture = the enemy in roasting veggies! This is the number one reason you end up with soggy veg compared to flavorful, crispy, tender roasted veggies.
- get the right temperature – if you don’t have an oven thermometer, get one. Just like my love for kitchen scales, my love for oven thermometers runs deep.
- burnt garlic – don’t chop your garlic too small or you risk burning it. Chopping your garlic into larger bits (aka a rough chop vs. a mince) is the key to getting nicely roasted bits of garlic that are flavorful without being torched.
- even roasting – slice larger broccolini stalks in half to help them roast quickly and evenly. Larger stalks will take longer to roast, and you risk burning the florets while the stalks remain undercooked. Additionally, you’ll want to be sure to not overcrowd the pan so the florets roast.


I’m always trying to eat more greens, but so tired of salad. This is my new favorite thing. Yum!
hahaha, I am the same way, Dusty! 😂 Salad is great and all, but it’s so nice to be able to enjoy a WARM veggie side dish sometimes, and this garlicky, cheesy, roasted broccolini does the trick!! 🤩 I am so glad you love broccolini, too! Thanks so much for your rating and review!💕