Pizza night is about to get a WHOLE lot better with this best-ever homemade pizza dough recipe. It uses easy-to-find bread flour as the main ingredient. It’s ready to use in about 90 minutes, but the flavors are incredible after 24-48 hours, and it makes enough for two pizza pies, so you can have one today, one tomorrow, and taste the flavor development of the crust yourself!

This homemade pizza dough recipe has been through a LOT of iterations. Sadly, I don’t have any copies of the recipe my grandmother (and great grandmother) used, so I had to iterate my own! It’s adapted from Bobby Flay’s recipe, with a few lil tips I learned in culinary school, too. Wanna top your dough with the best flavor? Make a homemade pizza sauce, too! Use seasonal ingredients for creative flavor combinations, like this potato leek pizza!
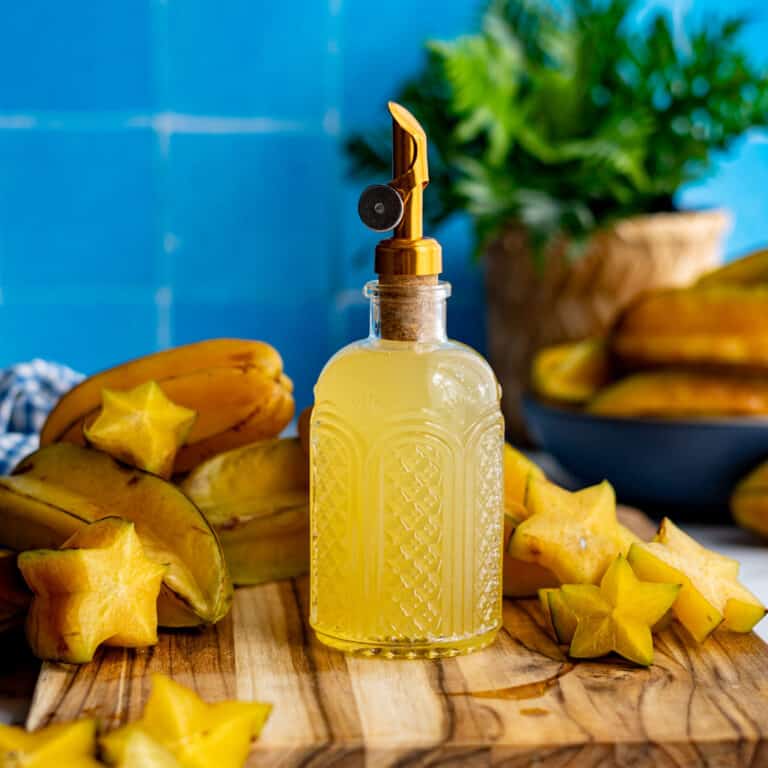
👀 the secret sauce…
✨ the flavor: This recipe hits The Feels and The Intrigue Flavor Factors, letting you create a Pizza Friday tradition while baking up tender, chewy, or crispy crust (it’s your choice)!
🎯 the method: Measure and combine the ingredients, let proof, then divide, shape, and bake! Seriously, that’s it!!
🏆 the win: In the world of bread recipes, pizza dough is pretty dang forgiving, which means it’s hard to mess this one up. Even your worst homemade pizza will be lightyears better than the best chain-bought pizza!
📖 my personal pizza dough odyssey
(aka the part of food blogs people LOVE to read)
Making homemade pizza dough is a topic I don’t take lightly because I LOVE PIZZA. It’s the perfect food if you ask me, and it’s baked into my family history. My great-grandparents came to America from Naples, Italy with my grandmother in tow. When I visited Italy for the first time, I chose to go to Naples specifically to explore pizzerias there. I seriously showed up with a printed out listed of pizza places (these were the MapQuest days, for any youths out there).

The trip was a blessing and a curse. A blessing because if you have never had true Neapolitan pizza…all it takes is one taste to fall in love. A curse because I couldn’t eat pizza in the States for months after returning home. Chain pizza was over for me. I mourned the version of me who looked forward to cafeteria pizza in elementary school. She had no idea!!!
So, I had to start on a journey of making my own pizza at home. After a few years, I had perfected my process, and shared the results with my family.
One night, over pizza, my mom shared a tidbit of family history I never knew about (as mothers do). It turned out that my grandmother was well-known for running her own weekly Pizza Friday when my mom was growing up, so this dough voyage was really “full circle” for my family. 😂
🛒 ingredients

🍳 how to make your pizza dough

1: Combine the flour, honey, water, olive oil, and yeast in the bowl of a stand mixer.

2: Mix briefly until a shaggy dough is formed.

3: Allow the dough to rest for 10-20 minutes. This helps the gluten develop before you add the salt.

4: After the rest, add in the salt and knead the dough well to incorporate it.

5: Check your dough for the right texture. If needed, adjust by adding a bit more water or flour.

6: Scrape the dough onto a lightly floured surface and knead it into a ball.

7: Place the dough in a lightly greased bowl, and cover it to let it rise.

8: Once the dough has doubled in size, you can divide it into two portions.

9: Rest the dough balls for 10-20 minutes, so they are easier to form. If you are saving for later, you can pop them in the fridge at this point.

10: Once you’re ready to make your pizza, be sure to keep the dough covered between steps so it doesn’t dry out or form a skin.
TIP: Be sure to let the dough rest between steps so you don’t overwork it! This is what leads to tough dough.
💡tips & tricks for getting it right
ℹ️ troubleshooting tips
There are some changes you may need to make to this homemade pizza dough, depending on where you live. And I promise, that even if your dough isn’t *perfect,* it will still be better than chain-delivery pizza, or grocery store freezer pizza!
- water content – Depending on the weather where you live, you could get slightly different results. Since I’m baking in central Florida, it’s always pretty hot and humid. That means I don’t need as much water, but you could need a little more than me.
- flour content – More water could also mean you need a little more flour to get the right consistency. Play around with the amounts a little at a time, until you get the results that work best for you.
If you have questions about this recipe, connect with me here on the blog or on social media and I’d be happy to help you troubleshoot!


Wanna save this recipe for later? 📬
🍽️ what to do with your pizza dough
- top it off – get wild and crazy with the toppings! You can go classic with shredded mozzarella, or you can even use a marinated mozzarella! Try switching up classics like turkey pepperoni pizza instead of regular pepperoni!
- bake as is – you can also use your pizza dough to make homemade breadsticks! Slather on some Italian inspired compound butter, or serve as is! They are perfect for scooping up dips and other appetizers, like a burrata and tomato caprese salad.
- appetizer-sized – you can portion your dough even smaller to make these mini Italian pizzettas that are perfect for a snack or party appetizer! They also freeze really well. 😉
🥫 get saucy!
Why stop at homemade dough?! Make a homemade sauce to top your pizza dough with, and get creative! Here are a few favorites…

No Cook sauce
This no-cook tomato paste pizza sauce is the one I make most often for Pizza Friday! It’s super easy to customize, and can be made in literally 5 minutes or less!

Garlic Parm Sauce
This easy (and cheesy) garlic parmesan sauce is a twist on a classic béchemel sauce, but don’t be afraid of the French technique! It’s a super straightforward sauce you can make in less than 30 minutes!

Lemony pesto
Want a more seasonal spin?! This lemony pesto sauce features a bold addition of lemon zest and juice, in addition to a hearty serving of parmesan for good measure.
♻️ customize your pizza dough
- all-purpose flour – instead of bread flour, you can use all-purpose flour. I recommend King Arthur Baking all-purpose flour. The resulting crust won’t be as chewy, but it will still be delicious! You can use all purpose flour if you don’t have bread flour–just know that your texture might be slightly different.
- sugar – use granulated sugar as an alternate sweetener in place of honey for similar results, with a lighter flavor.
- alternate oil – if you don’t have olive oil on hand, you can substitute another oil. Be sure to stick with something lighter in flavor, like coconut, avocado, or vegetable oil. You can also omit the oil if you prefer!
- pizza herbs – add in herbs like oregano, basil, and parsley to give your crust a classic Italian flavor!
Avoid using onion or garlic powder, as it interferes with the rising of the yeast. If you want to add those flavors, brush them onto the crust before baking!
🧰 equipment needed & storage tips
- baking scale – This recipe is formatted in grams because, it’s honestly the best, most precise way to bake! You can use cups/tsp/TBSP to measure if you don’t have a baking scale, but…if you bake even semi-regularly, it’s worth the investment to get a scale.
- measuring cups & spoons – Whether you have a scale or not, the measuring cups and measuring spoons from King Arthur Baking are my favorite tools for the kitchen. They come in every size you’ll ever need. They even have a yeast measuring spoon! (affiliate link)
- stand mixer: I use a stand mixer with a dough hook to make my pizza dough recipe. It’s powerful enough to knead the dough quickly, which makes the whole process easy! I have a Kitchen-Aid Artisan stand mixer, and I love it. It’s 100% worth the investment!
No mixer? No problem!
You can mix up this dough by hand, just know it will take a little more time and effort. But you will also appreciate the process more! There is something special about bringing together a dough by hand!
tools For baking your pizza:
- pizza peel: I have three. I’m telling you, I love pizza. This is hands down a necessity if you plan on making pizza regularly. It makes the job of transferring the dough in and out of the oven so much easier. I love the pizza peels by Epicurian the most. They are sturdy, hold up well to cutting, and clean up nicely.
- baking steel, thin aluminum cookie sheet, or pizza stone – I have a baking steel now, but I started out using a pizza stone, and then when it broke after YEARS of use, I used a thin Wilton cookie sheet from Michael’s. The key here is to have a HOT surface to bake on so the crust crisps up nicely as it bakes.
🫙 how to store unbaked pizza dough
You can make this pizza dough up to 72 hours in advance, and the flavor actually improves within that timeframe. 🤯 Place the dough ball in a lightly greased bowl big enough to allow room for expansion, and cover it with plastic wrap. Be sure to cover it tightly to protect the dough from forming a skin.
You can also prepare the dough ahead of time and par-bake it, then freeze the par-baked dough for up to three months. You’ll always be ready for a pizza party!
💬 q+a
Hand-stretching the dough is my preferred method for making pizza. Sometimes though, I do use a rolling pin. For instance, sometimes my dough is more sticky due to small changes in the humidity, or sometimes I want to hurry up and MAKE A PIZZA fast!
If I’m baking a pizza from dough that’s been in the fridge overnight, I may opt to roll it out. Colder dough takes longer to hand stretch, so when I’m in a hurry, I reach for the rolling pin! Hand-stretched dough is lighter and more airy, so keep that in mind!


You don’t HAVE to…but I do recommend making your pizza dough a day in advance if you can–it really helps the flavor of the dough develop. You can definitely make this dough and bake it the same day!
Allow the dough to rest overnight in the fridge after you let it rise and separate it into two balls. Let the dough come to room temperature before using it. This takes a few hours for me in my kitchen, but I’ve also definitely left it out for longer!
No way! I’ve made this dough both with and without a stand mixer with fabulous results. I’ve also had followers on social media who have reported great results making this dough by hand. Just be aware that it does take a little extra “elbow grease.” 😅

The BEST Homemade Pizza Dough (Pizza Dough with Bread Flour)
Wanna save this recipe for later? 📬
Equipment
- 1 Pizza Peel
- 1 pizza stone or thin cookie sheet
- 1 stand mixer with dough hook
Ingredients
- 420 grams bread flour (3 1/2 cups) I use King Arthur Baking bread flour. Depending on humidity, you may need to increase flour. See recipe notes.
- 8 grams instant yeast (2 1/4 tsp) or use 1 envelope instant-dry yeast
- 14 grams honey (2 tsp)
- 237 grams lukewarm water, about 110ºF (1 cup) depending on the humidity, you may need to increase to 1 1/2 cups water. See recipe notes.
- 25 grams olive oil (2 TBSP)
- 7 grams kosher salt (1 1/2 tsp)
Instructions
- Combine & mix ingredients. Mix all ingredients but the salt into a shaggy dough, just until the ingredients have come together.420 grams bread flour (3 1/2 cups), 8 grams instant yeast (2 1/4 tsp), 14 grams honey (2 tsp), 237 grams lukewarm water, about 110ºF (1 cup), 7 grams kosher salt (1 1/2 tsp), 25 grams olive oil (2 TBSP)
- Rest the dough. Let sit for 15-20 minutes to let the flour absorb the water. This helps the dough become more stable, and easier to work with.
- Add the salt. Add the salt & mix the dough on low speed in a stand mixer until the dough comes together.
- Mix until dough clears the bowl. The dough will come clean off the sides of the bowl, but it may still stick to the bottom of the mixer. It will be soft and slightly sticky. This should take about 5 minutes at a medium-low speed.
- Dough too sticky? If the dough is too sticky, add more flour, 1/4 cup at a time.
- Dough too dry? Add more water, 1-2 TBSP at a time.
If you are baking right away:
- Place the dough in a large lightly greased bowl, cover it with plastic wrap and let the dough rise for 60-90 mins; until doubled in size.
- Place a pizza stone or a large, thin cookie sheet in the oven, and preheat the oven to 450ºF after about 30 minutes of rising time.
- Divide the dough in half on a lightly floured surface, and gently shape each portion into a ball. Be careful not to punch the dough down too much, but try to get the dough shaped as tightly as you can.
- Cover with plastic wrap and let rest for 10-20 minutes.
- Shape the dough directly on a pizza peel, coated with flour, semolina flour, or cornmeal (I prefer to use semolina flour; because it yields a crispier bottom of the crust).
- Once the dough is shaped, gently shake the pizza peel back and forth to make sure that the dough can easily slide on and off the peel. If it sticks, carefully lift the dough off of the peel and add a light dusting of semolina or flour.
- Slide the dough onto the hot pizza stone or baking sheet, and par-bake the crust for 1-2 minutes, just until barely baked on the bottom, with no toppings on it. This helps you to get a more evenly cooked crust.
- Top with desired toppings, and return to the oven to bake, for about 8-12 minutes, until the crust is nicely browned and the toppings are melted.
If you are baking later:
- Place the dough in a large lightly greased bowl, cover it with plastic wrap and let the dough rise for 45 – 60 mins; until almost doubled in size.
- Place the dough in the fridge for up to 24 hours.
- Remove it from the fridge 3-5 hours before you intend to bake it. Let it come to room temperature before working with it. It will be too still to work with when it’s very cold.
- Proceed with shaping the dough as desired once it’s at room temperature!
Notes
⭕️ Dough shaping tips
Gently press from the middle of the ball outward. It may take some time to shape by hand, but be patient with the dough! If it tears or rips, you can pinch the dough back together, and let it rest for 5-10 minutes. It’s forgiving! You may use a rolling pin to shape the dough if you like, just know that it could be a bit denser & chewier than hand-shaped dough, but still tasty!🍕 Topping Tips:
- if you are using toppings that have more hydration in them (watery tomato sauce vs tomato paste; burrata or fresh mozzarella vs shredded; etc.) you can add those to the unbaked crust before par-baking, and increase the par-bake to 3-5 minutes. This helps bake off some excess moisture, so your pizza won’t be watery in the middle. If you’ve ever had pizza toppings slide off of the crust, this is why!
- par-baking helps the pizza be easier to handle if you’re just beginning your homemade pizza journey, so I recommend starting with this method. As you become more comfortable with the look and feel of the dough while sliding it on and off the pizza peel into the oven, you can play around with topping, par-baking, or just sliding a fully topped pizza into the oven at once!
ℹ️ Extra Pizza Tips:
- if you are too worried about sliding the dough off of a pizza peel, you can line the peel with parchment paper, and trim it to size. This is a tip I picked up from King Arthur Baking, and it works great when your dough is a little too sticky, or you aren’t confident with your pizza peel skills yet!
- if you don’t have a pizza peel, you can shape the dough on a cookie sheet–just use the full portion of dough instead of 1/2 portion for a thick crust, or you can still divide it in half for 2 pizzas on 2 separate pans. You can also use parchment paper on a cutting board (or another item you can easily lift and transfer, like a platter or large plate). Once the dough is shaped you can slide the dough and the parchment paper into the oven!
- if you don’t want to make two pizzas at once, you can par-bake one crust and then freeze it! If you don’t have lots of room in your freezer, you can divide the dough into 4 portions, making “personal size” pizzas, and freeze the par-baked crust. Let the crusts come to room temperature before you top and bake them. You can also let one portion of the dough rest in the fridge overnight. Just let it come to room temperature before shaping and baking the dough. This should take about 3-5 hours, depending on the temperature of your house.
🍽️ how to use your pizza dough
- appetizer-sized – you can portion your dough even smaller to make these mini Italian pizzettas that are perfect for a snack or party appetizer!
- get saucy – why stop at homemade dough?! Make a homemade sauce to top your pizza dough with. Try a white garlic parmesan sauce, seasonal basil forward homemade pesto sauce, fresh and flavorful cherry tomato sauce, and even no-cook tomato paste sauce.


Omg SOOOOO good!! What would be your recommendation for high altitude changes? More flour? Less water? More bake time?
Ooooh, I’m not used to baking at high altitudes as a sea-level baker 😅 so I hesitate to recommend the best tips, but I do believe you will want to add more water for a wetter dough since it can be drier at higher altitudes. Be sure to keep an eye on the dough as it rises too, it could rise faster at higher altitudes. Check the photos showing the stickiness of the dough in this post, I think that could be helpful for getting the ratio of water to flour right! Thanks for your question, Aimmee! 💕
this is The Best pizza dough recipe i have found and i have tried dozens of other recipes that tasted like cardboard or tasteless or couldnt even chew. The texture and look of this recipe dough was explained extremely well. This will be the ONLY recipe I will be using from now on. Thank you sharing.
Oh Tammy thank you SO much for sharing your review and experience making this pizza dough!!🥰 I’m so so happy you found the explanations helpful, it’s always my goal to make my recipes easy to follow! And I’m thrilled that you’re putting this recipe into your regular rotation, we make it almost every week for Pizza Friday, and I’m so happy you love it, too! 🍕🥳