

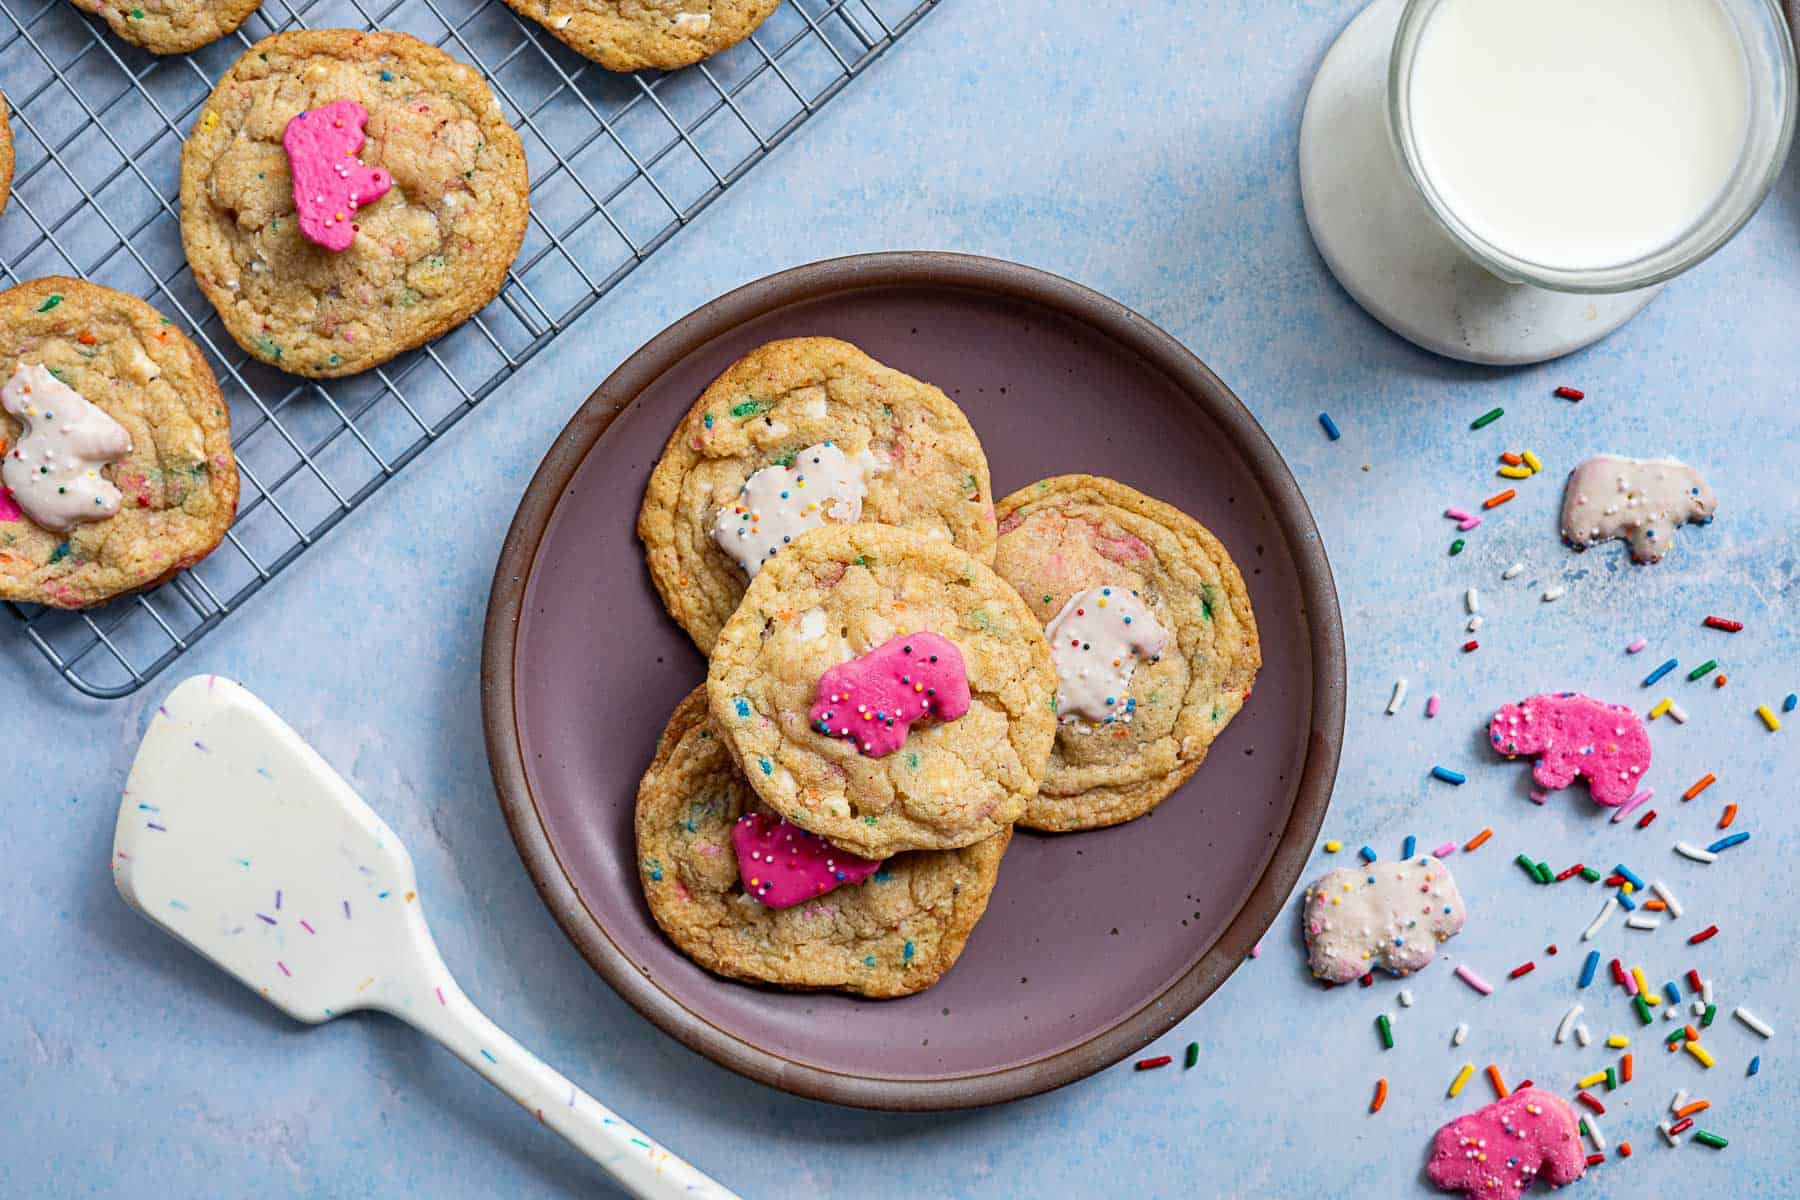
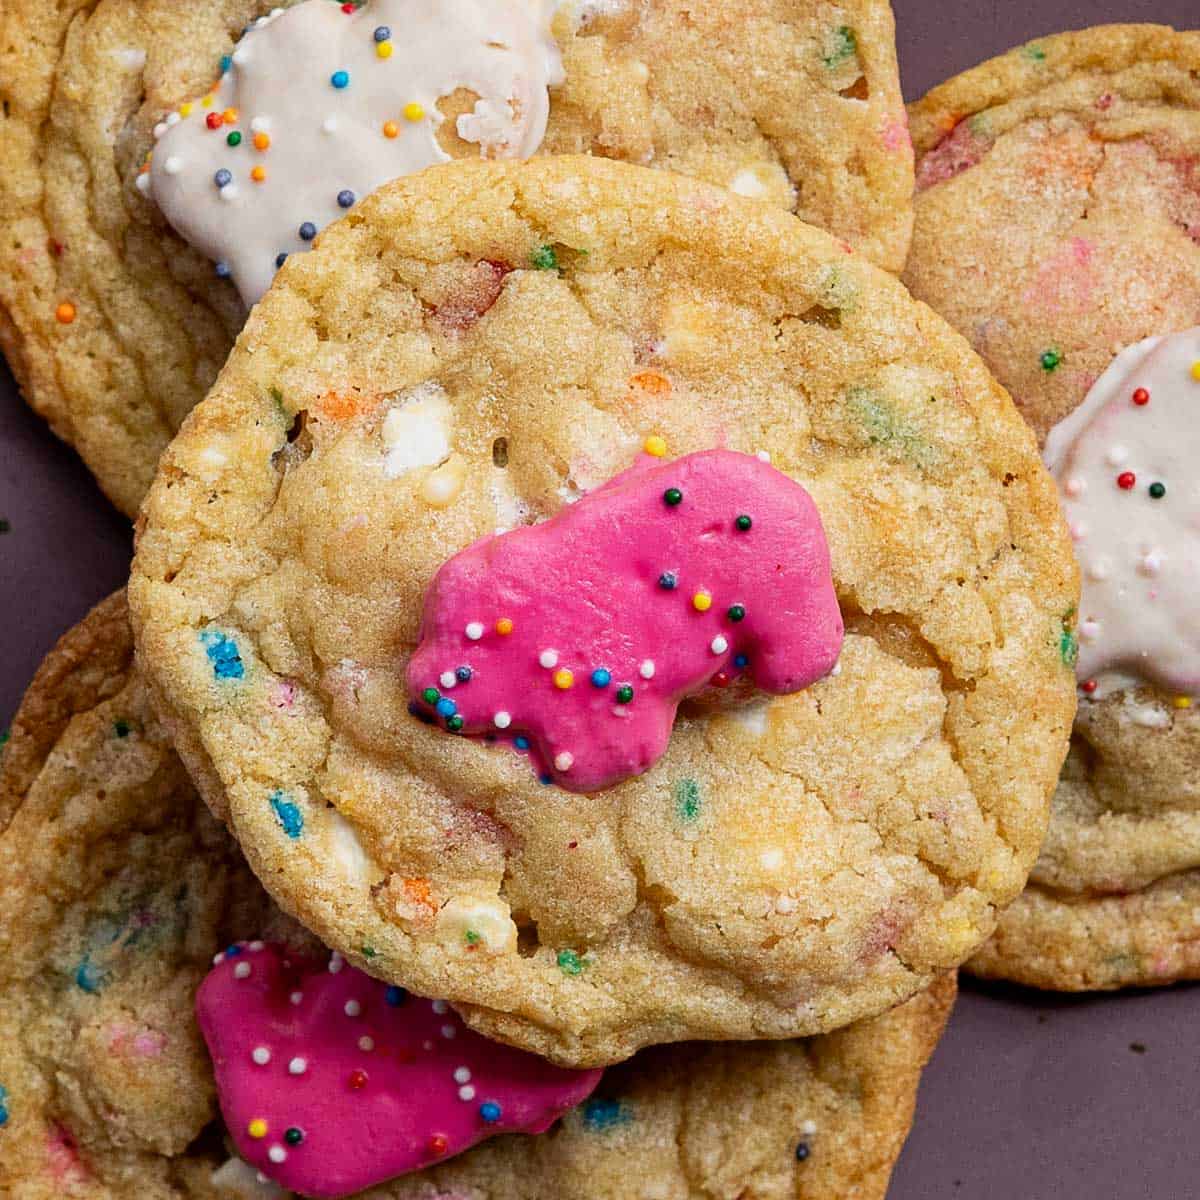
This circus animal sugar cookie recipe is made with Mother’s Original frosted circus animal cookies, sprinkles, and mini marshmallows (like the kind in your favorite breakfast cereal)! They’re sweet and chewy, bursting with classic “birthday cake” vanilla flavor, with pockets of crunchy cookie within a cookie goodness!
When I went to baking and pastry school, cookie class was my favorite. It was 8 hours long, but I didn’t care. It was the best day of the week because I learned everything there is to know about cookies. That class helped me to be able to create my own cookie concoctions like this recipe, which uses a cookie stuffed into another cookie. That’s right. Cookies INSIDE other cookies. EMBRACE THE MADNESS (it’s delicious)!!
Serve them up for a birthday party, tuck them in a lunchbox, or enjoy them as a mid-week treat, because you really do deserve it!!! They pair perfectly with other treats like classic rice krispies for a throwback style dessert spread. You can also get super festive for springtime holidays like Easter with homemade peeps soda pop, and spike it with peeps vodka, for grownups. Sugar rush? Yeah. 🍭 Worth it? Also yeah! Life is short, have a treat!
👀 the secret sauce…
✨ the flavor: This cookie is all about The Feels, because it’s bursting with a flavor that evokes carefree childhood days a la funfetti birthday cake! It also hits on The Wow, Mom! for the adorably stunning presentation, and The Intrigue because it’s absolutely stuffed with flavors!
🎯 the method: Combine the base cookie ingredients, add your mix-ins, then chill the dough to let the flavors meld and help the dough stabilize. Bake the cookies and top with yet ANOTHER cookie!!!
🏆 the win: You get real stuffed cookies with circus animal cookie chunks baked into the dough, so every bite has that cookie-within-a-cookie payoff (not just a cute lil topper).
what are The Flavor Factors?
The Flavor Factor Framework is my lil set of “flavor guideposts” for cooking with confidence! Less following recipes to a tee, more trusting your instincts, getting creative in the kitchen, and becoming a more intuitive cook! 👩🏻🍳
📚the backstory of developing this cookie recipe
(aka everyone’s favorite part of food blogs!)
I first saw these cookies trending on TikTok from *gasp* Kim Kardashian’s chef, Chef Khristianne Uy, aka Chef K (fitting for the Kardashian Krew 😂). While there was no recipe posted in Kimmy K’s stories, I knew I had to put my spin on these cookies and I got to work.
I posted a teaser video of them in 2022 when I first made them, but they weren’t quite where I wanted them to be, flavor and texture-wise. Since I’m insane thorough, I wanted to be sure to really get the recipe perfected before sharing it.
Well, FOUR YEARS LATER (okay, maybe I’m a bit TOO thorough…) I am finally getting around to posting them, thanks to a few fellow TikTok commenters asking for the recipe. Sorry, 2024 Tanya, for taking so long that you’re apparently no longer on TikTok 🙈, and shoutout to Jenn for giving me another nudge in April 2026 to share the recipe, too!!! 💕
These cookies have a lot of butter, which gives them the signature “school cafeteria cookie” melt-in-your-mouth texture. They’re golden and crispy on the edges, and soft and chewy (bordering on gooey) in the middle. Unlike most of my other recipes here using high quality vanilla extract, these use store bought clear imitation vanilla because…well…it gives the best “fake vanilla” flavor, which amplifies the taste of the circus animal cookies for maximum 90’s kid nostalgia. This is a trick I learned from Christina Tosi of MilkBar. There’s a time and place for everything, folks! You can grab a bottle online and have it shipped right to your door (affiliate link)!
🛒 ingredients needed
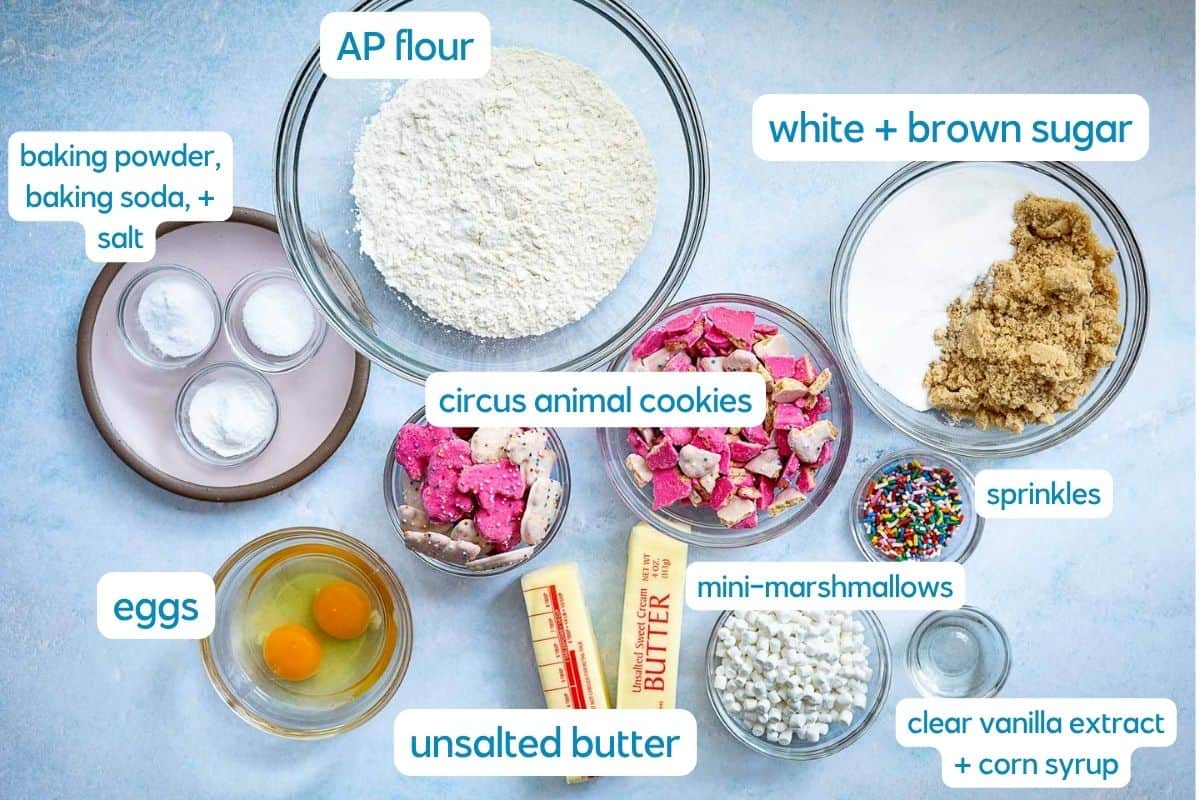
cookie base ingredients
mix-in ingredients
See the recipe card for the exact quantities.
🏆 tips for your best-ever-bake
- Take your ingredients out of the fridge. Room temperature ingredients like butter and eggs incorporate better than cold ingredients, so take the time to remove the chill from your cold ingredients.
- Chill the dough. I’m gonna tell you to do this like eight more times, so mentally prepare yourself NOW. 😂
- Watch the bake time. You want the edges of your cookies to be light golden brown before taking them out of the oven, then allow them to finish cooking on the baking sheet for a few minutes. This helps them to be crispy at the edges and chewy in the middle.
🍳 how to make circus animal stuffed cookies
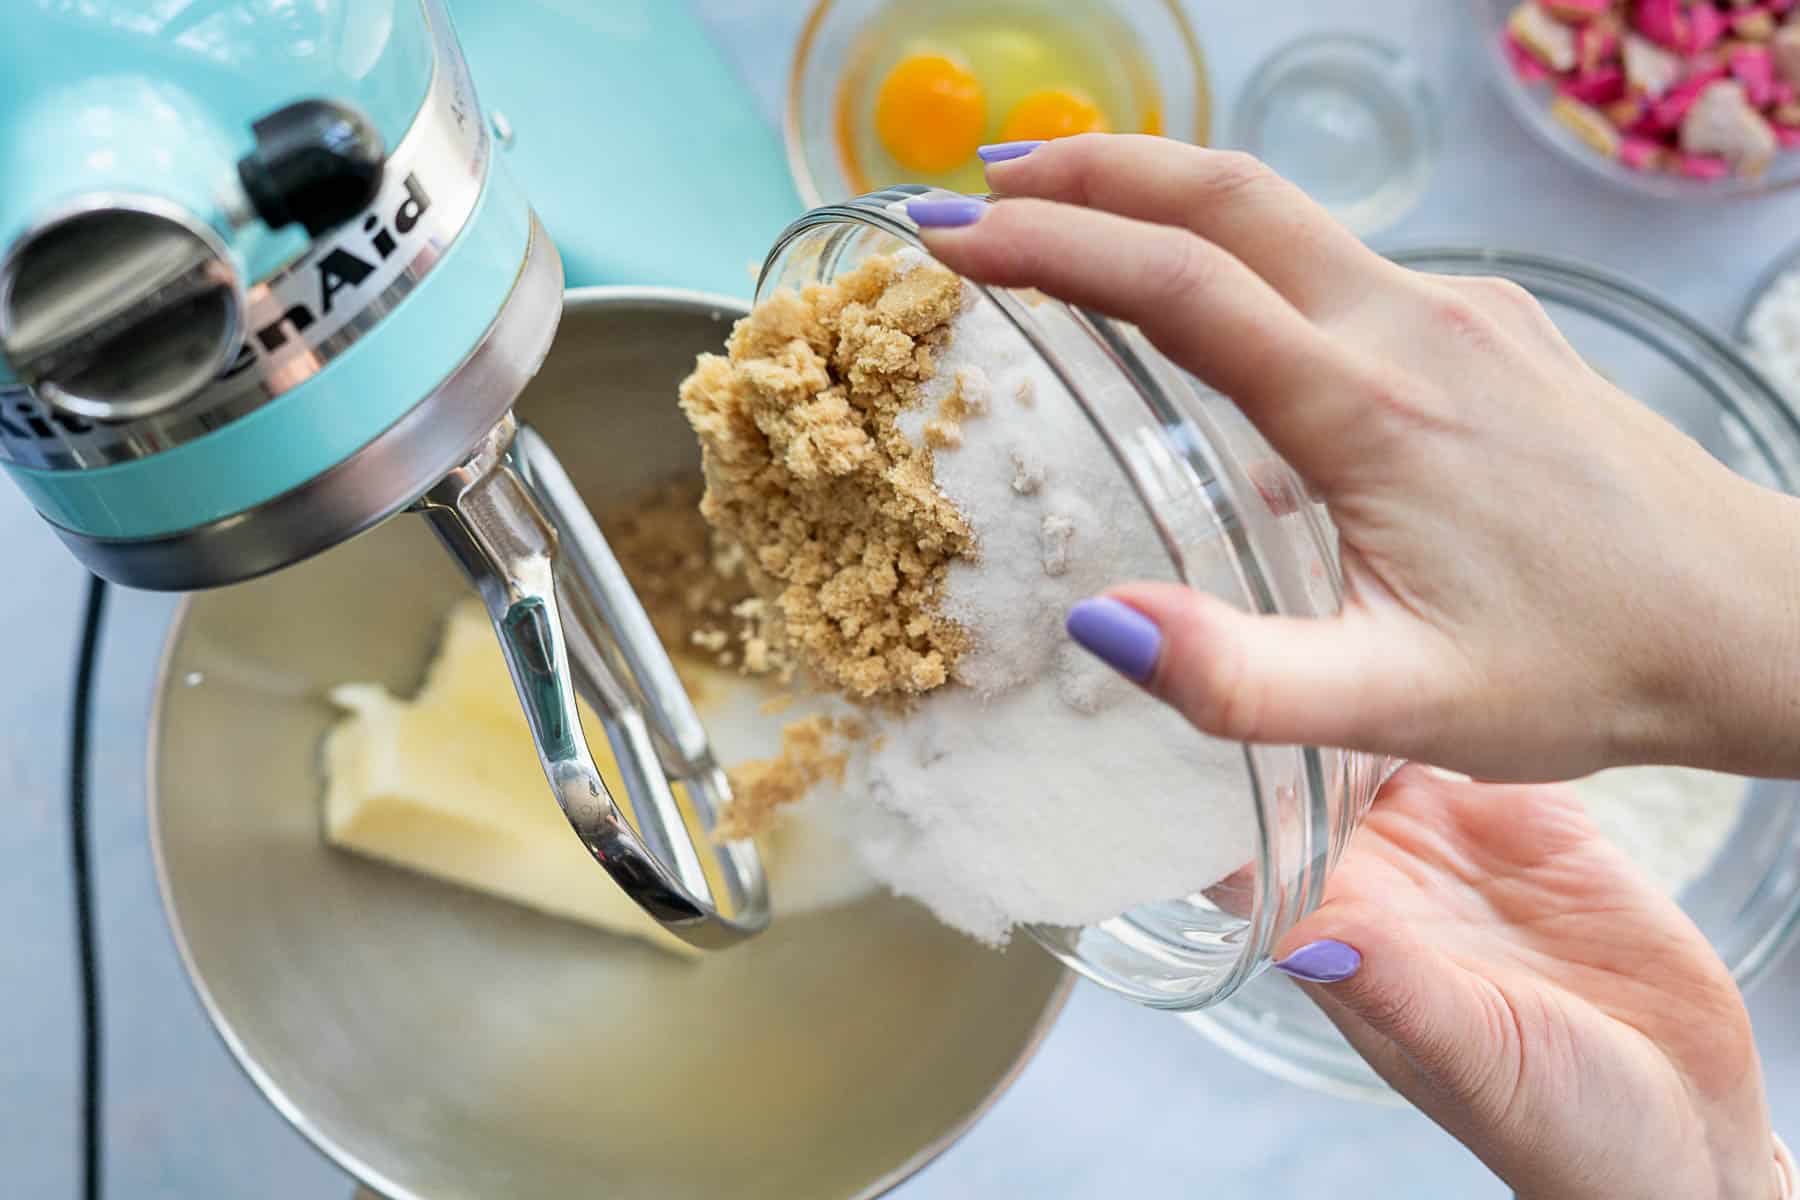
1: Cream the butter, sugars, and corn syrup until light and fluffy.
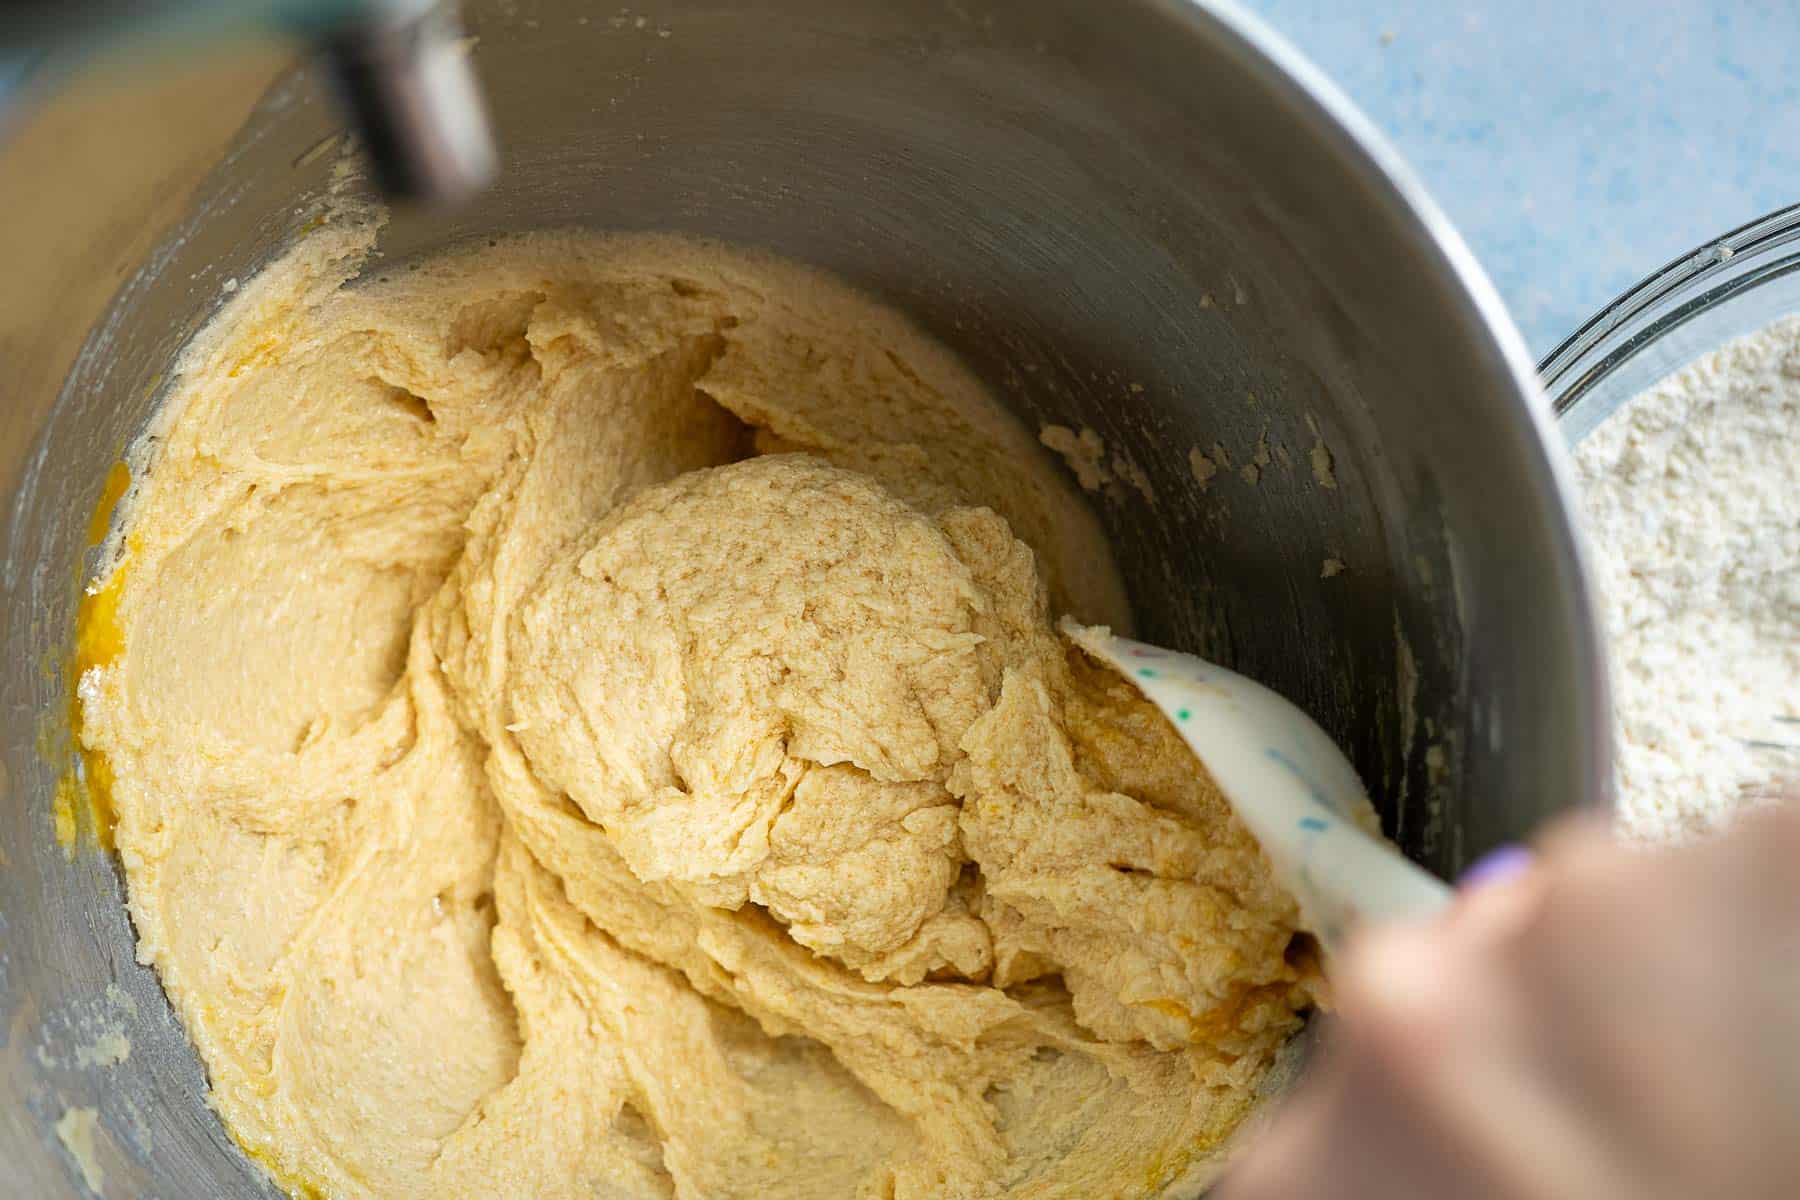
2: Mix in the eggs and vanilla just until combined, scraping down the bowl.
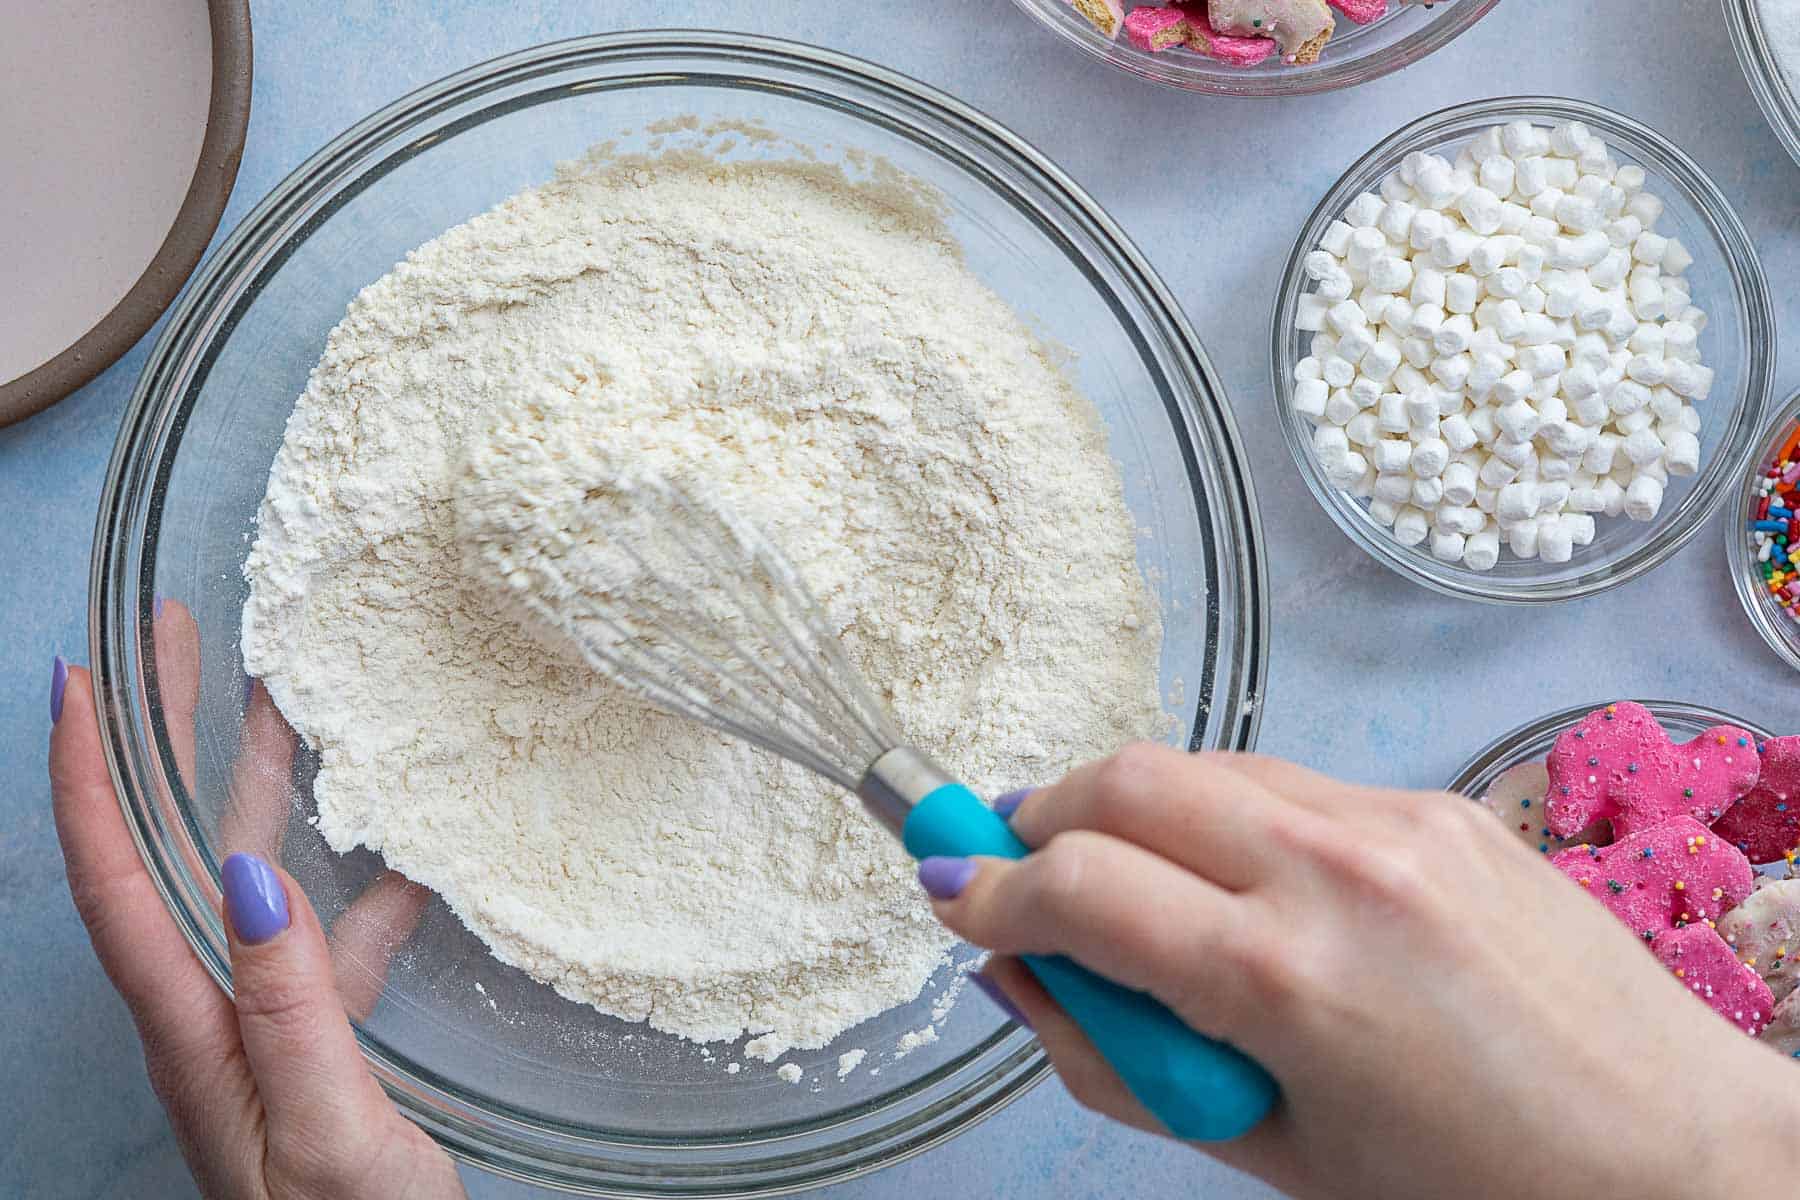
3: Whisk the dry ingredients together (flour, baking powder, baking soda, salt).
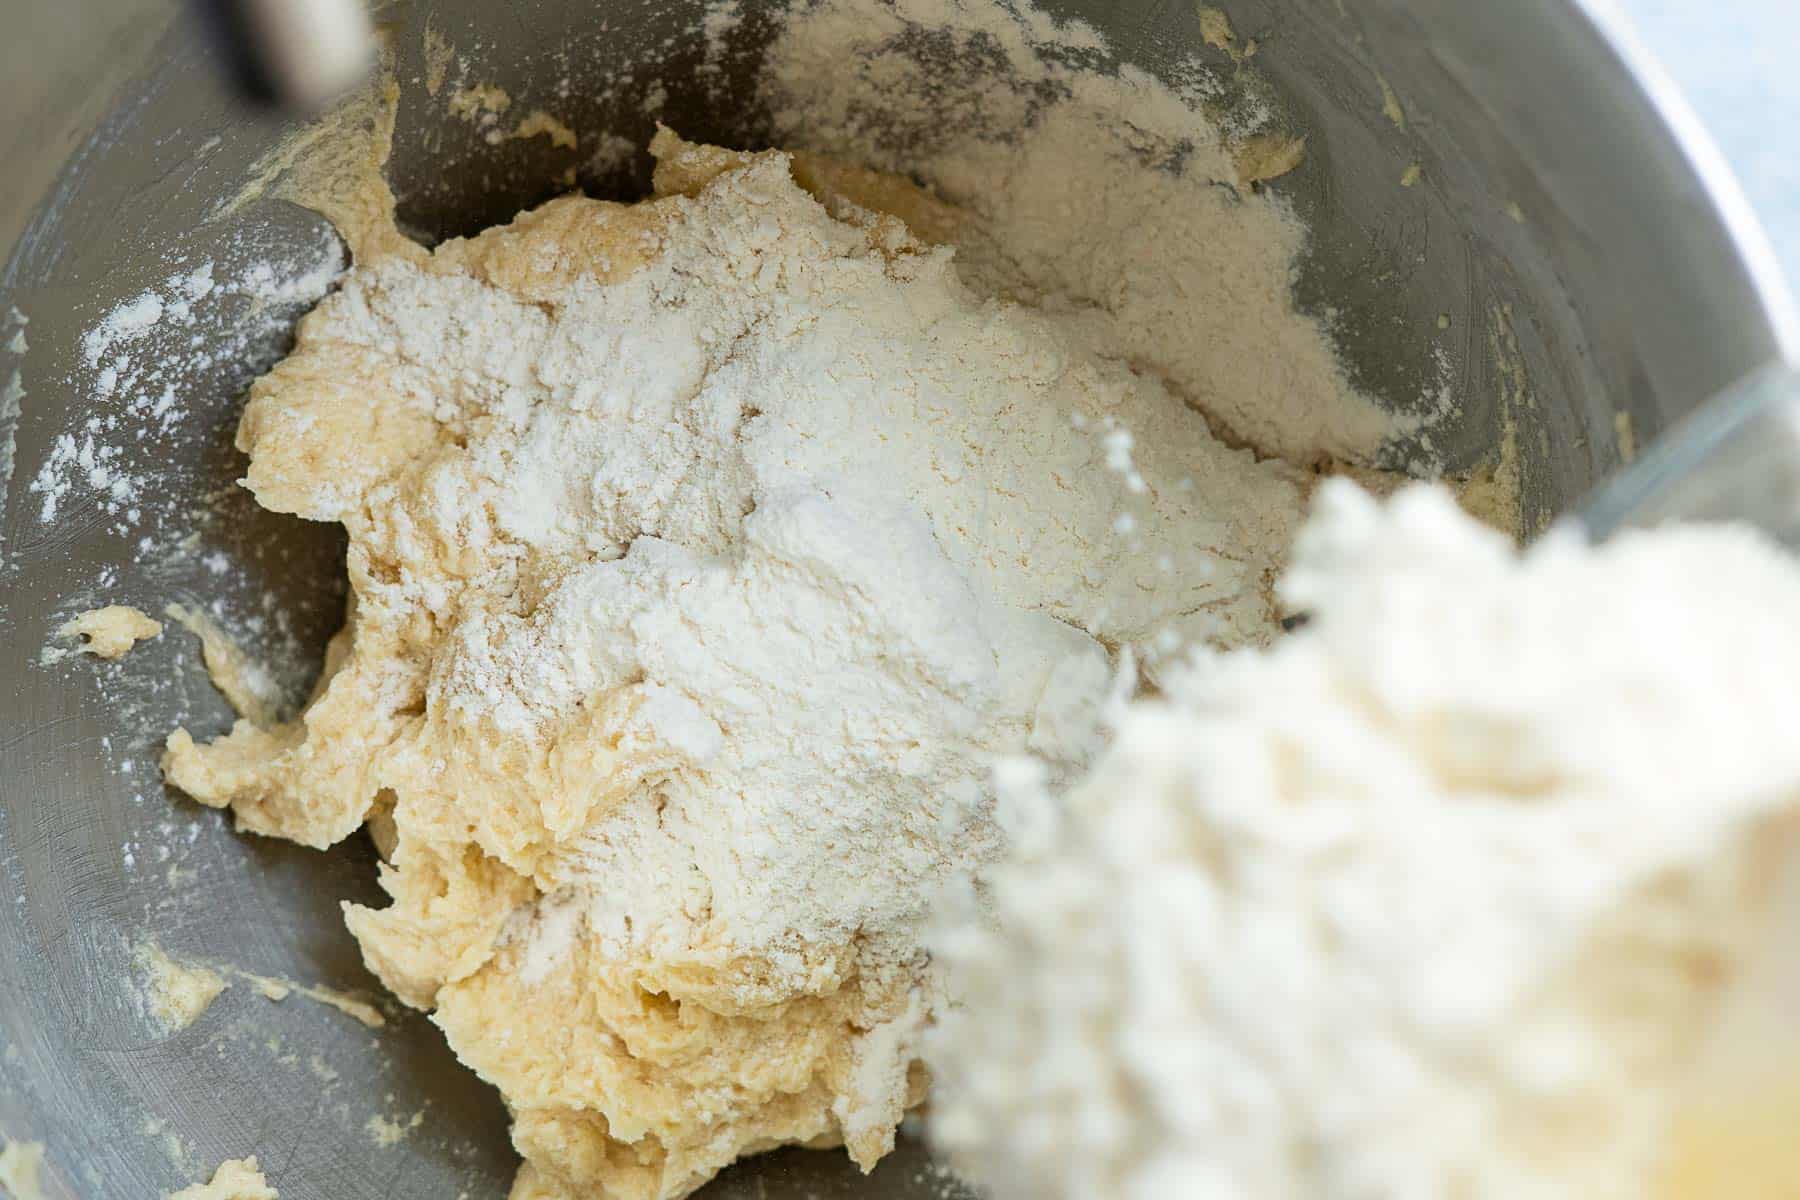
4: Add the dry mix to the wet mix and mix just until no flour streaks remain (don’t overmix).
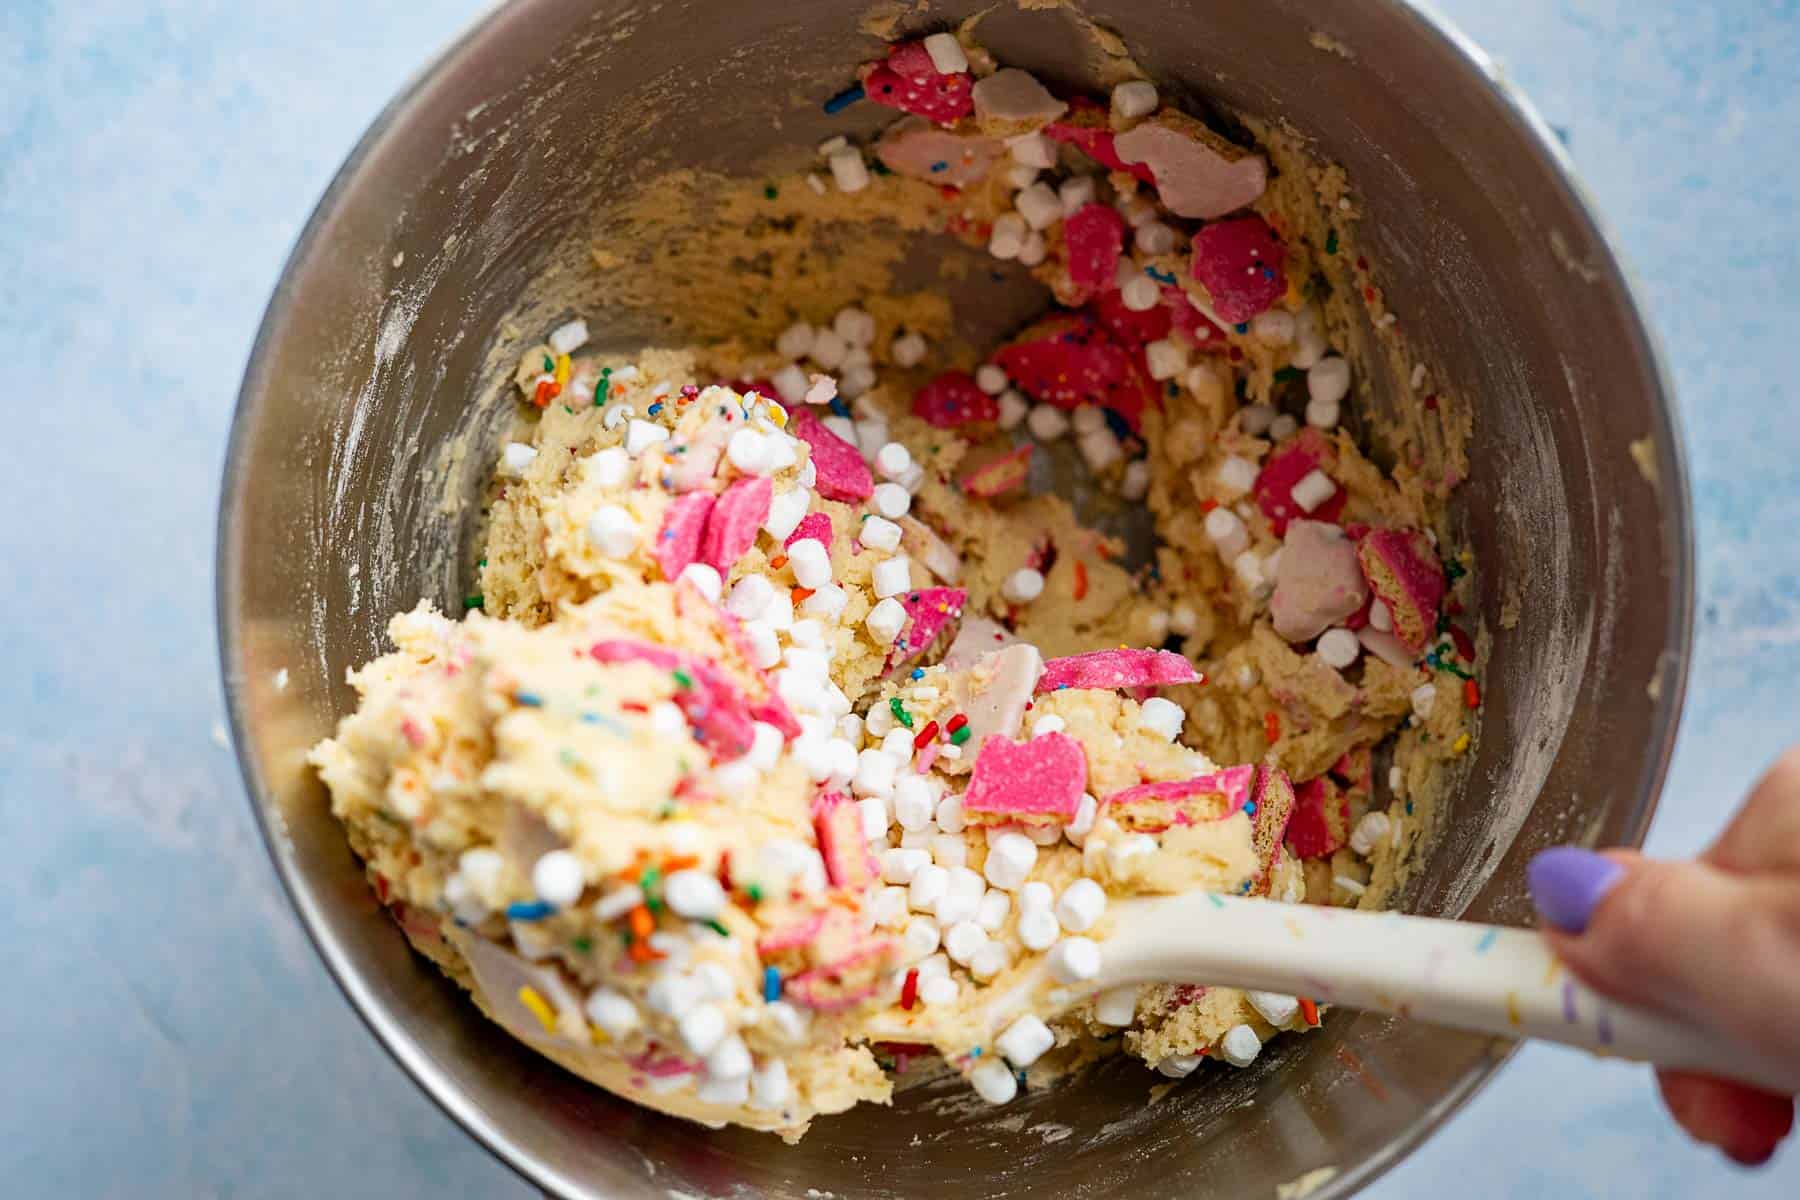
5: Fold in the crushed circus animal cookies, dehydrated mini marshmallows, and sprinkles.
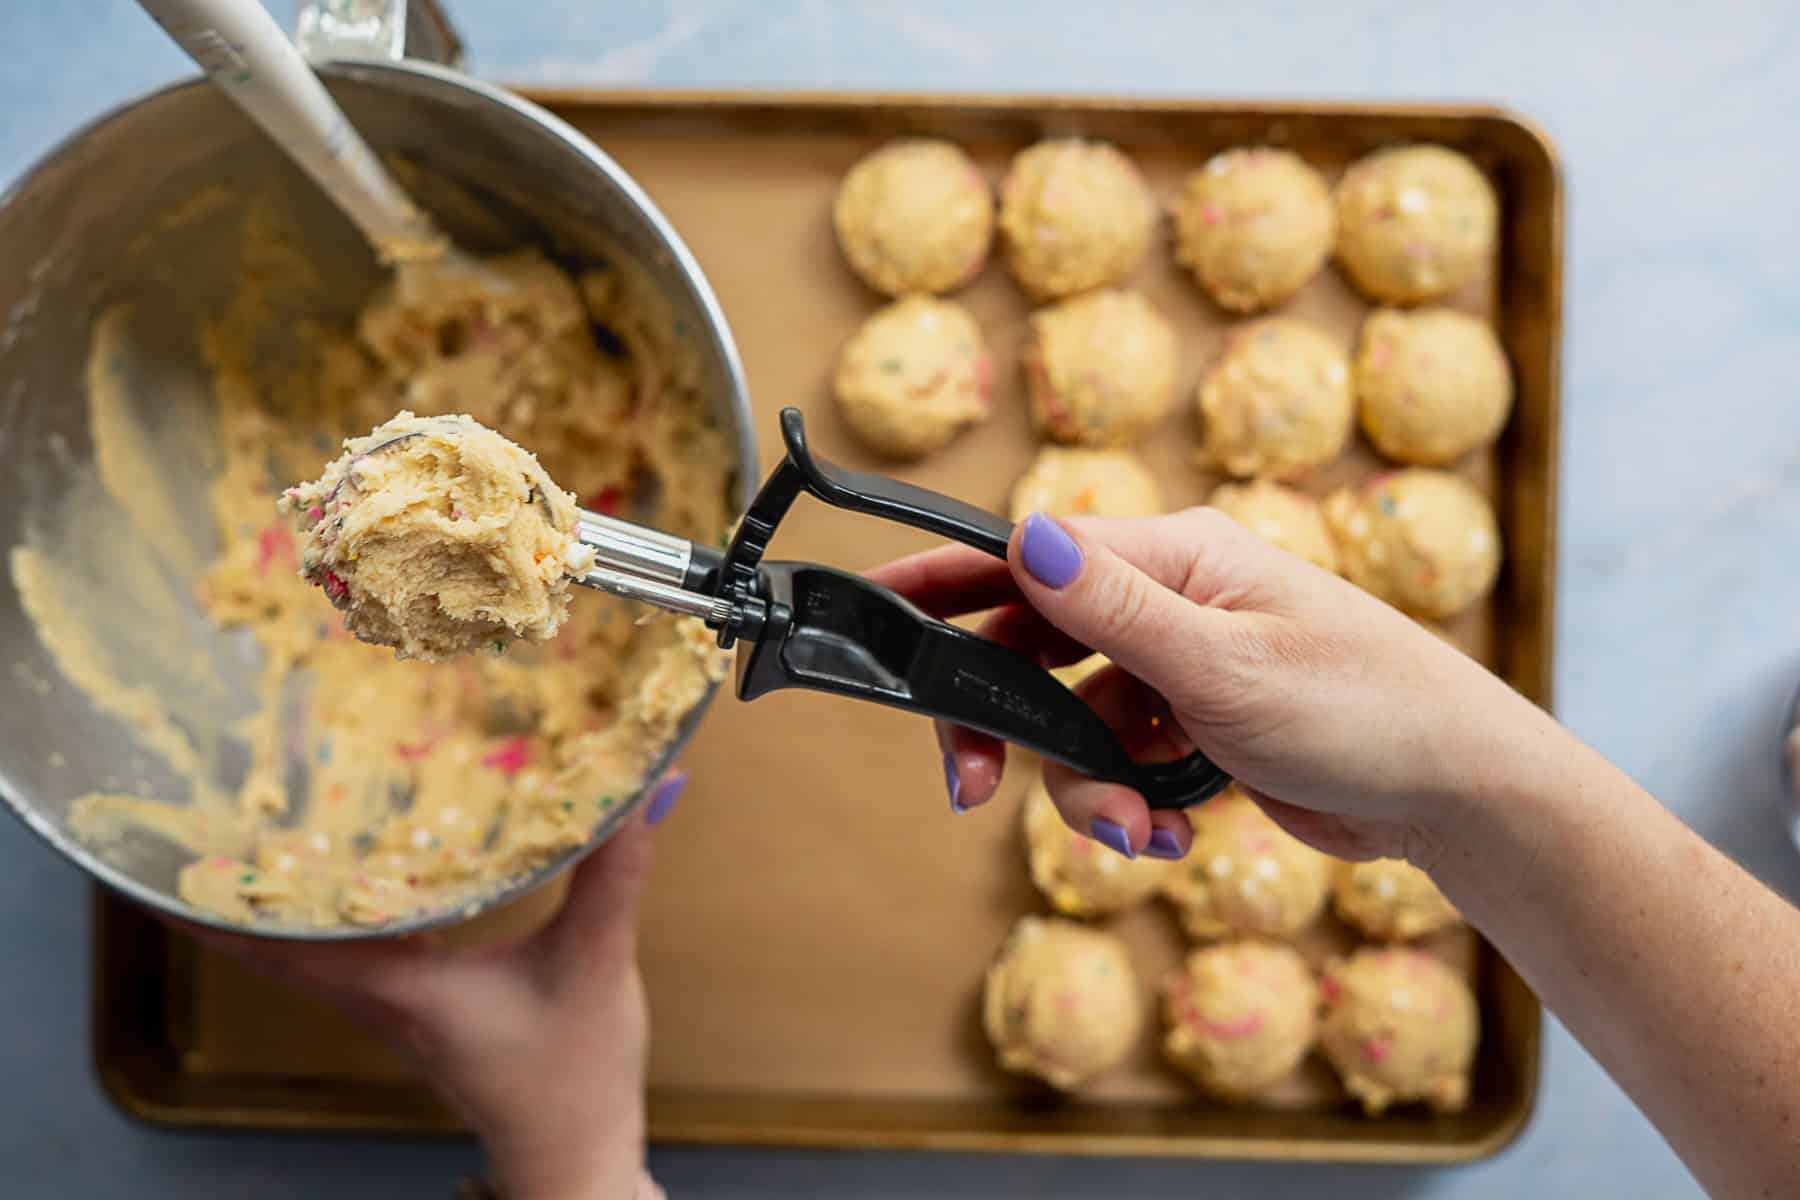
6: Rest the dough 15–20 minutes, then line a sheet pan with parchment and scoop 2 TBSP portions of dough onto the pan.
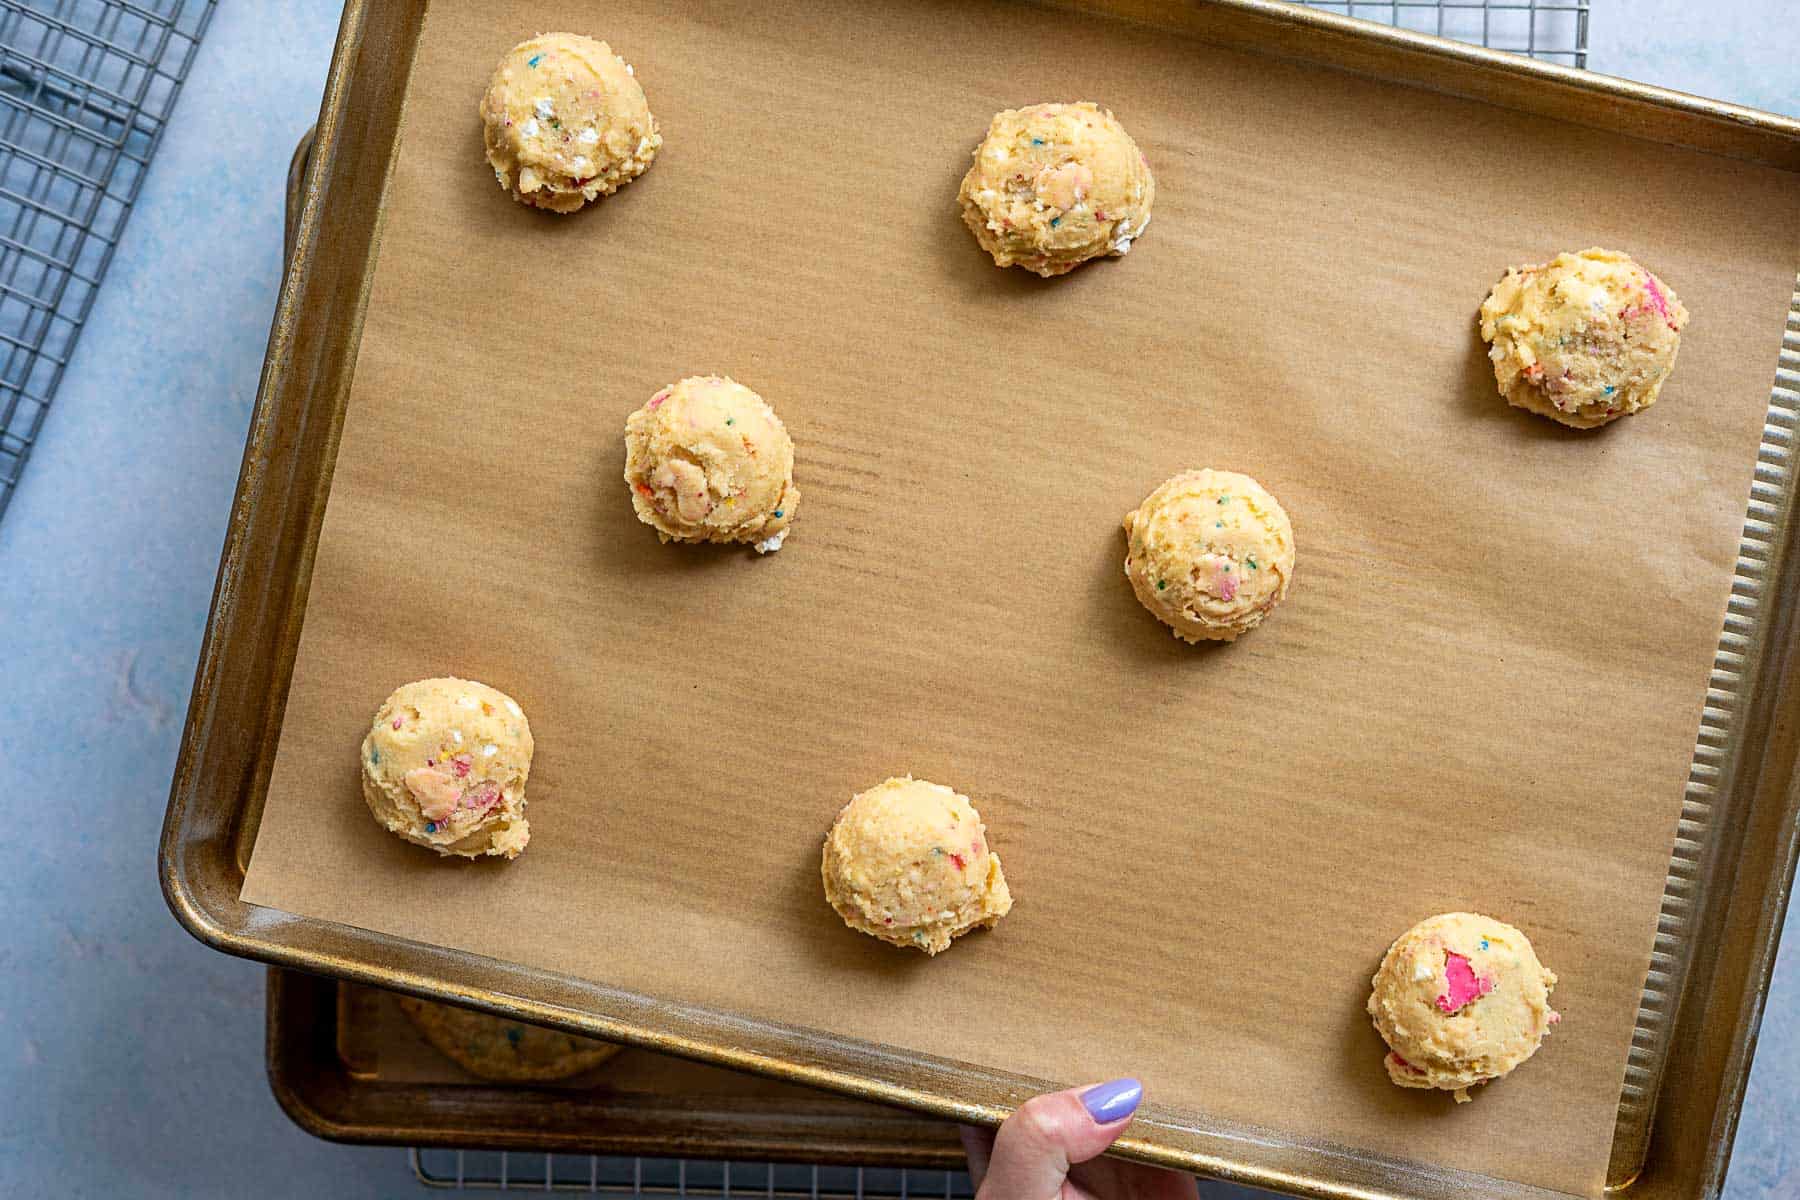
7: Space chilled dough balls 2–2.5 inches apart on a parchment-lined sheet pan.
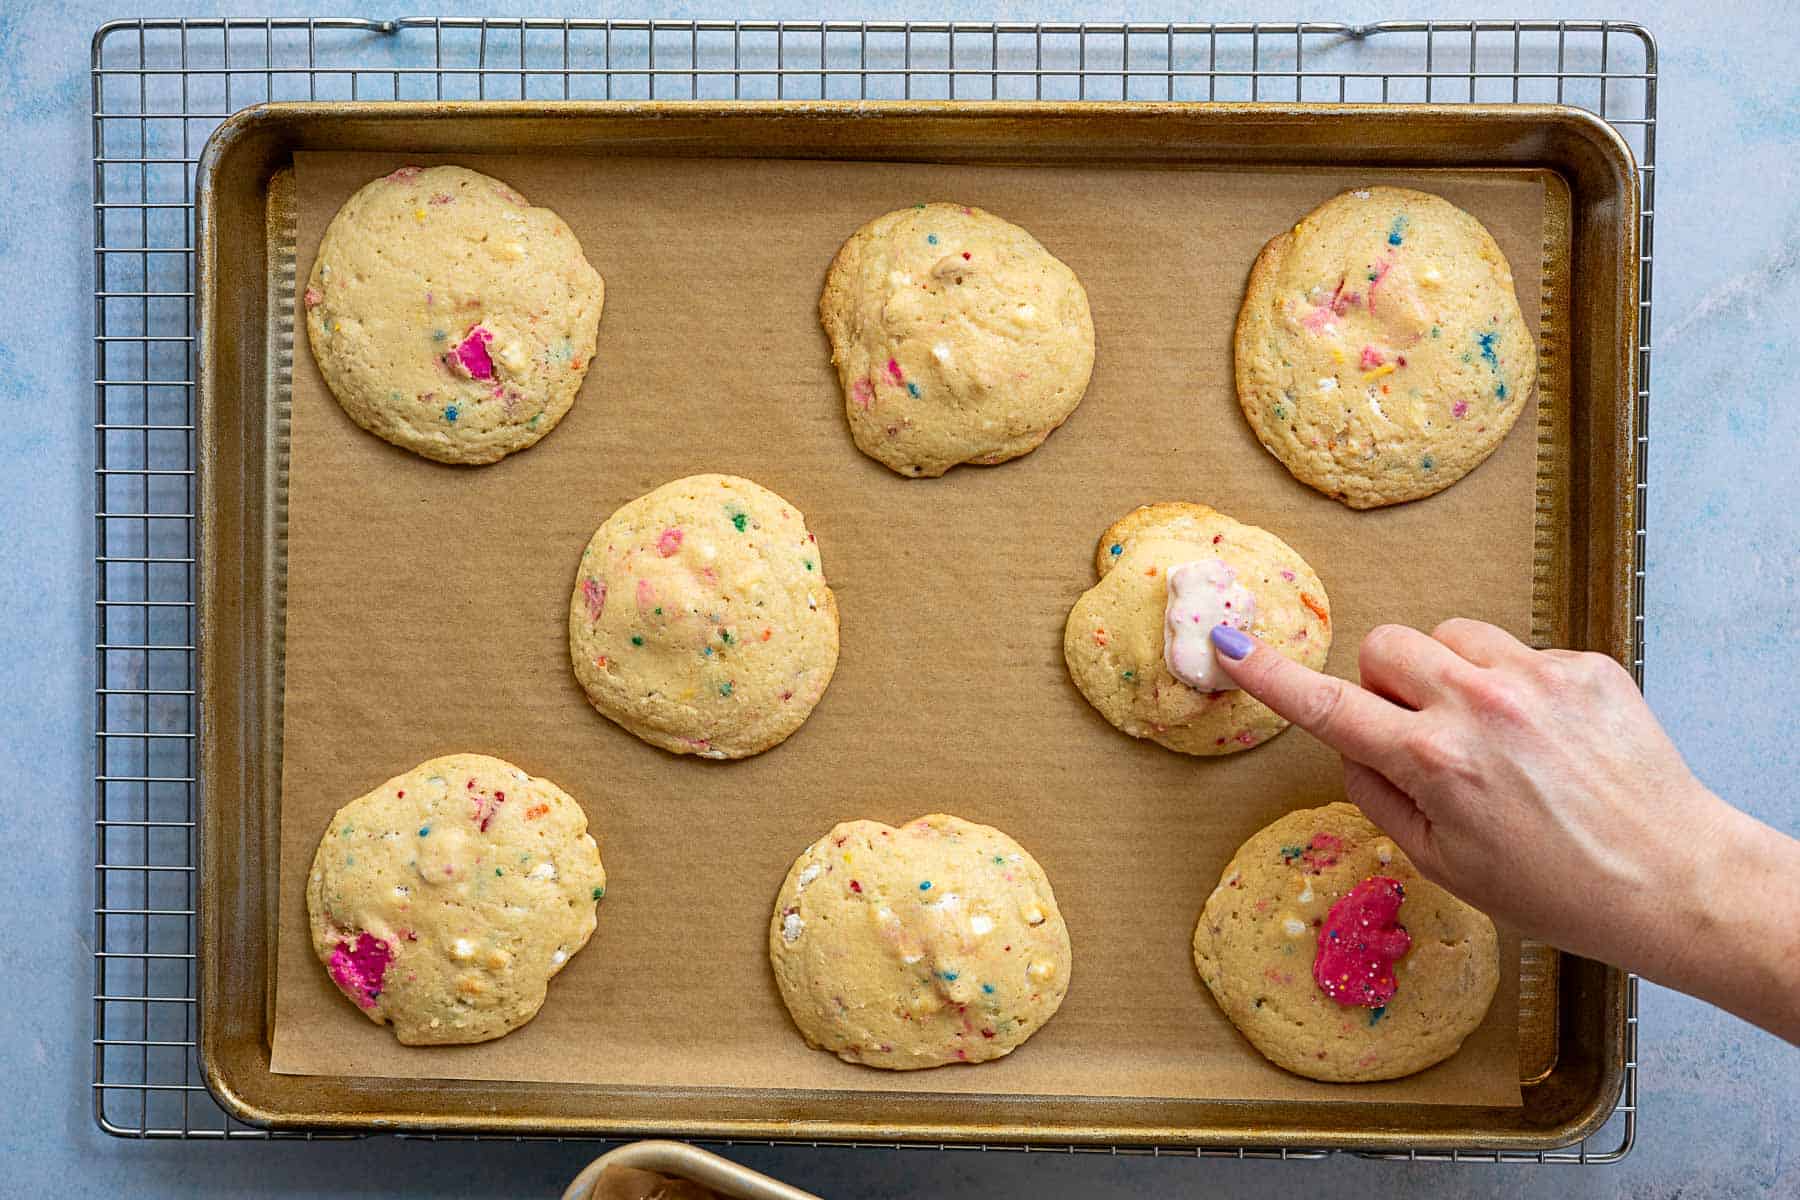
8: Bake 10–12 minutes until lightly golden, cool 2 minutes on the pan. Gently press a circus animal cookie onto the top of each cookie, then move to a rack to finish cooling.
💡tips & tricks for getting it right
ℹ️ troubleshooting tips
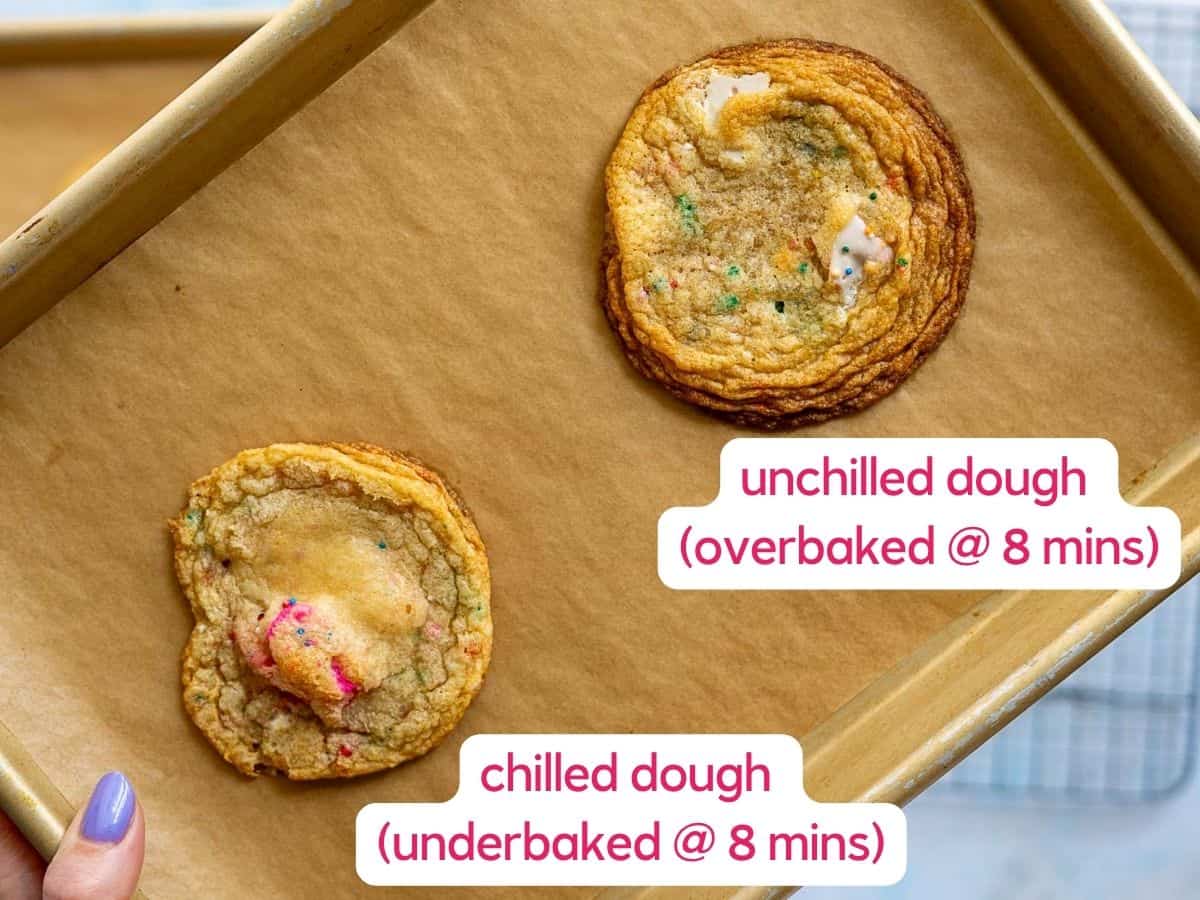
- don’t want to wait – want cookies NOW without waiting for them to chill? Bake a few cookies to enjoy right away. BE WARNED: they WILL have a different flavor and they WILL spread thinner than if you let them chill. But then you will have a very useful, practical, and tasty real-world science experiment answer for why chilling your dough is important. 👩🏻🔬 Check them after about 7-8 minutes, and keep an eye on them because they will bake faster, too.
- not enough flavor – did you chill your dough? When I tested these cookies, the batch I baked right away had hardly any vanilla taste at all. They were almost bland. The next day, they had a FACE FULL OF VANILLA.
- spread too much – okay seriously…did you chill your dough??? I knoooow, it’s tough to wait for the dough to chill and it’s annoying too…but there’s really a REAL reason to chill the dough. It helps the flavors to deepen and meld together, and it helps to ensure your cookies don’t spread too much when baking.
- cover while chilling – be sure to cover your cookies with plastic wrap while chilling in the fridge (or while freezing). This helps stop any funky fridge flavors from getting into your dough. Garlic noodle sugar cookies don’t have the same appeal. 🥲

- over-mixed or under-mixed – mixing the dough the correct amount is the key to perfect cookies! Scrape the bowl down between steps, being sure to also scrape the bottom of the bowl, so you can ensure that everything is incorporated.
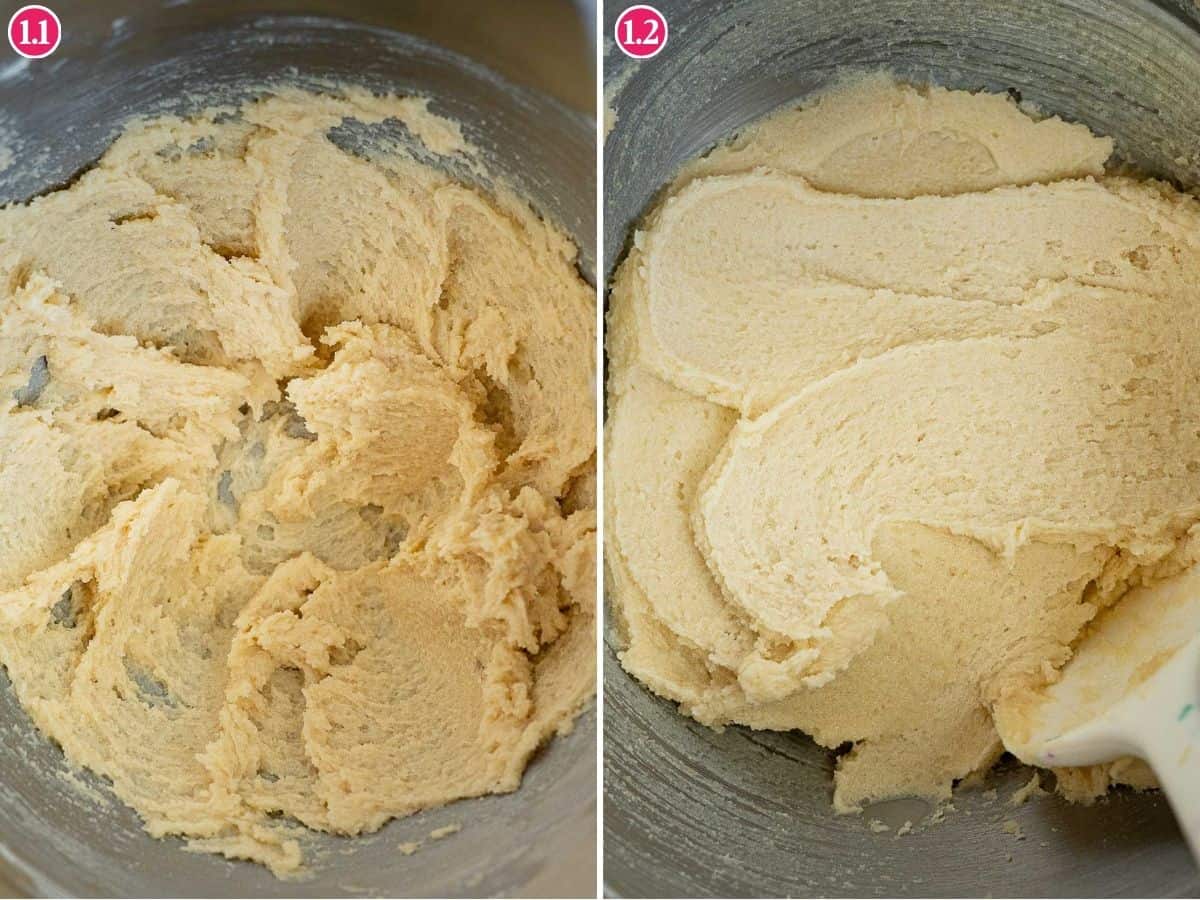
When creaming your butter and sugars, the color of the mix will lighten a bit and the texture will be light and fluffy, without lots of grains of sugar present.
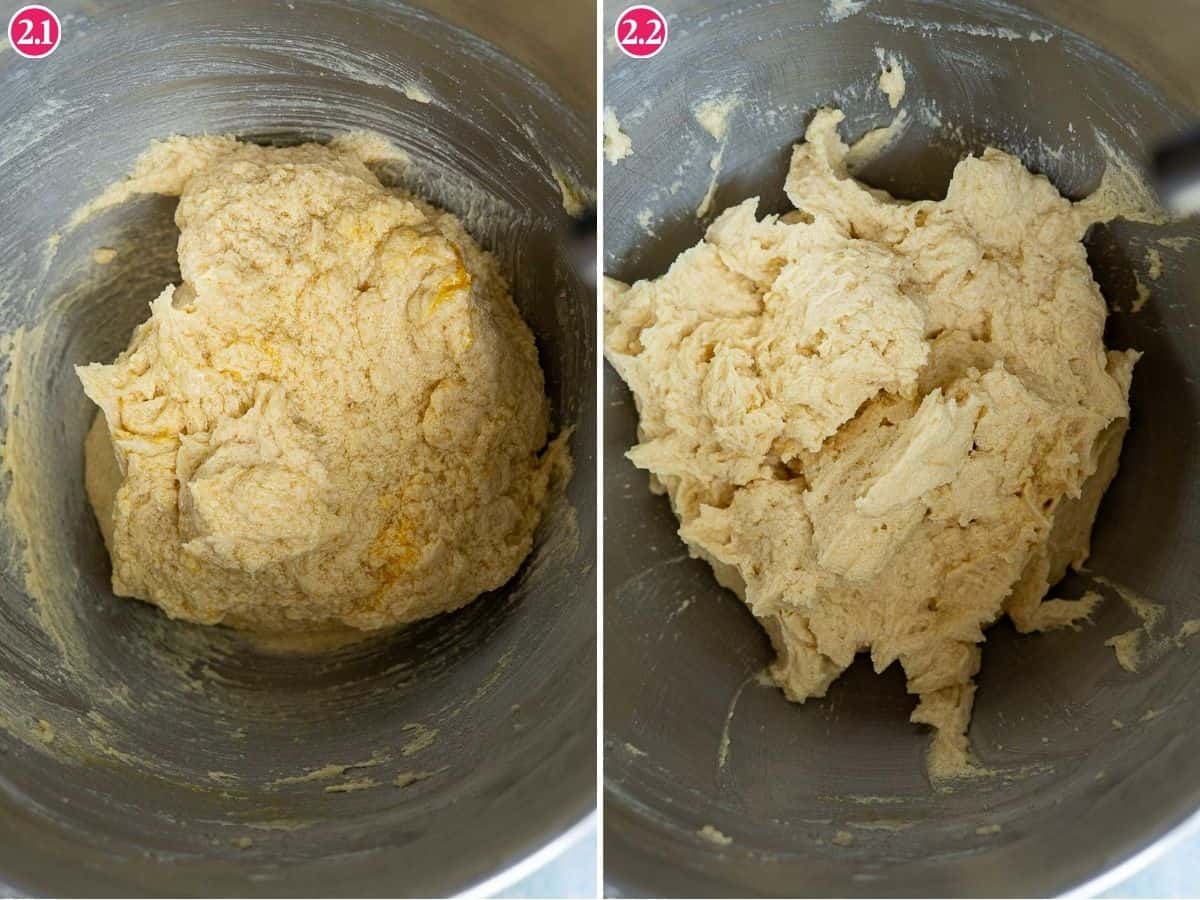
When mixing in the eggs and vanilla, take care to mix the eggs in one at a time until they are fully incorporated, then add the vanilla. Scrape down the bowl between adding eggs to make sure they are mixed in evenly.
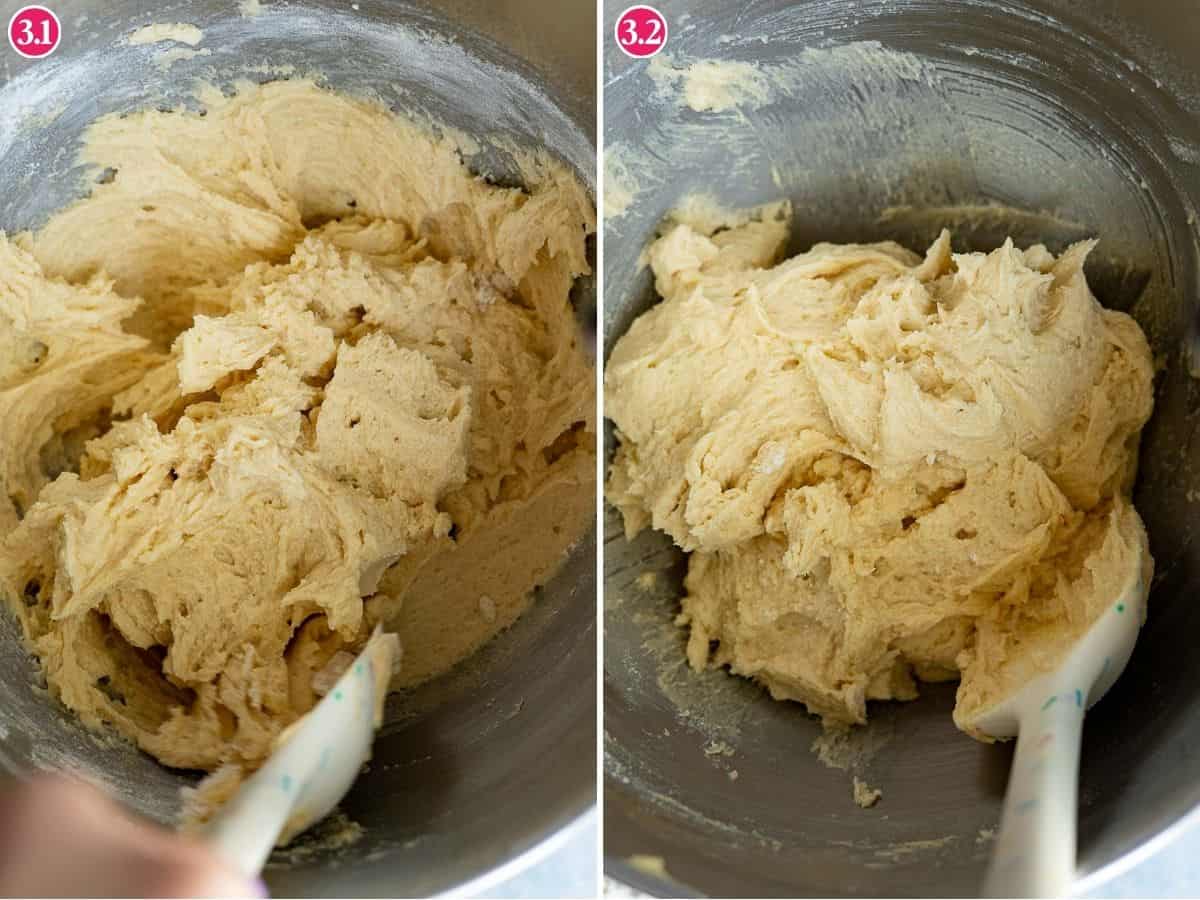
When adding the dry ingredients, I like to do this in 2-3 batches, and mix just until you can’t see strong white streaks anymore. Be sure to also scrape down the bowl (including the bottom!) between batches so the dry ingredients are evenly incorporated.
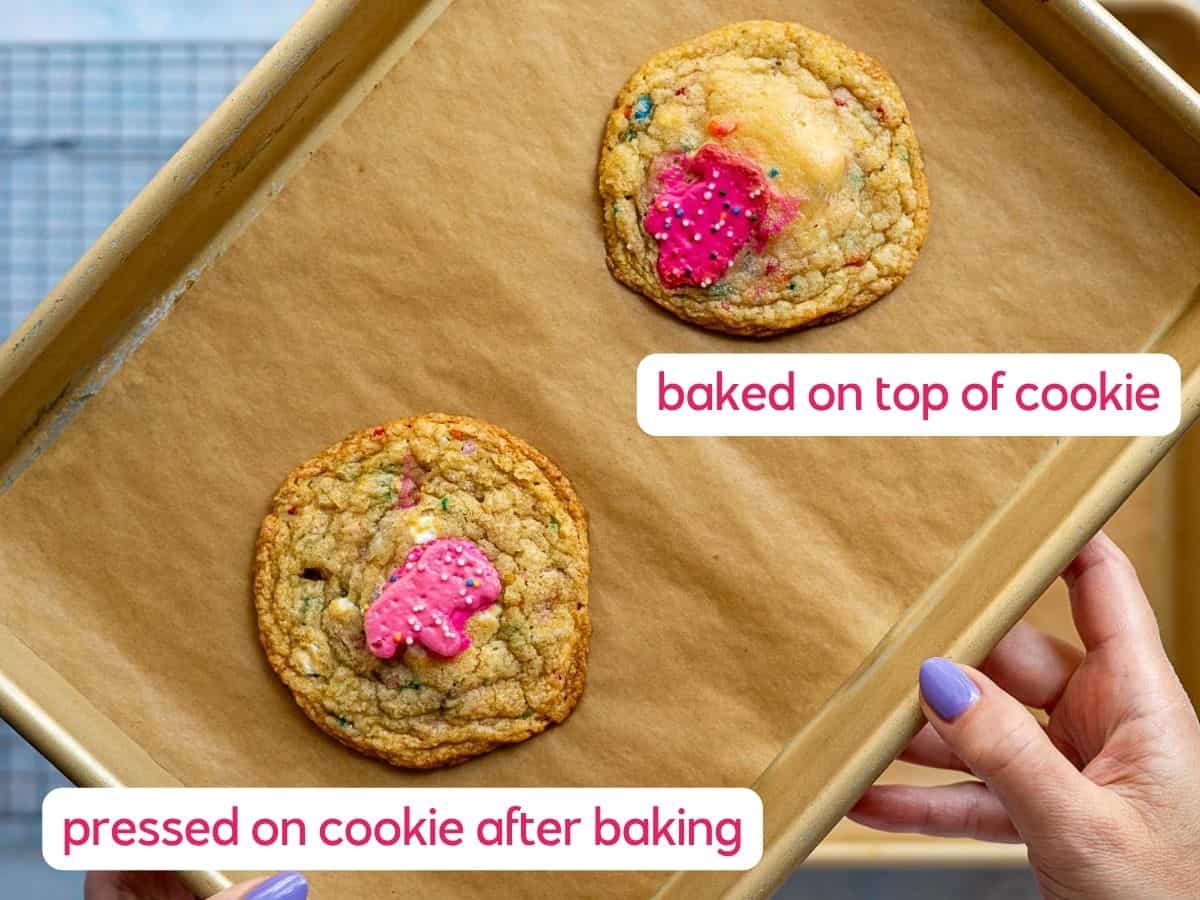
baking with animal cookies on top vs. putting them on after
When I’m making these for me, I prefer to bake the cookies ON the cookie. While it does result in a bit of browning, I find that the flavor is better and less sweet.
Baking them helps the flavor incorporate more fully into the entire cookie, and helps it become one “super cookie.” It mellows the sweetness a bit, but it also mutes the color of the cookies, so keep this in mind if you want BOLD colored cookies with a stronger sweeter cookie flavor.
Wanna save this recipe for later? 📬
🍽️ how to serve your stuffed cookies
- nostalgic treat for later- One of my all time favorite cookie tips is freezing dough for later! Scoop and prep your cookies to chill, but pop them in the freezer instead of the fridge. Check the instructions below for more details on freezing your dough, then baking from frozen,
- holidays + parties – these are the perfect cookies to make for a holiday, party, or gathering when you wanna make an impressive and festive cookie! The colors go well with any spring or summer celebration, from Easter to picnics + summer BBQs! They also work in place of birthday cakes as the perfect birthday party cookie, and serve as a completely acceptable cupcake replacement too. 😌
❄️ how to freeze + bake from frozen
After scooping your cookies, pop them in the freezer, making sure to cover them with plastic wrap. This allows you to have pre-portioned and ready-to-bake cookies whenever the mood strikes!
Make sure to seal them in a zip top bag as soon as they are frozen (8-12 hours, or overnight). This helps keep their flavors contained, and keeps any rogue freezer flavors from getting into the dough. Store in the freezer for up to 3 months (I’ve pushed it to 6, but the flavor does start to degrade).
When baking from frozen, I also like to put a circus animal cookie on top and bake it that way, so I don’t need to worry about storing them separately from the dough. Bake cookies straight from frozen for 12 – 15 minutes in a 350ºF oven.
♻️ customize your circus animal cookies
- salted butter – go ahead. Use the salted butter if it’s all you have, I won’t tell. You don’t even have to adjust the salt content if you don’t want to, but I would drop it by 1/2 if I were you. 😜
- double the batch – I have tested this recipe by making a double batch, and it works perfectly, but be sure your mixer can handle all that dough!
- regular vanilla extract – if you don’t have clear vanilla extract, you can use regular vanilla extract in place.
- infused sugar – use homemade vanilla sugar or another infused flavored sugar in place of granulated sugar for an extra boost of flavor!
🧰 special equipment needed & storage tips
🫙 how to store finished cookies
Store your cooled cookies in an airtight storage container at room temperature for up to 5 days, or follow the freezing instructions in the post for storing frozen cookie dough.
💬 q+a
If you make this recipe, please leave a review in the comments and a star rating!
⭐️⭐️⭐️⭐️⭐️
I read every single comment, and each rating is helpful to other readers, too! 🥹
I also love connecting on social media, so snap a pic and hashtag it #myrecipeforfun and tag me on YouTube, TikTok, Threads, or pin this recipe on Pinterest!
Stuffed Circus Animal Sugar Cookies (Fun Birthday Cookies!)
Wanna save this recipe for later? 📬
Equipment
- 1 stand mixer or hand mixer
- 2 half-sheet pans
- parchment paper
- kitchen scale or measuring cups
- whisk for mixing dry ingredients
- spatula for incorporating mix-ins
- small bowls for preparing ingredients
- cookie scoop 2 TBSP
Ingredients
- 226 g unsalted butter 2 sticks, softened at room temp
- 200 g granulated sugar 1 cup
- 160 g light brown sugar 3/4 cup, packed
- 30 g corn syrup 1-1/2 TBSP
- 101 g eggs 2 large eggs, room temp
- 9 g vanilla extract 1-1/2 tsp
- 7 g baking powder 1-1/2 tsp
- 10 g baking soda 1-1/2 tsp
- 6 g salt 1-1/2 tsp Diamond Crystal kosher salt
- 300 g all-purpose flour about 2-1/2 cups
- 150 g Mother’s frosted circus animal cookies broken up, about 1-1/2 cups
- 30 g mini marshmallows mini-freeze-dried (dehydrated) marshmallows, about 1/2 cup
- 26 g rainbow sprinkles about 2 tbsp
Instructions
- Cream butter, corn syrup, + sugars. Cream butter, corn syrup and sugars together until light and fluffy.226 g unsalted butter, 200 g granulated sugar, 160 g light brown sugar, 30 g corn syrup
- Add eggs + vanilla. Add in eggs and vanilla, and mix just until incorporated.101 g eggs, 9 g vanilla extract
- Combine wet + dry ingredients. In a separate bowl, combine the flour, baking powder, baking soda, and salt using a whisk or sifter. Slowly add the dry ingredients into the butter + egg mixture until all ingredients have been incorporated, being careful not to over mix.7 g baking powder, 10 g baking soda, 6 g salt, 300 g all-purpose flour
- Add mix-ins. Crumble in the crushed circus animal cookies, mini marshmallows, and sprinkles. Mix lightly using a wooden spoon or spatula until the ingredients are incorporated.150 g Mother’s frosted circus animal cookies, 30 g mini marshmallows, 26 g rainbow sprinkles
- Rest dough. Allow the dough to rest for 15-20 minutes while you prep your baking sheet to hold the scooped cookie dough balls. They will sit on the baking sheet in the fridge as they chill overnight.
- Prep pan + scoop dough. Line a pan with parchment paper. Scoop your dough using a 2 TBSP cookie scoop and begin placing the cookie dough balls on the pan. Fill the entire pan, as you will be resting the dough and don’t need to worry about spacing yet. 30 cookies will fit comfortably on a half-sheet pan or a jellyroll pan.
- Cover + chill. Cover the pan with plastic wrap and place in the fridge to chill for 8-12 hours, or overnight.
- Preheat oven. Heat the oven to 350ºF. Keep the cookies in the fridge as you bake batches, so they stay as cold as possible between batches.
- Place cookies on pan. Space the cookies 2-2.5 inches apart on a cookie sheet lined with parchment paper. 8 cookies fit well on a half-sheet pan, staggering the cookies in lines of 2, then 1, as pictured in the instructions of the blog post.
- Bake in batches. Bake for 10 – 12 minutes, or just until the edges and tops of the cookies start to brown lightly.
- Cool. Allow the cookies to cool on the baking sheet for 2 minutes. This helps them to finish baking! After 2 minutes, move them to a cooling rack.
- Store. Store your finished cookies in an airtight storage container for up to 5 days.
Notes
❄️ how to freeze + bake from frozen
After scooping your cookies, pop them in the freezer, making sure to cover them with plastic wrap. This allows you to have pre-portioned and ready-to-bake cookies whenever the mood strikes! Make sure to seal them in a zip top bag as soon as they are frozen (8-12 hours, or overnight). This helps keep their flavors contained, and keeps any rogue freezer flavors from getting into the dough. Store in the freezer for up to 3 months (I’ve pushed it to 6, but the flavor does start to degrade). When baking from frozen, I also like to put a circus animal cookie on top and bake it that way, so I don’t need to worry about storing them separately from the dough. Bake cookies straight from frozen for 12 – 15 minutes in a 350ºF oven.ℹ️ troubleshooting tips
- don’t want to wait – want cookies NOW without waiting for them to chill? Bake a few cookies to enjoy right away. BE WARNED: they WILL have a different flavor and they WILL spread thinner than if you let them chill. But then you will have a very useful, practical, and tasty real-world science experiment answer for why chilling your dough is important. 👩🏻🔬 Check them after about 7-8 minutes, and keep an eye on them because they will bake faster, too.
- not enough flavor – did you chill your dough? When I tested these cookies, the batch I baked right away had hardly any vanilla taste at all. They were almost bland. The next day, they had a FACE FULL OF VANILLA.
- spread too much – okay seriously…did you chill your dough??? I knoooow, it’s tough to wait for the dough to chill and it’s annoying too…but there’s really a REAL reason to chill the dough. It helps the flavors to deepen and meld together, and it helps to ensure your cookies don’t spread too much when baking.
- over-mixed or under-mixed – mixing the dough the correct amount is the key to perfect cookies! Scrape the bowl down between steps, being sure to also scrape the bottom of the bowl, so you can ensure that everything is incorporated.
- cover while chilling – be sure to cover your cookies with plastic wrap while chilling in the fridge (or while freezing). This helps stop any funky fridge flavors from getting into your dough. Garlic noodle sugar cookies don’t have the same appeal. 🥲