


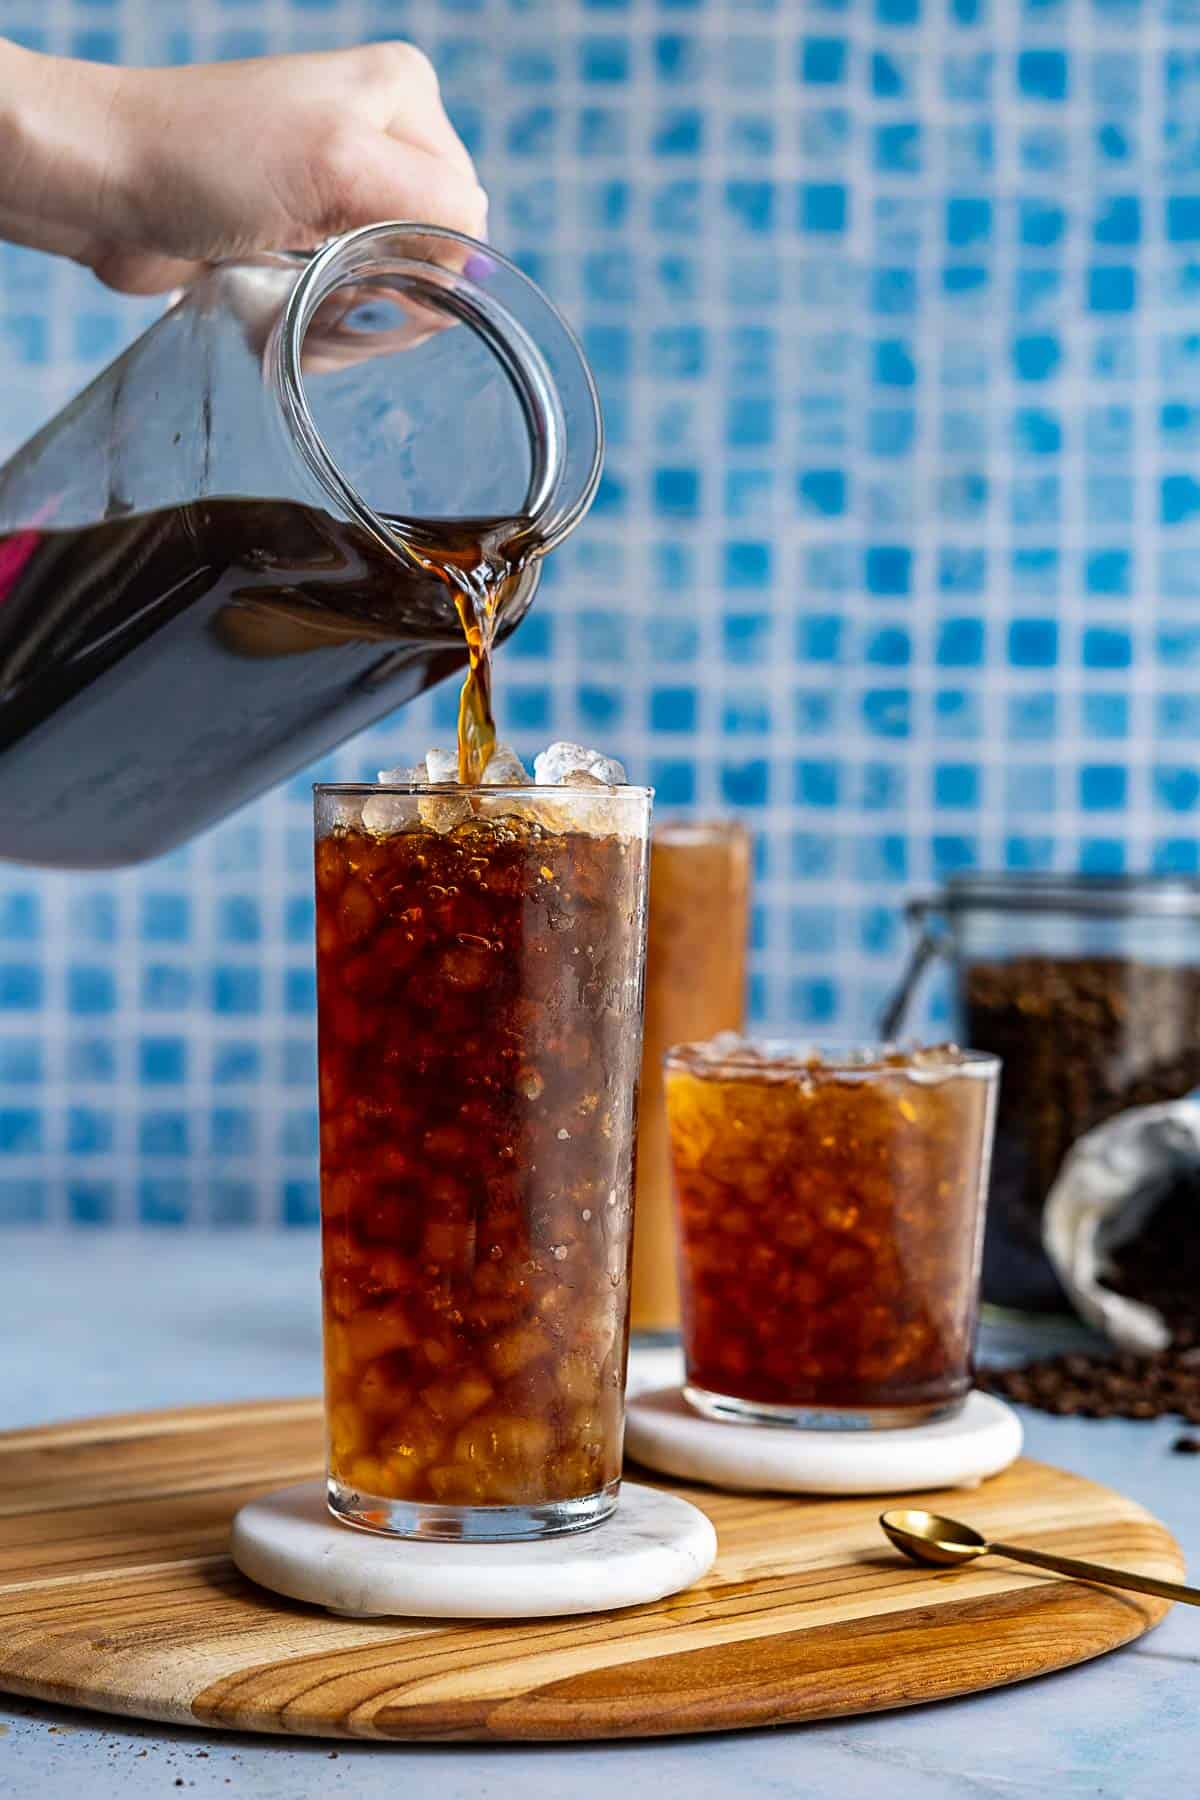
Over the years, I’ve made a lot of cold brew coffee; it’s my household’s favorite way to caffeinate in the morning! After a ton (and I mean A TON) of trial and error, I finally found the perfect ratio for cold brew coffee at home.
Whether you prefer a lighter, less caffeinated, ready to drink cup of coffee, or you want to brew a big batch of concentrate like I do, I’ve got you covered in this ultimate guide to making the perfect cup of cold brew coffee at home. We’ll break down the best kind of beans to use, the best grain size for your beans, the best ratio of coffee, and the best infusion time, so you can make the perfect cup of cold brew every time.
Coffee is something that my family has always taken seriously maybe because my grandma is from Italy a.k.a. the birth place of espresso. We literally order coffee in 5 pound bags at my house and we go through pretty fast too.
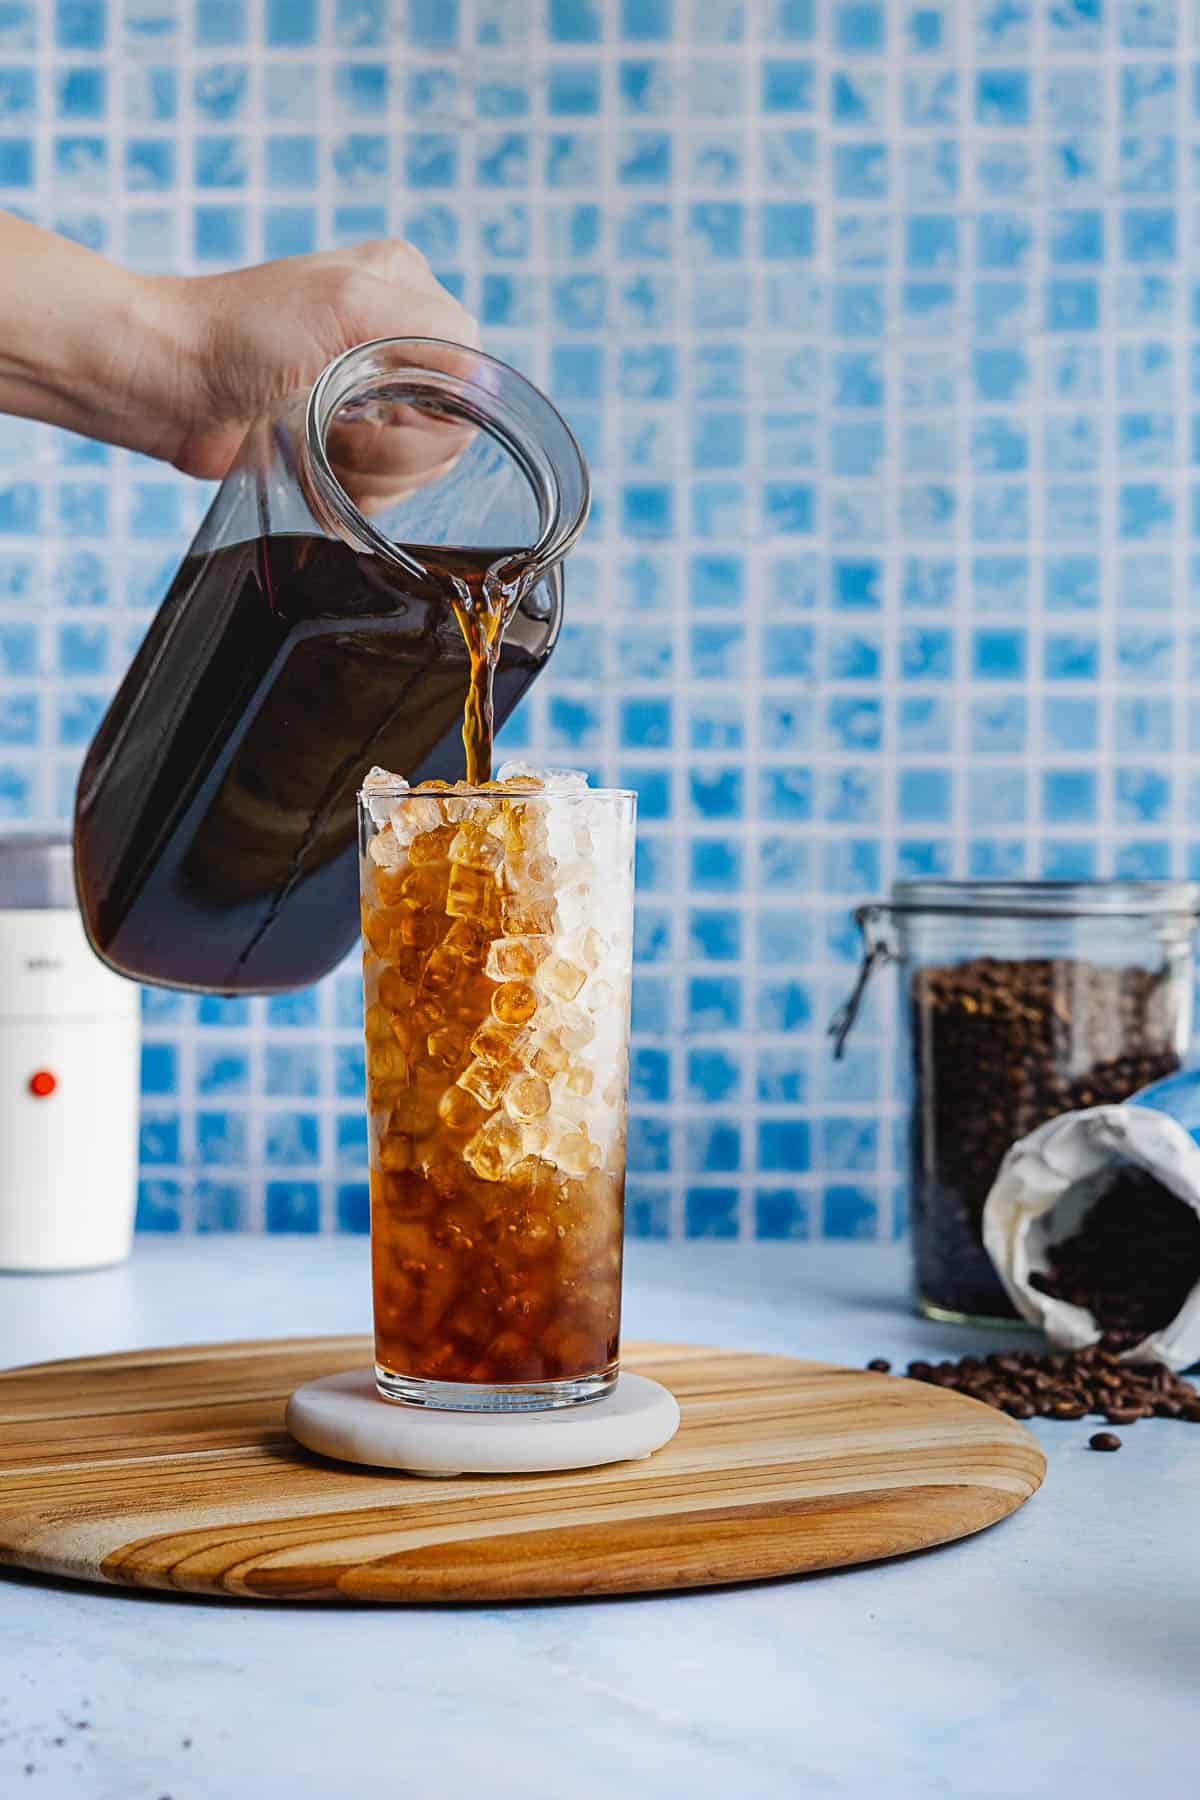
While I do love making espresso drinks, like a simple iced Americano or easy iced cortado every now and then, it’s hard for me to abandon my love of cold brew coffee. It’s just so smooth to drink and it’s so easy to make in big batches to keep on hand for the whole week.
Cold brew is the perfect base for any flavored coffee creation mix in any of your favorite flavored syrups and you’re basically a culinary mad scientist in the kitchen. What’s more fun than that?! 🤓
why this cold brew recipe works:
⚖️ weighed ratios. Measuring out the ingredients by weight means you get the same results every single time.
👌 smooth & sippable. Cold brew coffee is great because it’s less acidic than hot coffee, meaning it’s smoother and easier to sip through throughout the day.
📅 big batch ready. Making cold brew means you can make a big batch and use it allllll through the week. You can even make a concentrate and freeze it for months on end!
🛒 the best cold brew ingredients
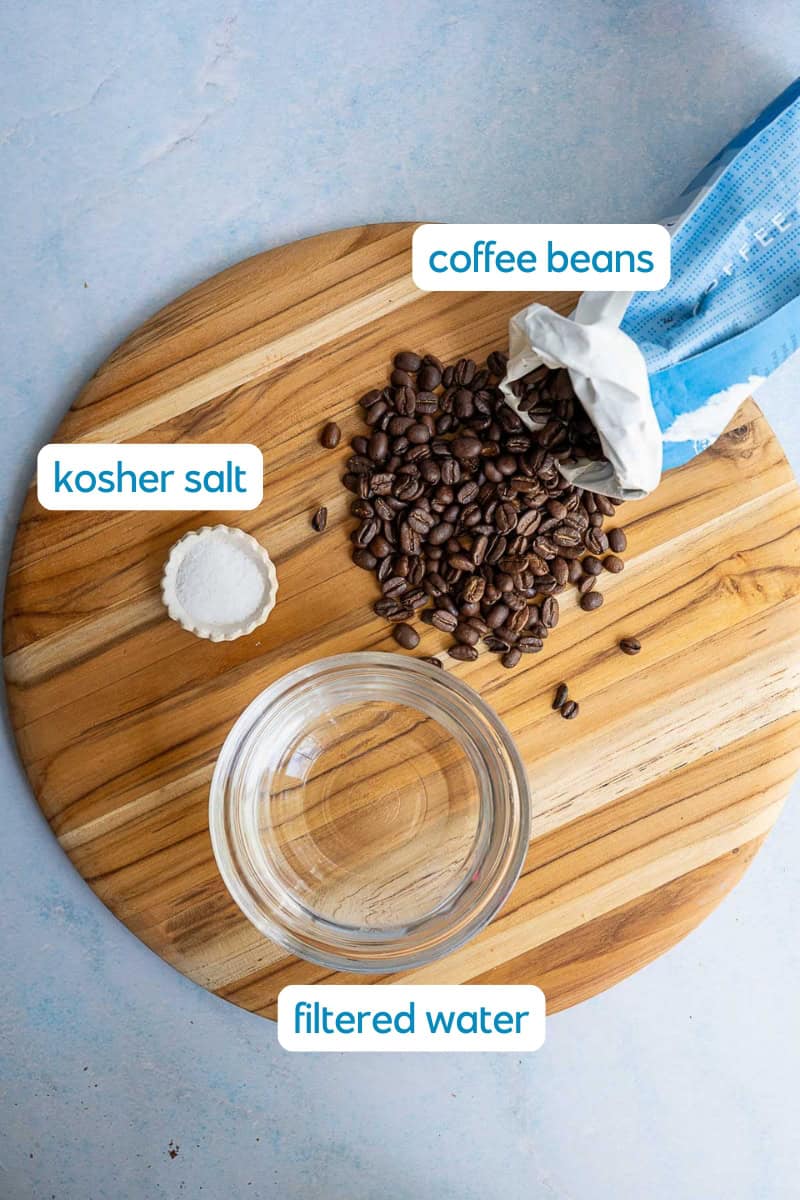
See the recipe card for the exact quantities.
🍳 step-by-step cold brew process
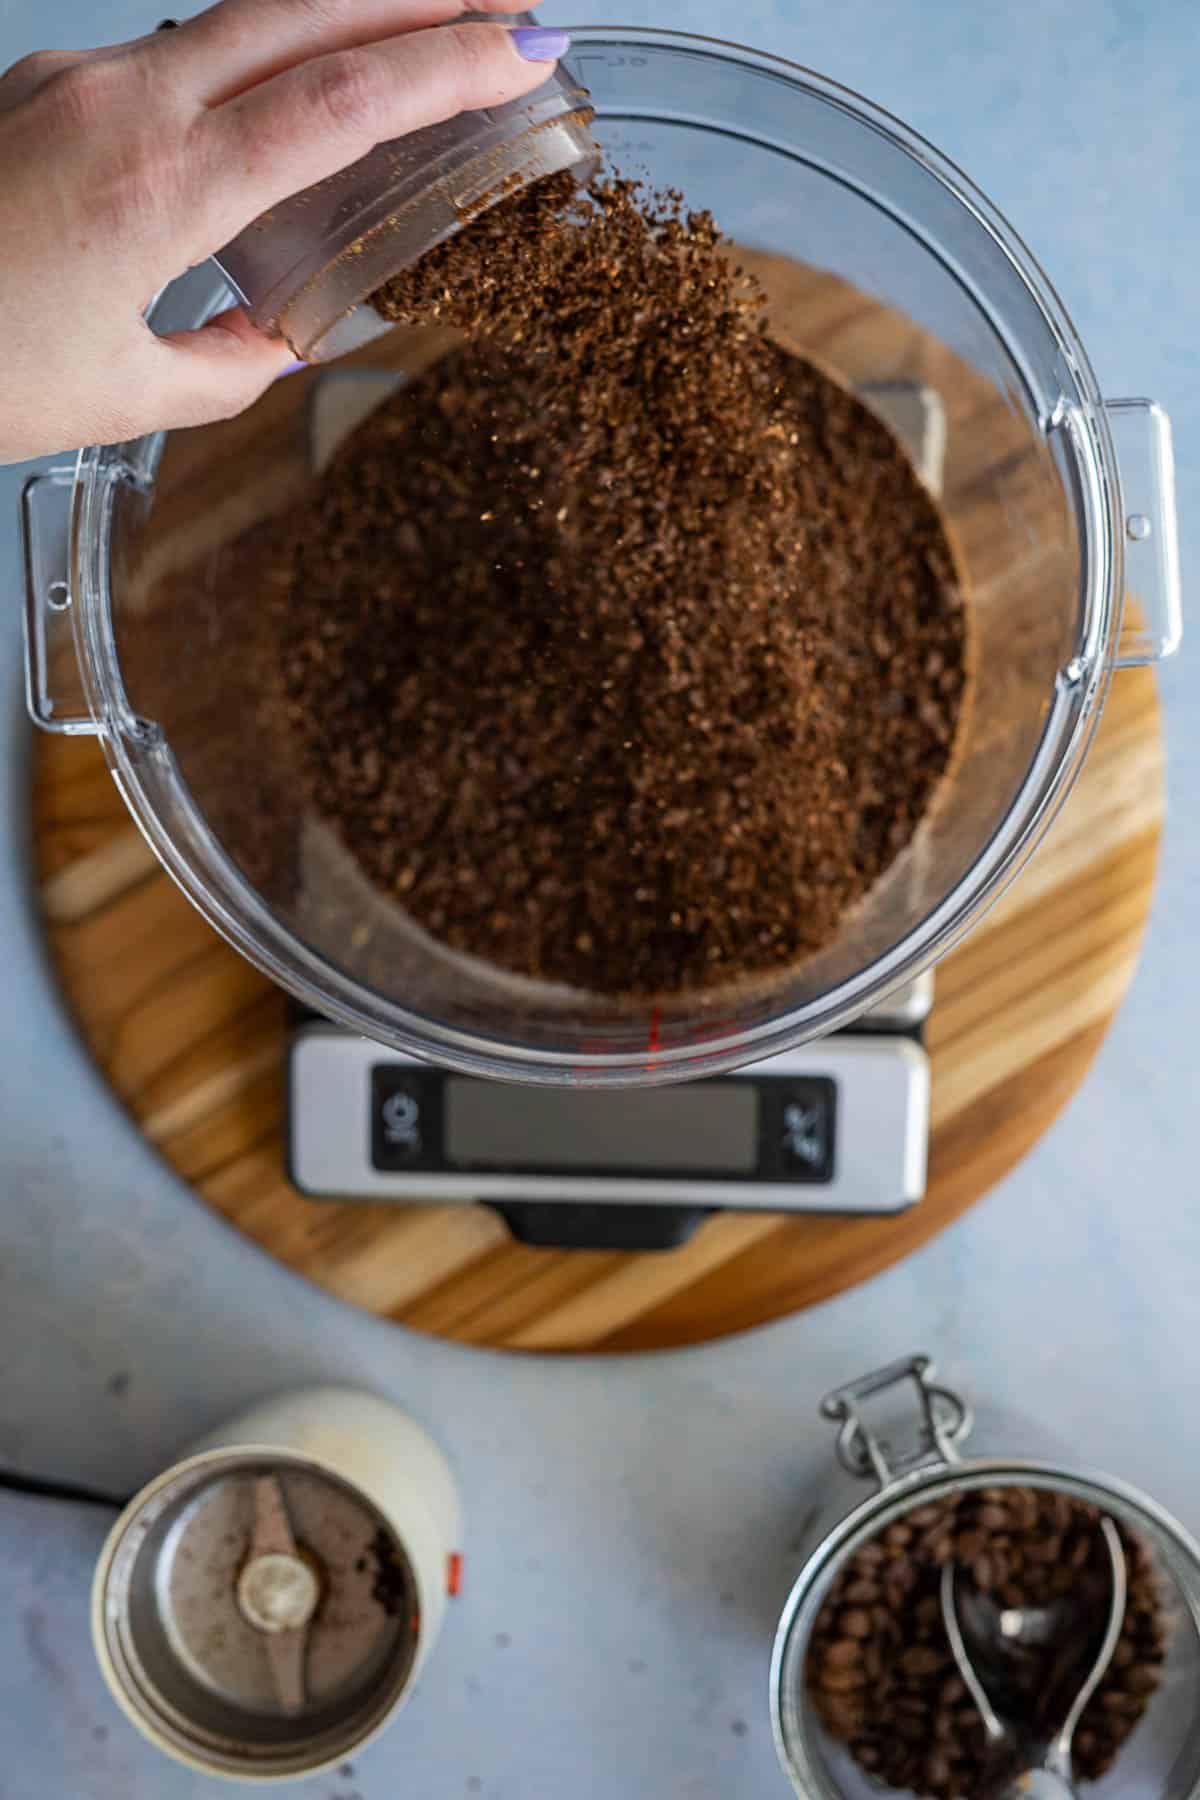
1: Roughly grind your coffee beans, so that they are course in texture and not super fine, and put them in your brewing container.
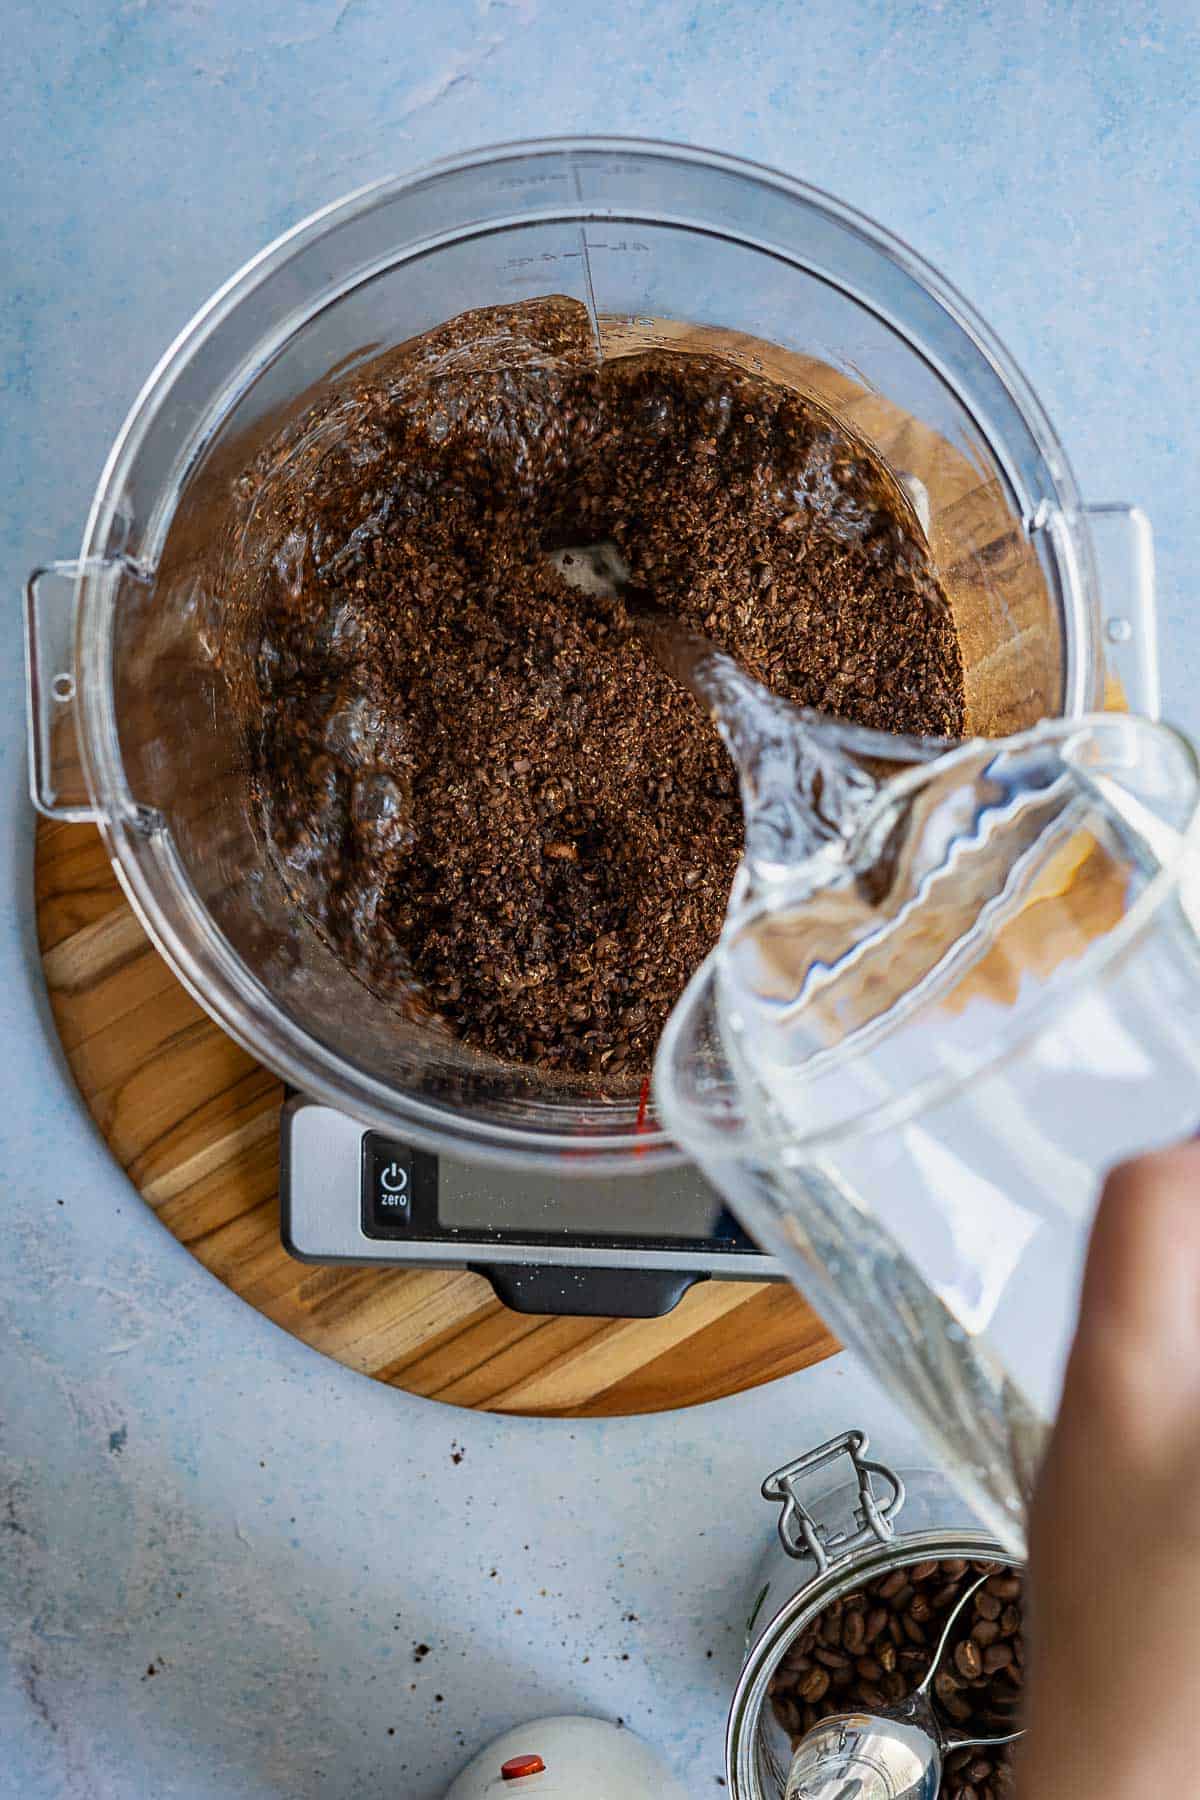
2: Top with just enough water to cover the grounds.
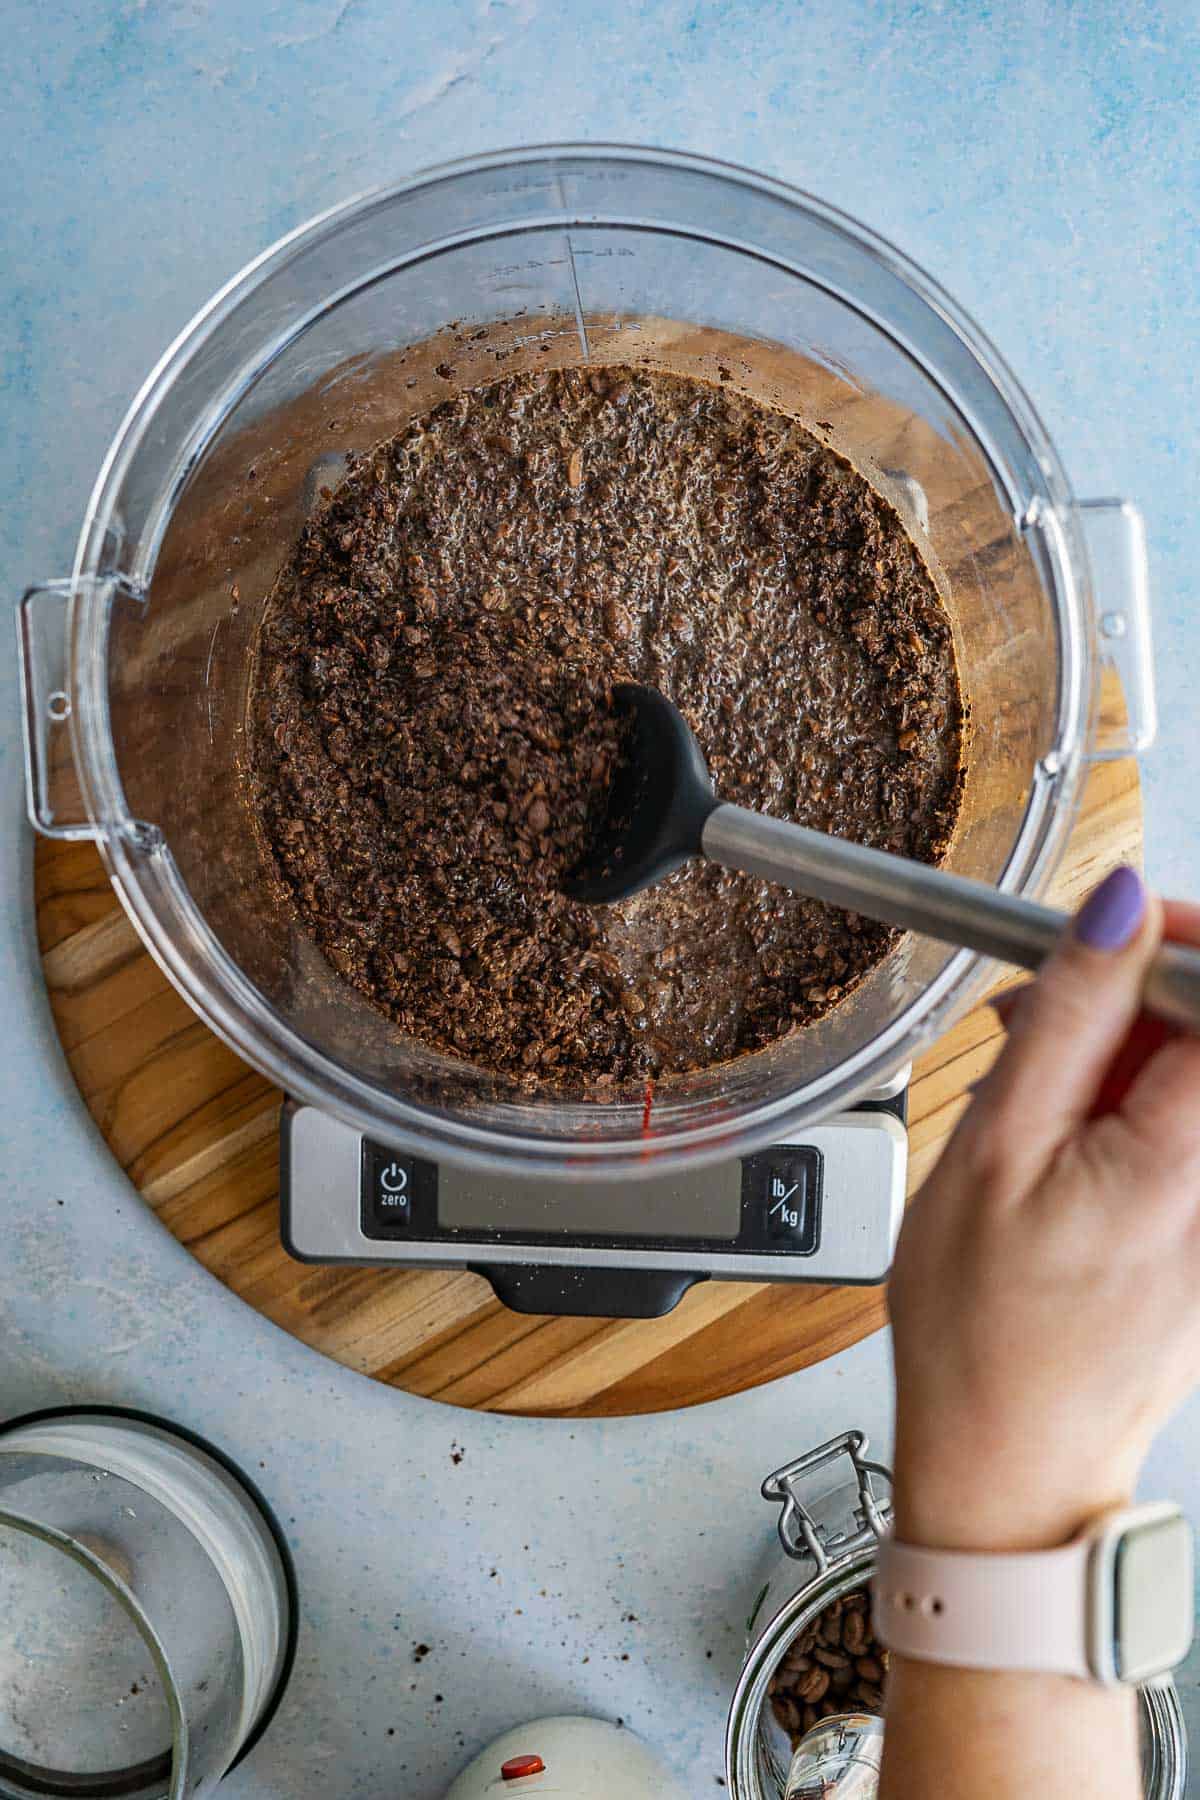
3: Stir the mixture to really saturate all of the coffee grounds.
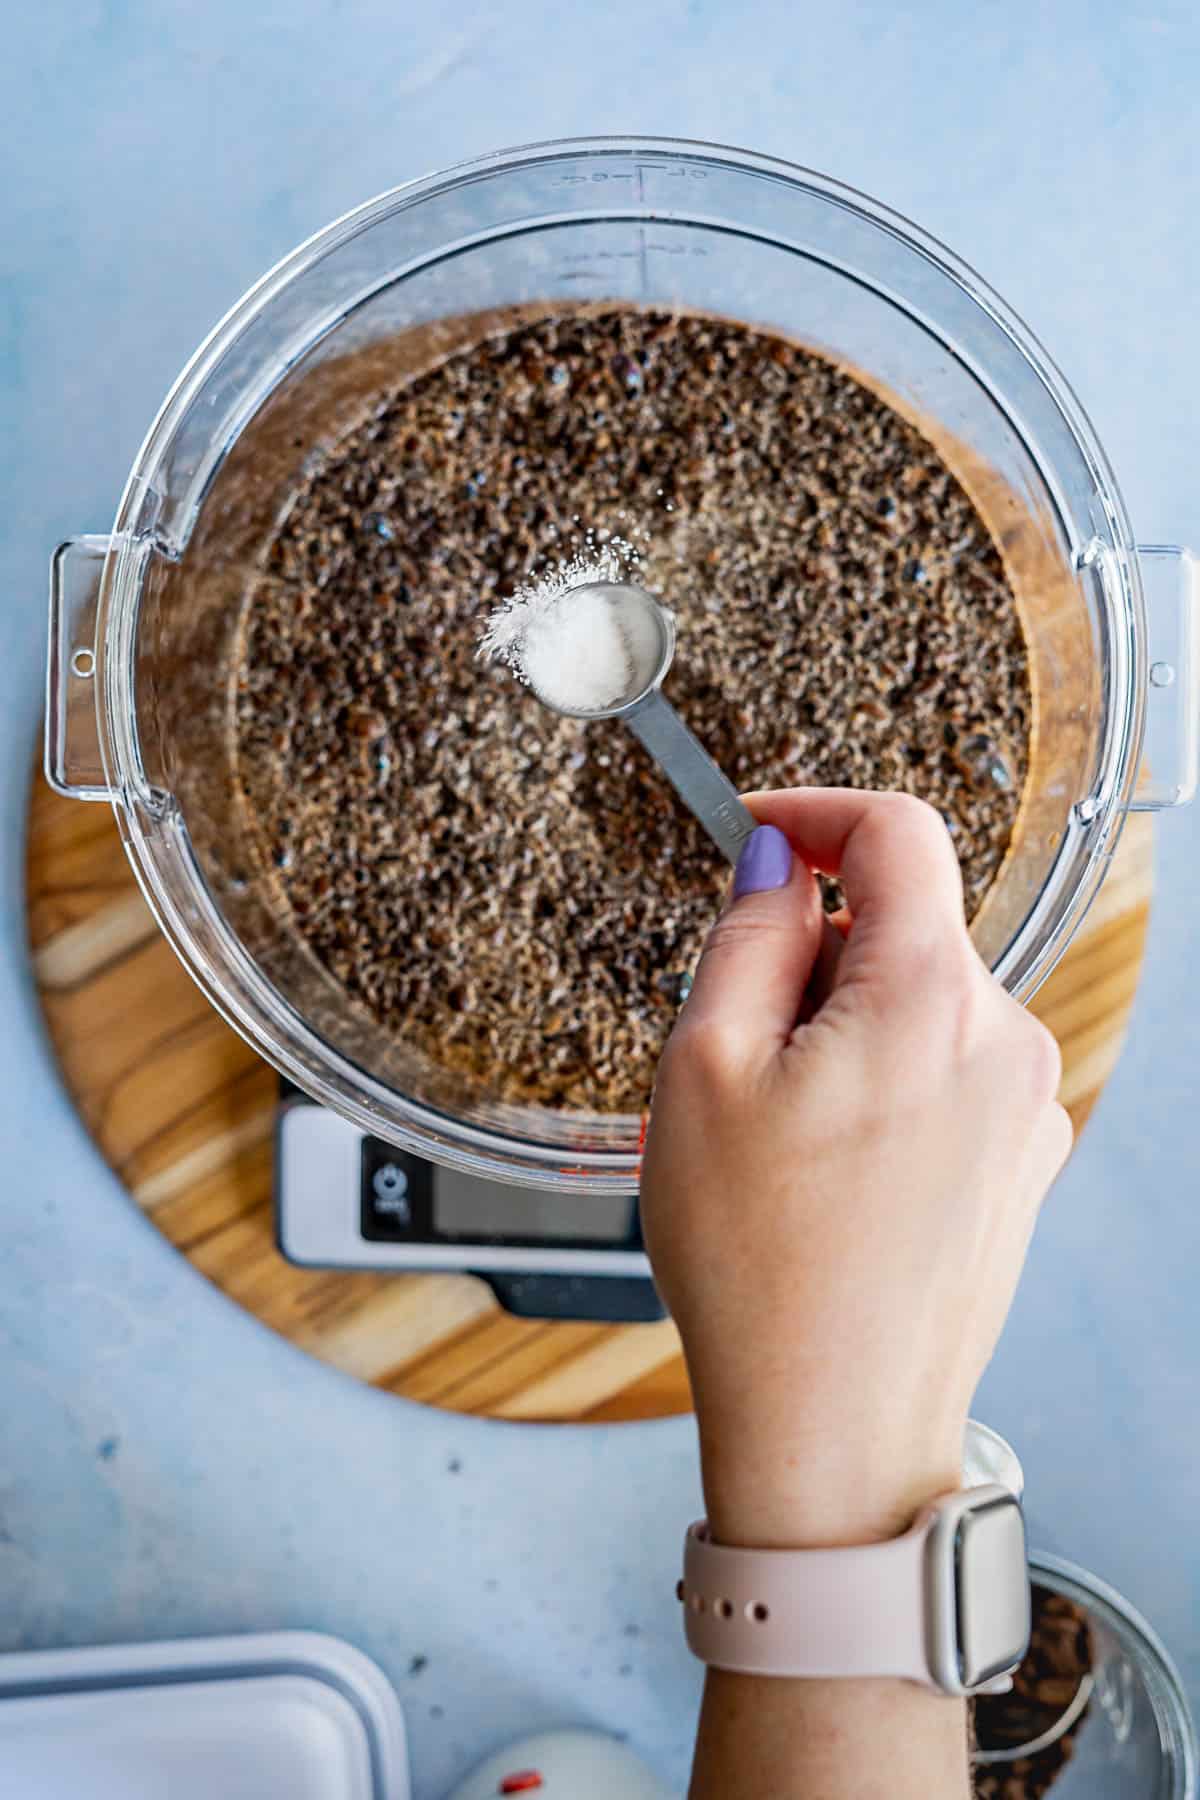
4: Add in the rest of the water, then add a pinch of salt if using.
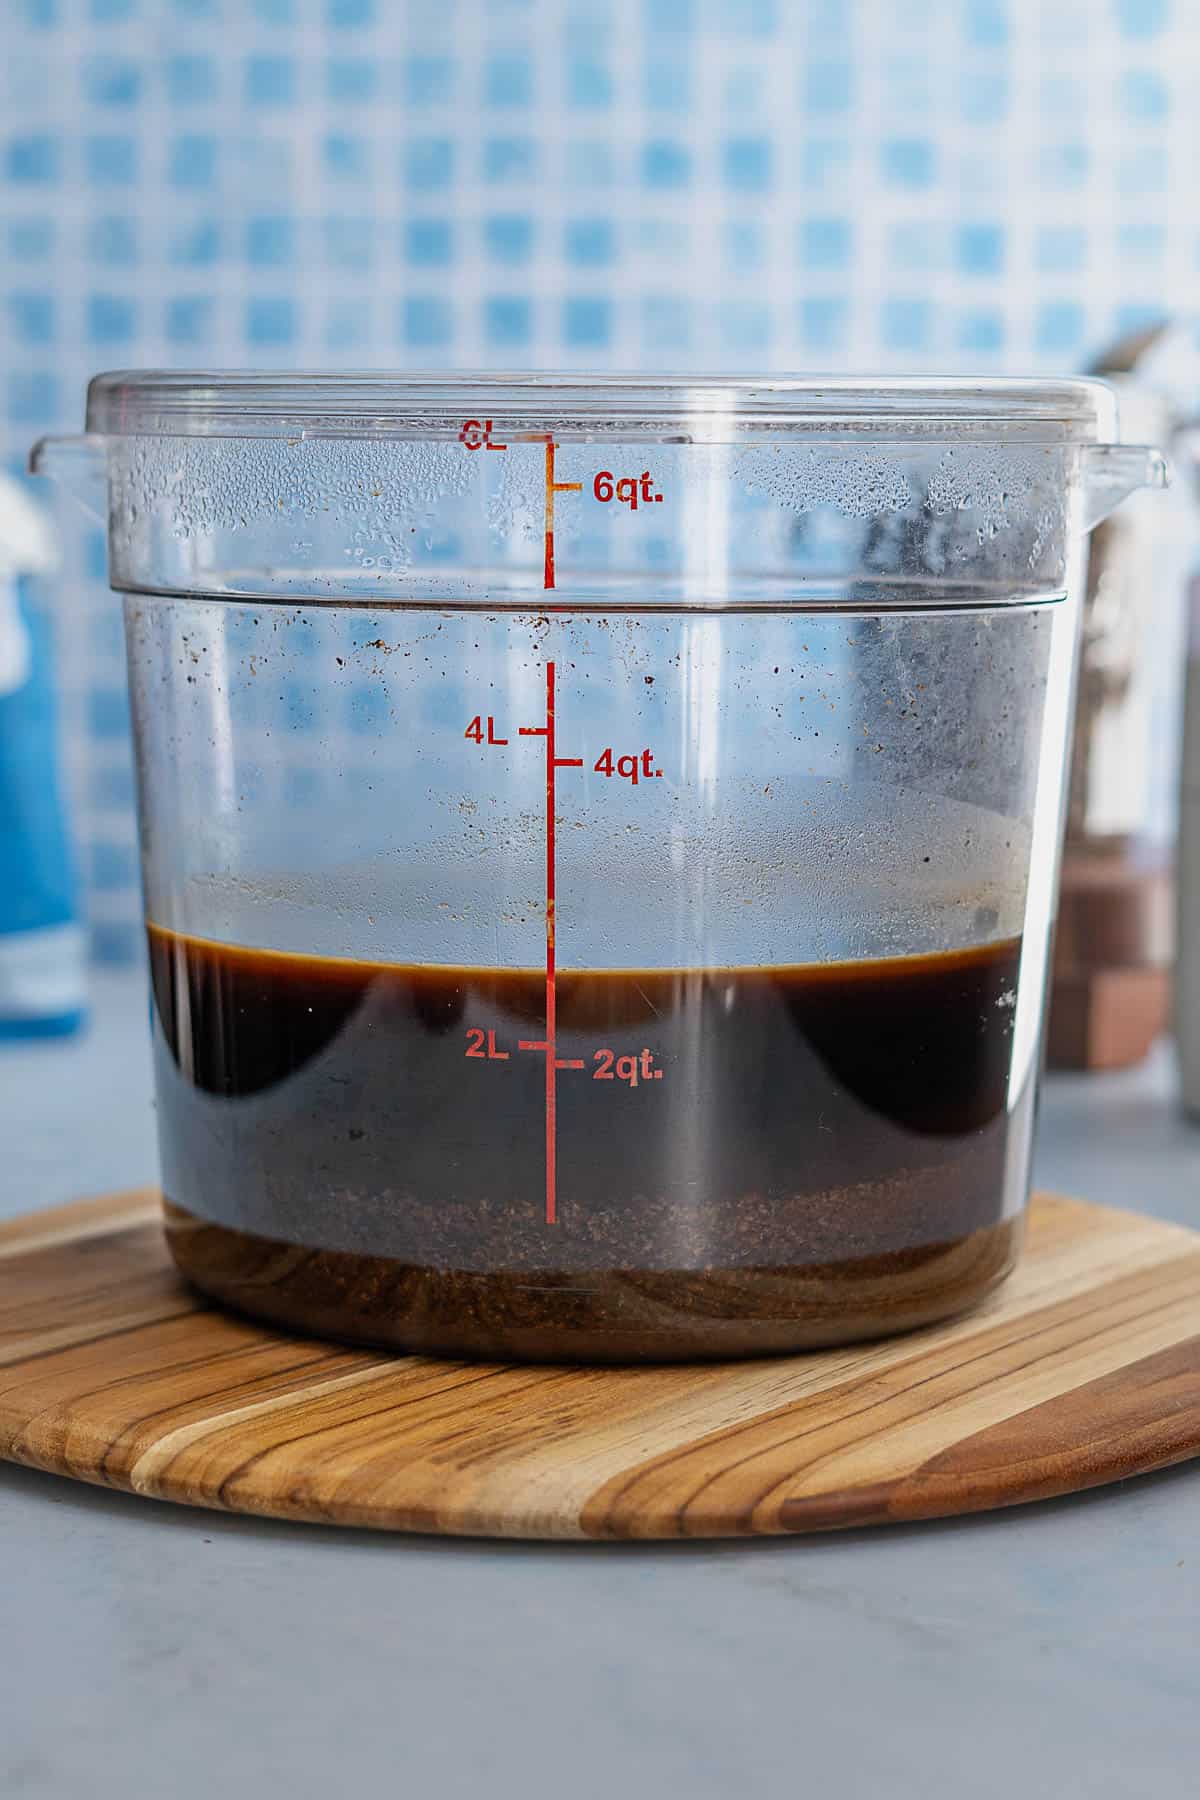
5: Put the lid on your container and allow it to brew for up to 48 hours. If brewing longer than 24 hours, make sure to put it in the fridge to brew.
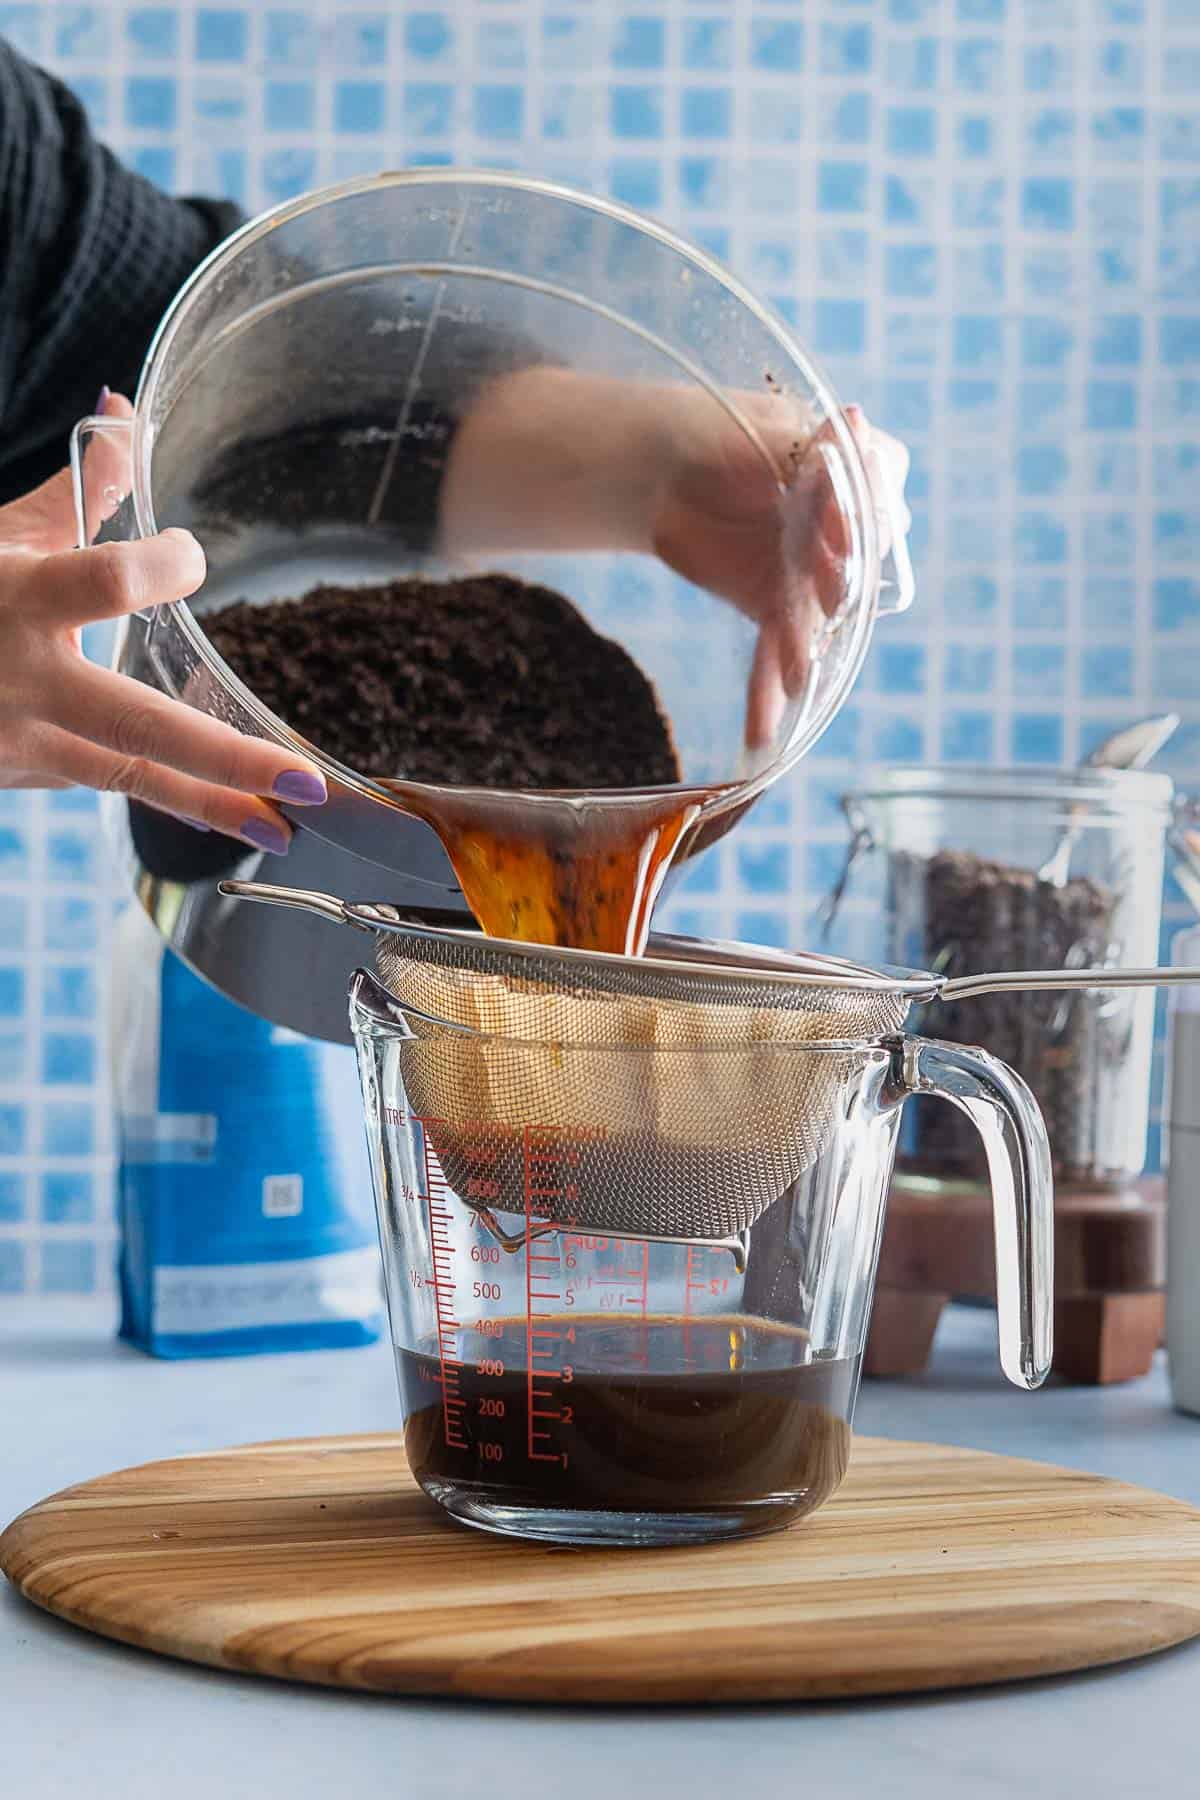
6: Pour your coffee through a fine mesh sieve to separate the grounds from the coffee.
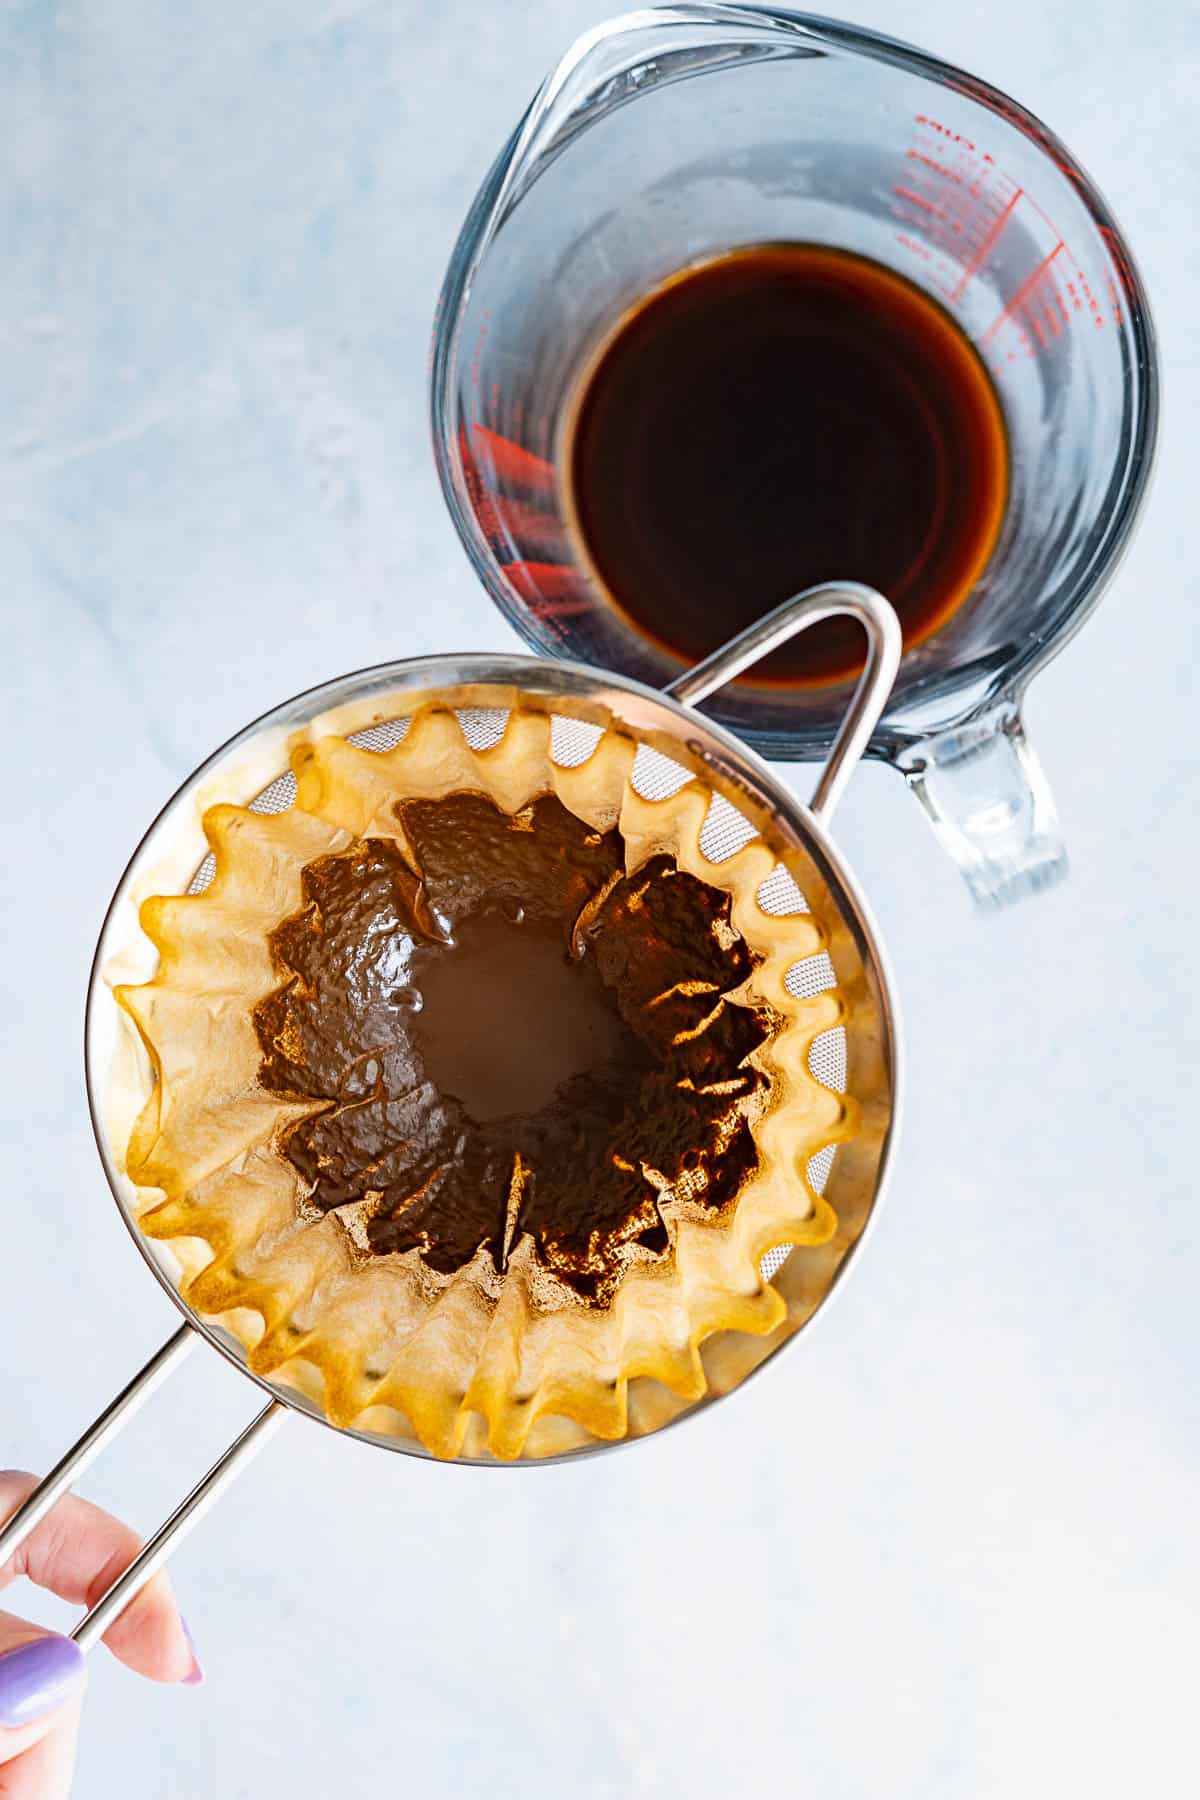
7: Double strain your coffee through an even finer strain sieve or line the sieve with a paper coffee filter. This helps to remove any fine sediment from your coffee.
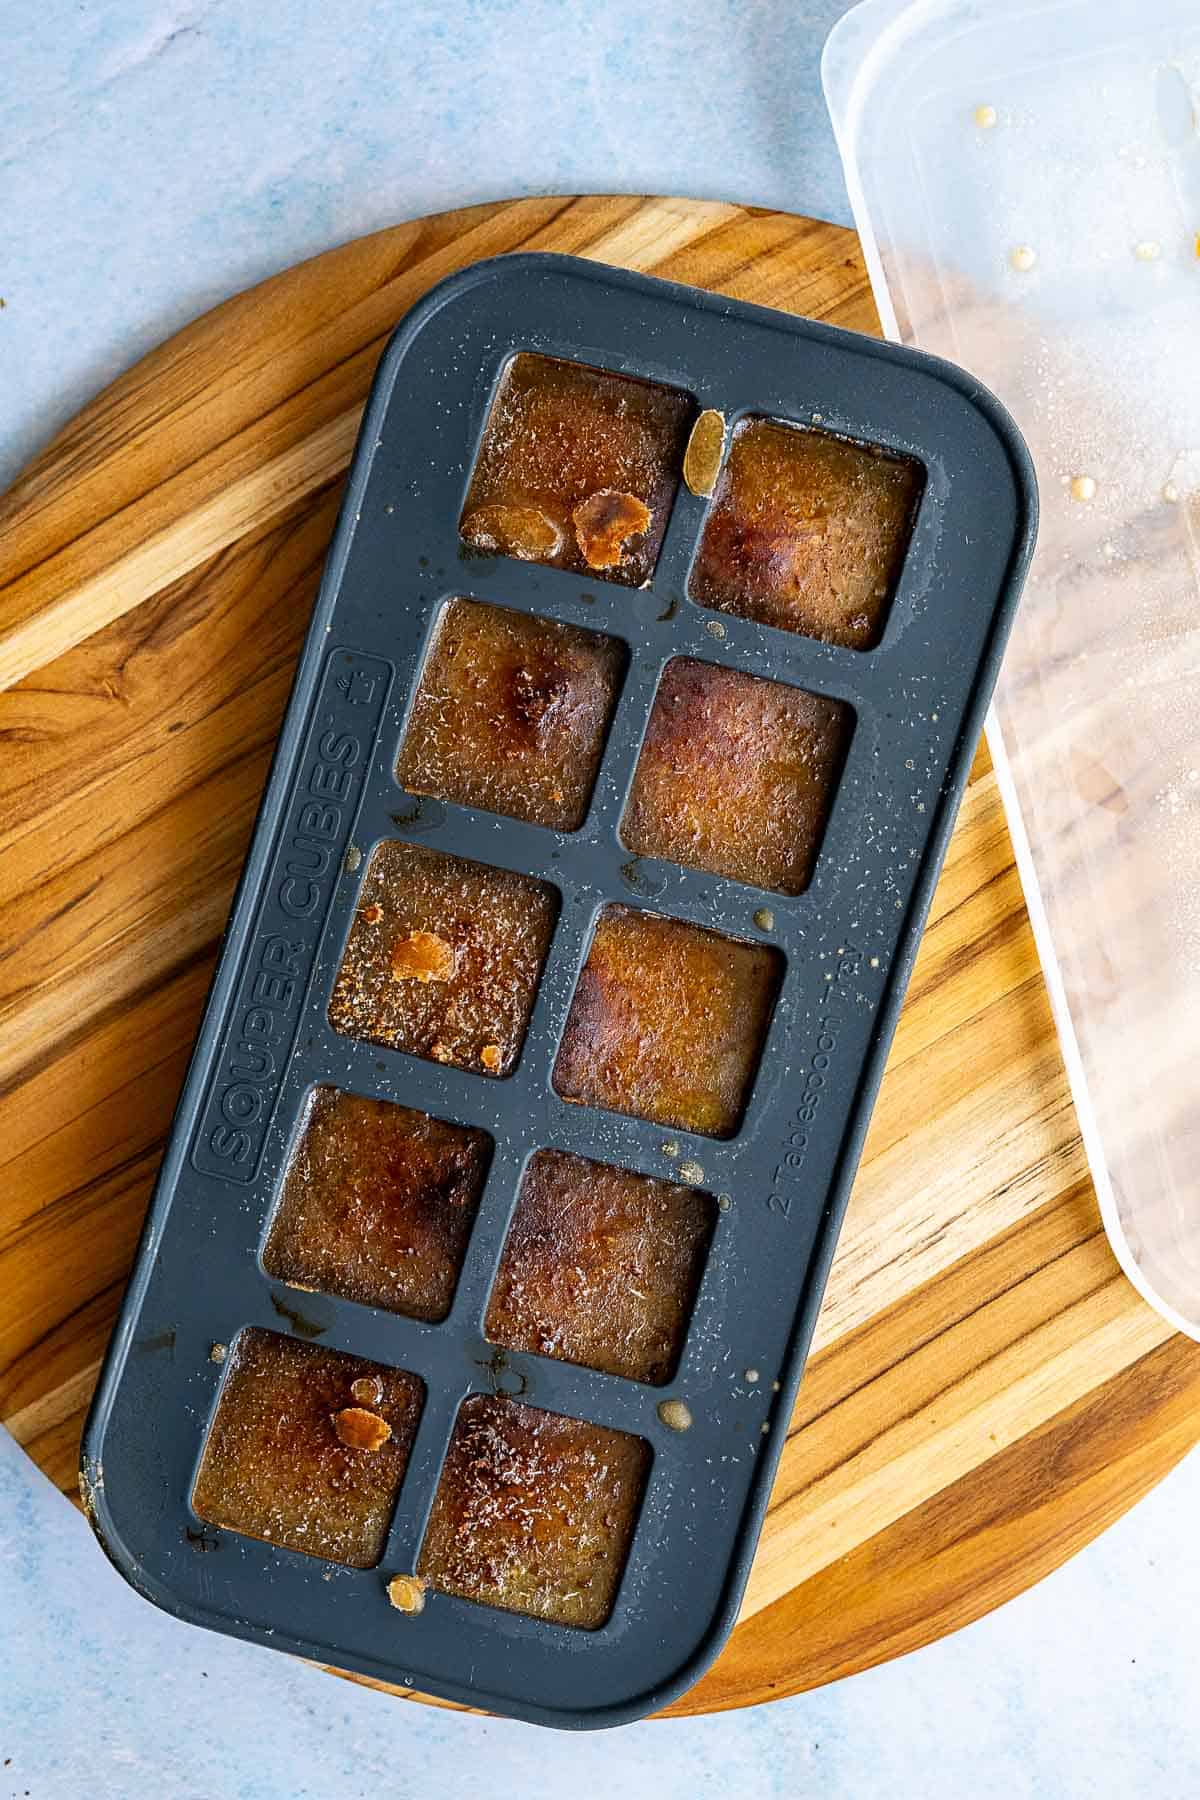
8: Store your cold brew in the fridge or portion it into cubes and freeze for longer storage.
Wanna save this recipe for later? 📬
💡tips & tricks for getting it right
🍽️ ideas for using cold brew
- in cocktails – you can use your cold brew and any coffee cocktail that calls for espresso measure for measure, as long as you brew your coffee at a stronger ratio like 1:4 or 1:6. Try out my vanilla espresso martini or my chocolate espresso martini with cold brew!
- in your favorite lattes – use your cold brew in place of espresso for making your favorite coffee drinks at home too! Add in 1-2 ounces of syrup and you’ve got an easy seasonal flavored latte, no espresso machine required!
ℹ️ tips for getting the perfect cold brew
- grind it good – unlike espresso, which requires a super fine grind cold brew coffee is best when the beans are coarsely ground. Grinding the beans too fine can lead your cold brew to become bitter, so err on the side of caution and use a chunkier grind.
- timing matters – make sure to set a reminder over an alarm, however you need to remember how long your coffee is brewing for. It doesn’t necessarily get stronger the longer it’s brewed instead it can get acidic or bitter, so make sure to pay attention to how long you’re steeping your beans. Don’t go over 48 hours for the best flavor.
- filter it out – if you’ve ever been the unfortunate recipient of gritty coffee grounds at the bottom of a brewed pot of coffee you know why filtering out the grinds matters. While this step can be time-consuming, double filtering your coffee helps to improve the flavor and texture of your drink. No one wants sludge coffee. 🥲
⚖️ scaling tips
- big or small – I’ve included ratios so you can make a small batch OR a large batch of concentrate. I like to make a very big batch of coffee and store it throughout the week. I also love to make a batch of concentrate (brewed at a stronger ratio), then freeze it into cubes to keep on hand for emergency caffeine fixes.
♻️ customize your cold brew
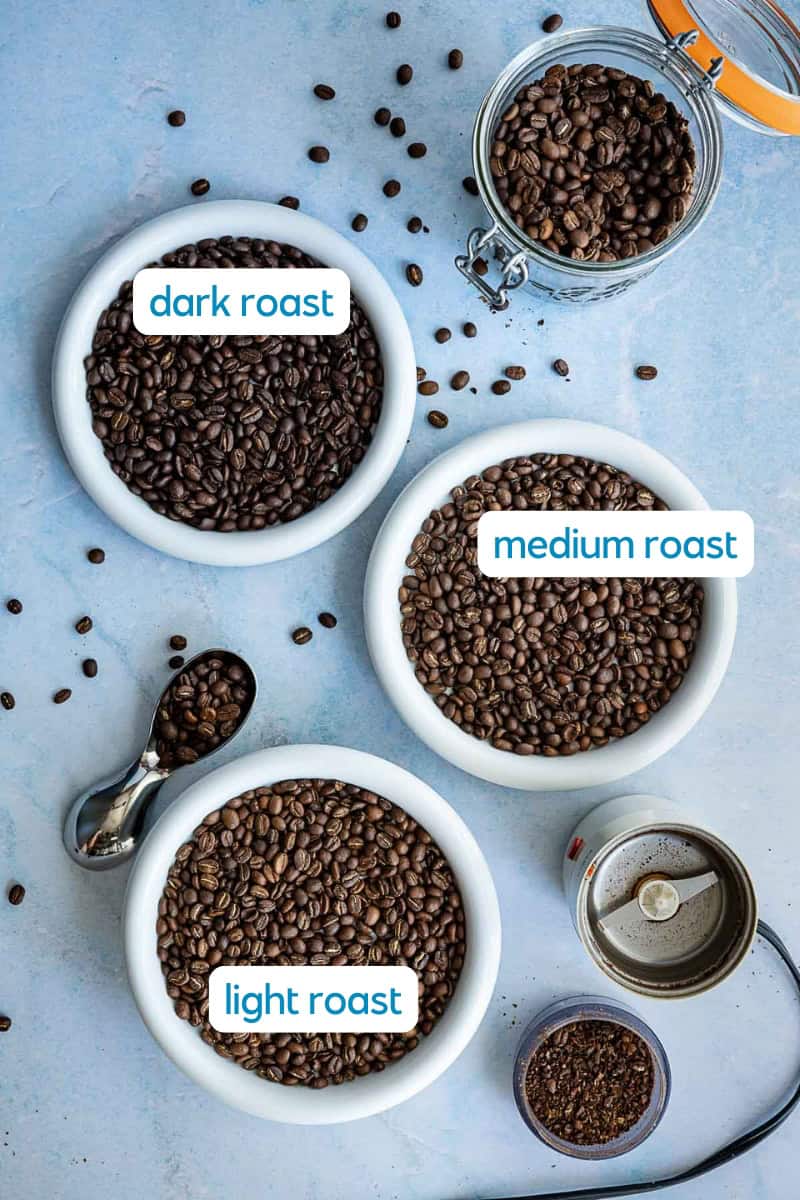
- swap the roast – you can make cold brew coffee from any sort of beans you like, whether it’s dark roast, medium roast, light roast, or even flavored coffee beans! The roasting level of the coffee impacts the flavor of the beans. Think of it like this: the lighter the roast, the more of the actual coffee flavor you will taste. The darker the roast, the more of the roasting process you will taste. A good coffee company knows how to tailor the roast of the coffee to the flavor of the beans.
- dark roast beans – dark roast beans are sometimes called espresso roast, because this is the type of bean most used in espresso shots. Lots of folks tend to associate dark roast beans with bitterness, but they actually are not more bitter or acidic, and that taste has more to do with brewing style and time. In cold brew, dark roast beans will give you a bolder, stronger, punchier coffee taste. Other tasting notes include chocolate, smoke, and earthiness.
- medium roast beans – I like to associate a medium roast coffee bean with a medium-cooked steak. It’s got a sear on it, but it is still pink in the middle. Medium roasted coffee won’t be as toasty and deep in color as dark roast, and you’ll get to taste a bit of the unique characteristics of the beans AND the roasting process.
- light roast beans – these are my favorite roast because they have greater variation of flavor due to a lighter roasting time. This means that you really get to taste more of what makes the coffee unique, from the growing region to the variety of coffee beans! The taste of this roast tends to be more citrusy, fruity, or even floral in flavor.
- flavor it – add in a pinch or two of your favorite spices and flavorings for custom flavored coffee! I love cardamom, cinnamon, or vanilla. Just be sure to start small with the flavor or add it in after the longer steeping time so it’s not too overpowering.
🧰 equipment needed & storage tips
🫙 how to store homemade cold brew
Store your coffee in an airtight bottle in the fridge throughout the week. Technically it can last up to two weeks, but I’ve never had it last that long in my house. 😂
I also like to freeze the coffee in 1 ounce portions to use as a cold brew concentrate.
Think of it like ounces of espresso. The night before I’ll pull out 2 to 4 cubes of concentrate and allow them to slowly melt in the fridge. By the morning, they’re ready to be diluted further in water and sipped throughout the day.

💬 q+a
What’s the best grind for making cold brew?
Coarsely grind your coffee beans for the best taste. Unlike with espresso, with benefits from a finer grind, cold brew is best (and less acidic) when it’s made from a coarser grind. It’s also easier to strain out, too!
What coffee beans are best for cold coffee?
The beans that you use depend on your own personal preferences, But I found that I like lighter to medium roasted coffee beans for making cold brew. Dark espresso style roasted beans can be a little too bold for cold brew, especially when using a stronger ratio such as a concentrate. Medium and light roasts just tend to be smoother in taste, in my experience!
If you make this recipe, please leave a review in the comments and a star rating!
⭐️⭐️⭐️⭐️⭐️
I read every single comment! I also love connecting on social media, so snap a pic and hashtag it #myrecipeforfun and tag me on Instagram, TikTok, or pin this recipe on Pinterest!

How to Make Cold Brew: Cold Brew Coffee Concentrate
Wanna save this recipe for later? 📬
Equipment
- 1 brewing container
- 1 mesh sieve and optional additional coffee filter
Ingredients
Standard 1:10 ratio brew (see notes for other stronger ratios)
- 120 g coffee coarsely ground
- 1200 g water about 42 ounces, 5 1/4 cups
- pinch kosher salt optional
Instructions
Use the ratio chart in the recipe notes to get the perfect brew!
Then, follow the instructions below using the weights of coffee grounds and water.
- Coarsely grind coffee. The grind should be much coarser than what you'd use for drip coffee, sort of like raw sugar crystals vs. granulated sugar.
- Weigh grounds. Weigh your ground coffee and place in your brewing container.
- Combine grounds + a little water. Add just enough cold filtered water to cover the grounds.
- Stir to combine + add the rest of the water. Stir gently to ensure all grounds are wet and no dry pockets remain. Add the remaining water to your mix.
- Add salt. Add a pinch of kosher salt, if using. For larger batches, use up to 1/4 tsp of salt.
- Steep. Cover container and let steep for 12-48 hours either at room temperature or in the refrigerator.
- Strain. Strain your coffee through a non-reactive mesh sieve to separate it from the grounds.
- Double filter if desired. Line a fine mesh strainer with cheesecloth or a coffee filter and position over a clean container. Slowly pour the cold brew through the strainer to filter out all grounds. You may need to do this in batches.
- Store. Transfer strained cold brew to a clean, airtight container and refrigerate for up to 2 weeks.
Notes
Cold Brew Ratio Cheat Sheet
Use this chart to get the PERFECT ratio of coffee beans to water, every time, depending on the strength of the cold brew you prefer! 1:10 Ratio (Drinkable As Is)| 120 | g | coffee | coarsely ground |
| 1200 | g | water | about 42 ounces, 5 1/4 cups |
| pinch | kosher salt | optional |
| 120 | g | coffee | coarsely ground |
| 960 | g | water | about 32 ounces, 4 cups |
| pinch | kosher salt |
| 340 | g | coffee | coarsely ground, 12 ounce bag |
| 2040 | g | water | about 72 ounces, 9 cups water |
| 1/4 | tsp | kosher salt | optional |
| 340 | g | coffee | coarsely ground, 12 ounce bag |
| 1360 | g | water | about 48 ounces, 6 cups |
| 1/4 | tsp | kosher salt | optional |


I make this every Sunday, then I have coffee all week long! It’s sooo smooth too, I love it