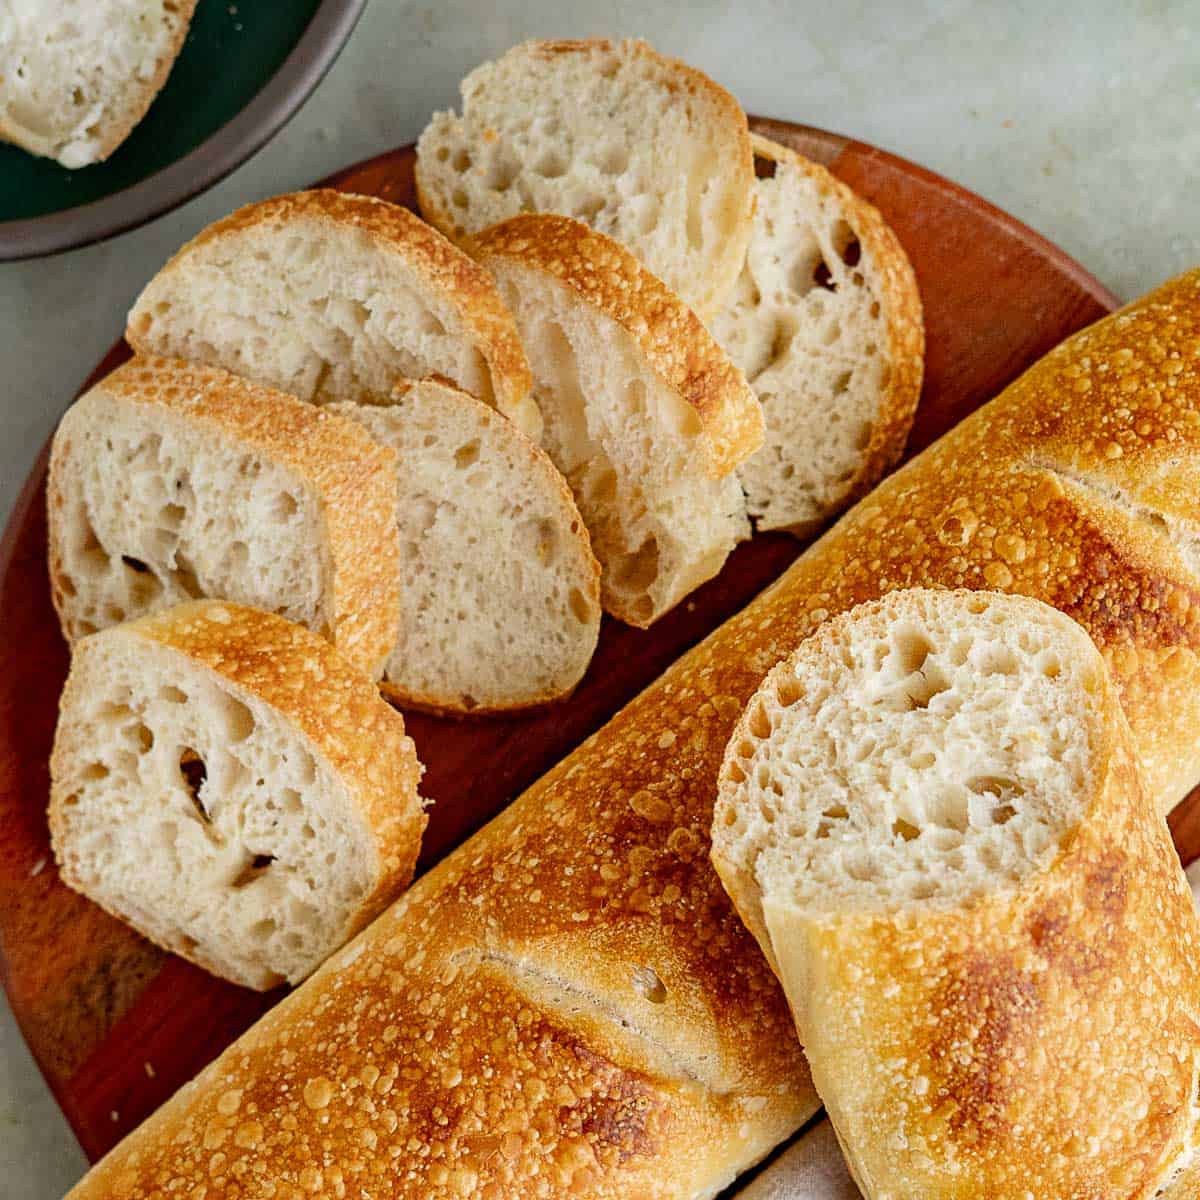
These rustic Italian sourdough baguettes are a 4-ingredient wonder! They rise purely from the help of a super-active starter, meaning there is no additional yeast added. The flavor is incredible, and they’re so versatile you’ll definitely be making these on repeat.
I’ve been baking bread all my life, but when I took a specialty breads course in culinary school, my passion for bread rose to a whole new level (bread pun intended 🥖). While my grandma loved cooking and baking, my dad was actually the big bread baker in our family! He would always turn out a few loaves for every holiday, and he also had a sourdough starter BEFORE it was cool. So naturally, as I keep up the baking tradition, I wanted to create a recipe that was a nod to both my father and my grandmother. That’s how this recipe came to be!
This simple no-knead sourdough loaf is similar to the rustic baguettes Italian families make (or buy!) each week to feed their families without breaking the bank. It’s so simple to mix together because you can do everything in the same bowl, from initial mixing to overnight rising. And since there’s a longer rise time, there’s no difficult kneading, well…needed! 😛 I love using this bread for crostini crackers, golden crispy homemade Italian breadcrumbs, and garlic bread, to name a few! It’s also wonderful just for dipping in seasoned oil or slathering with a flavorful spread like pesto compound butter!
why this sourdough Italian baguette recipe works:
🥖 traditional technique. Stirato means “to stretch” in Italian, and this bread is made using a traditional stretch and fold technique instead of kneading by hand. The loaves are also formed by gently pulling and stretching the dough!
🍽️ everyday staple. This bread is the perfect accompaniment to any meal, whether it’s serving as the base of crostino recipes or topped with garlic and parmesan and served alongside your favorite pasta.
🤌 simple + no fuss. While I wouldn’t say it’s exactly easy, the process to make this bread is very simple! It’s the perfect weekend baking project that you can do between other chores, or while taking it easy!
🛒 ingredients

See the recipe card for the exact quantities.
🍳 how to make Italian sourdough bread
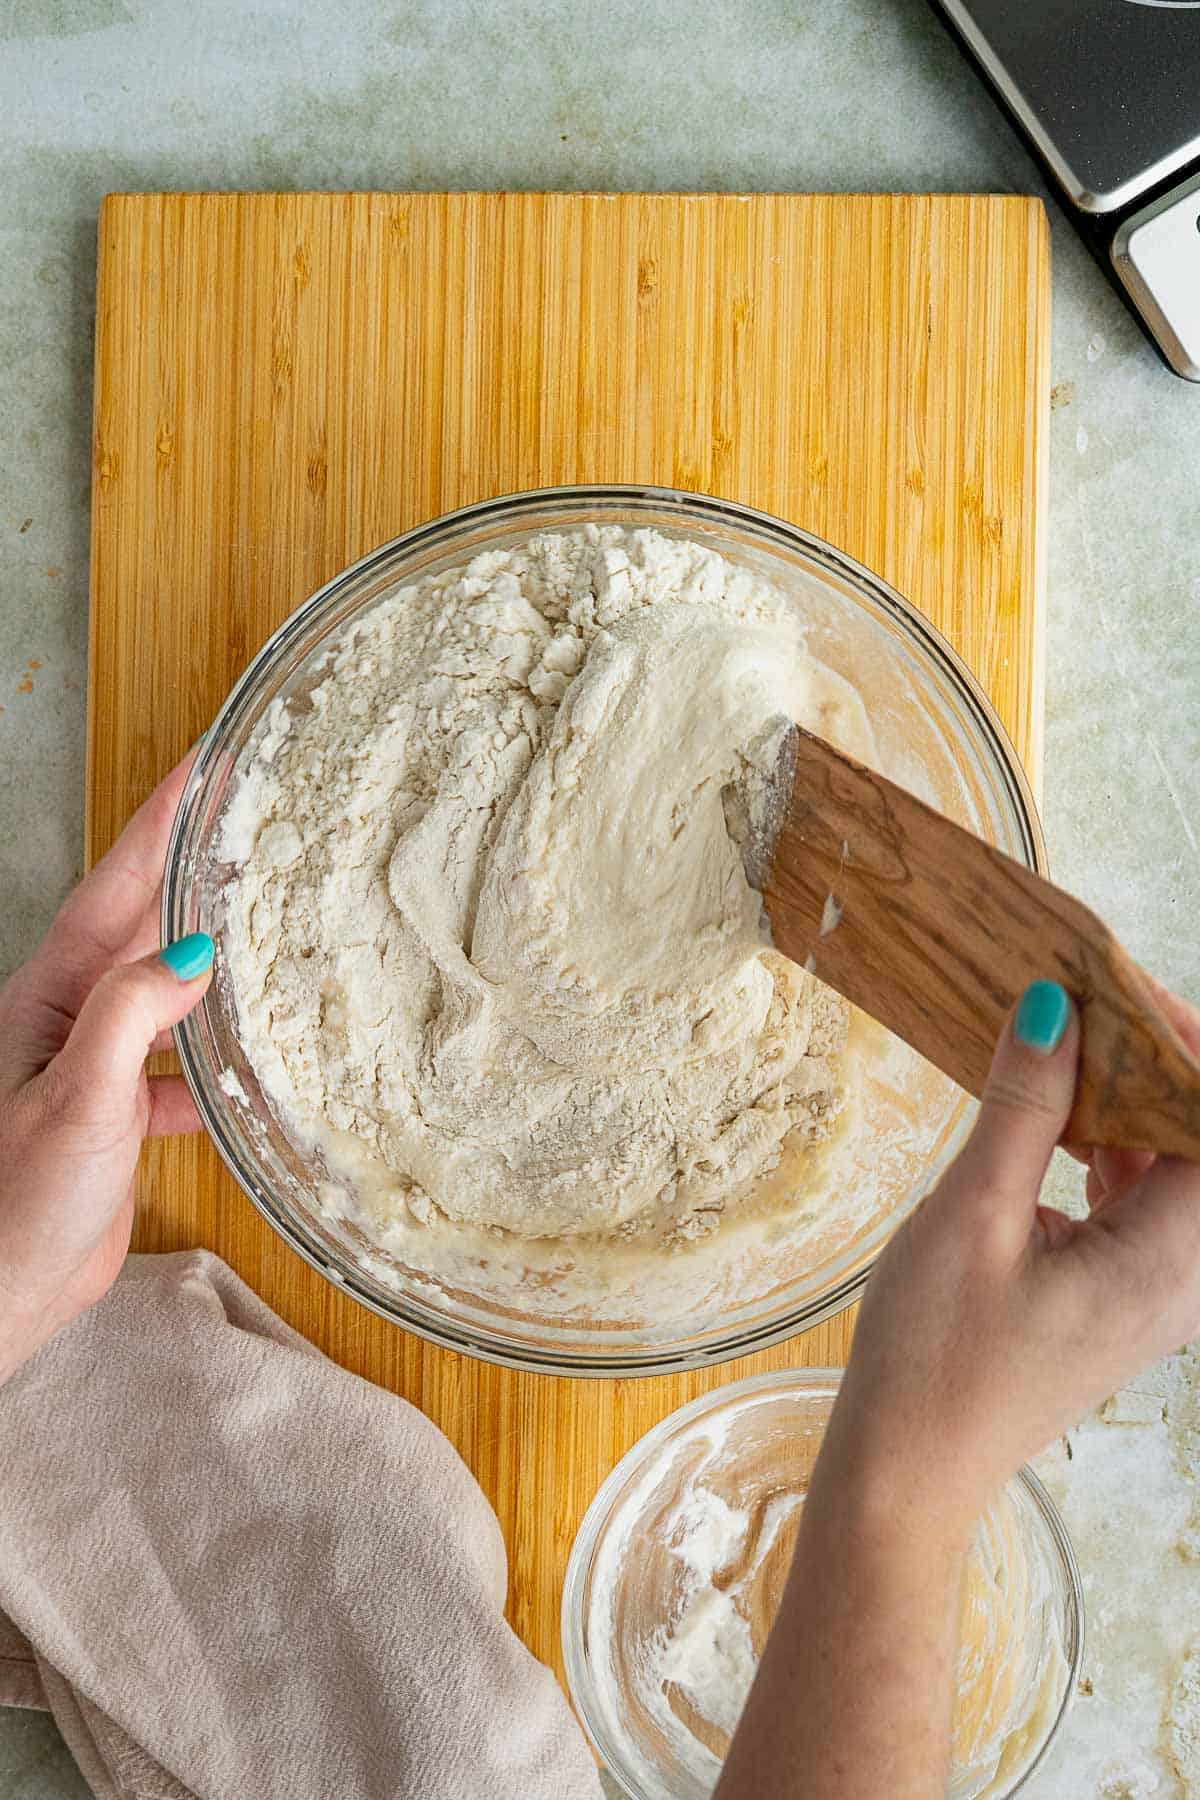
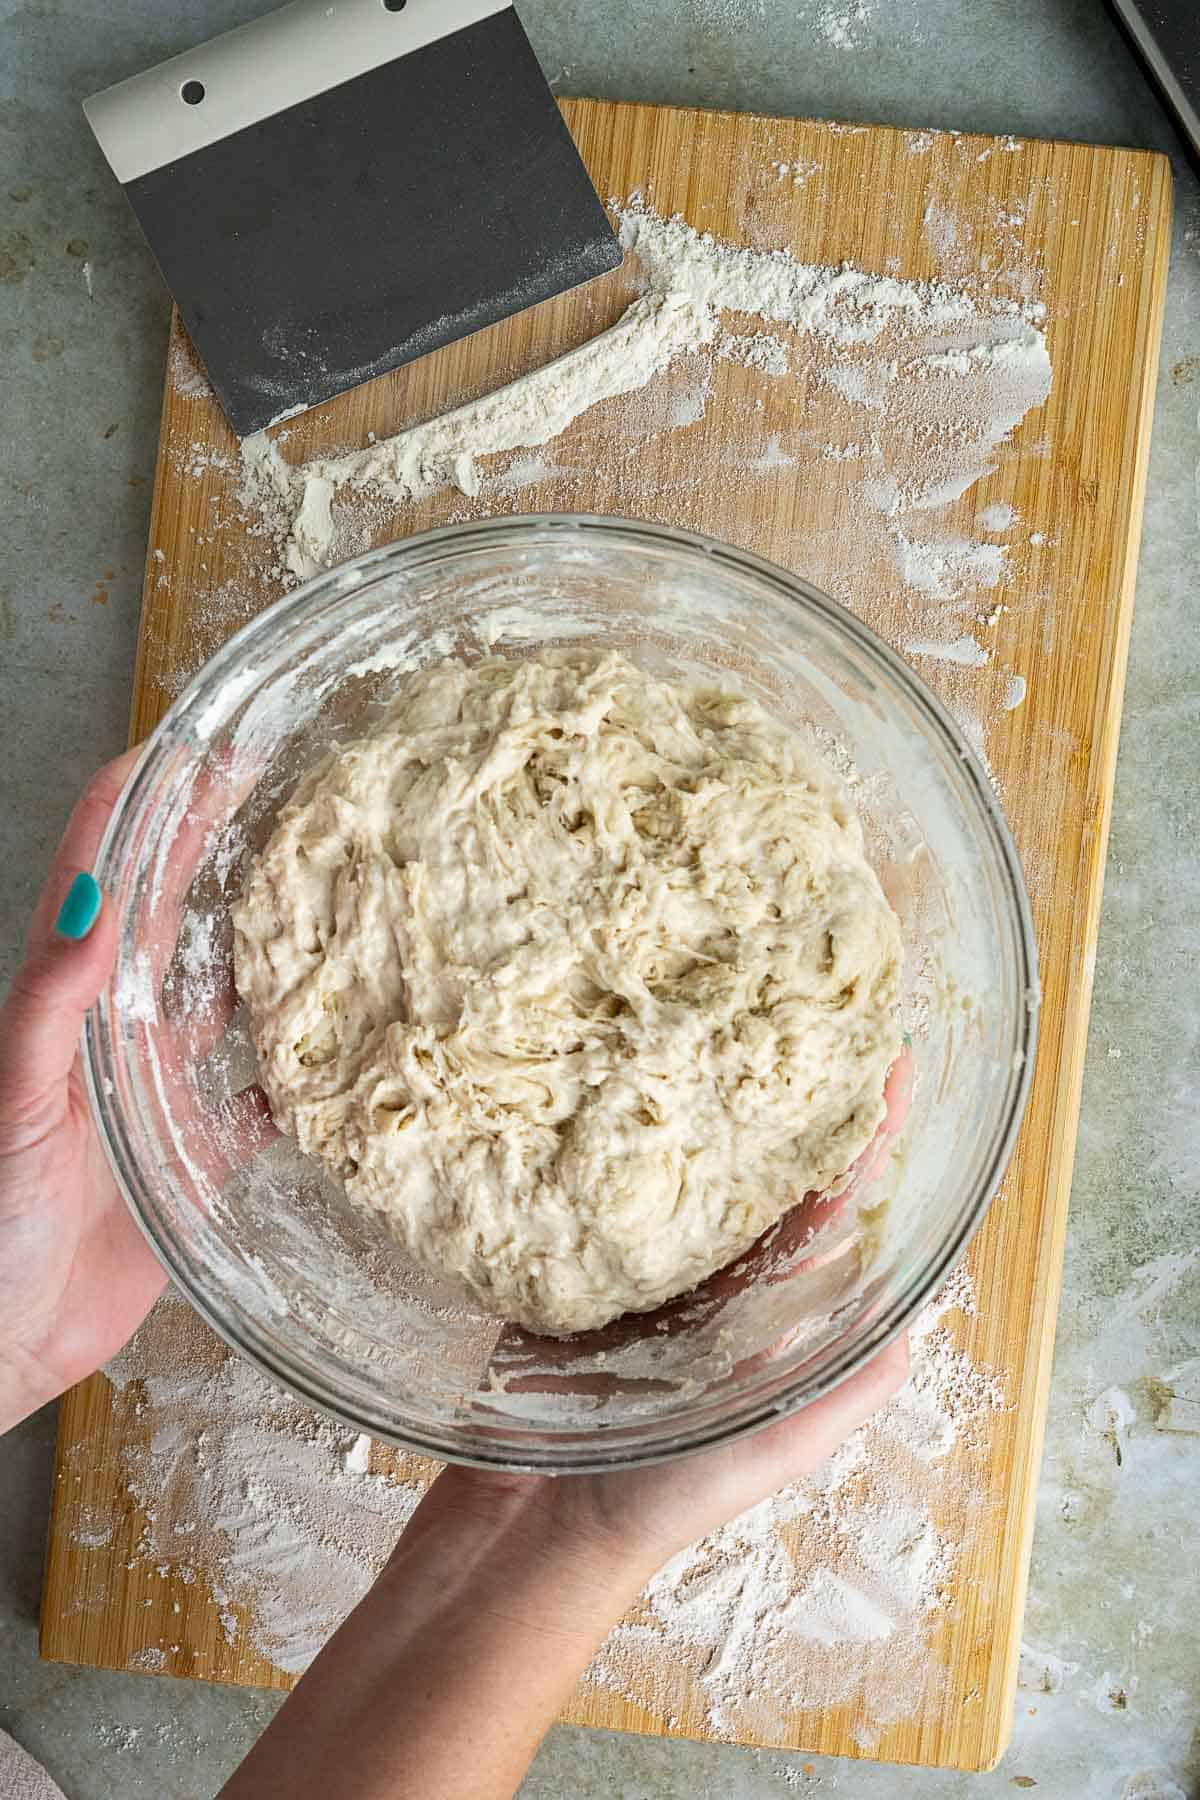
1: Combine all ingredients in a bowl and mix until a shaggy dough forms.
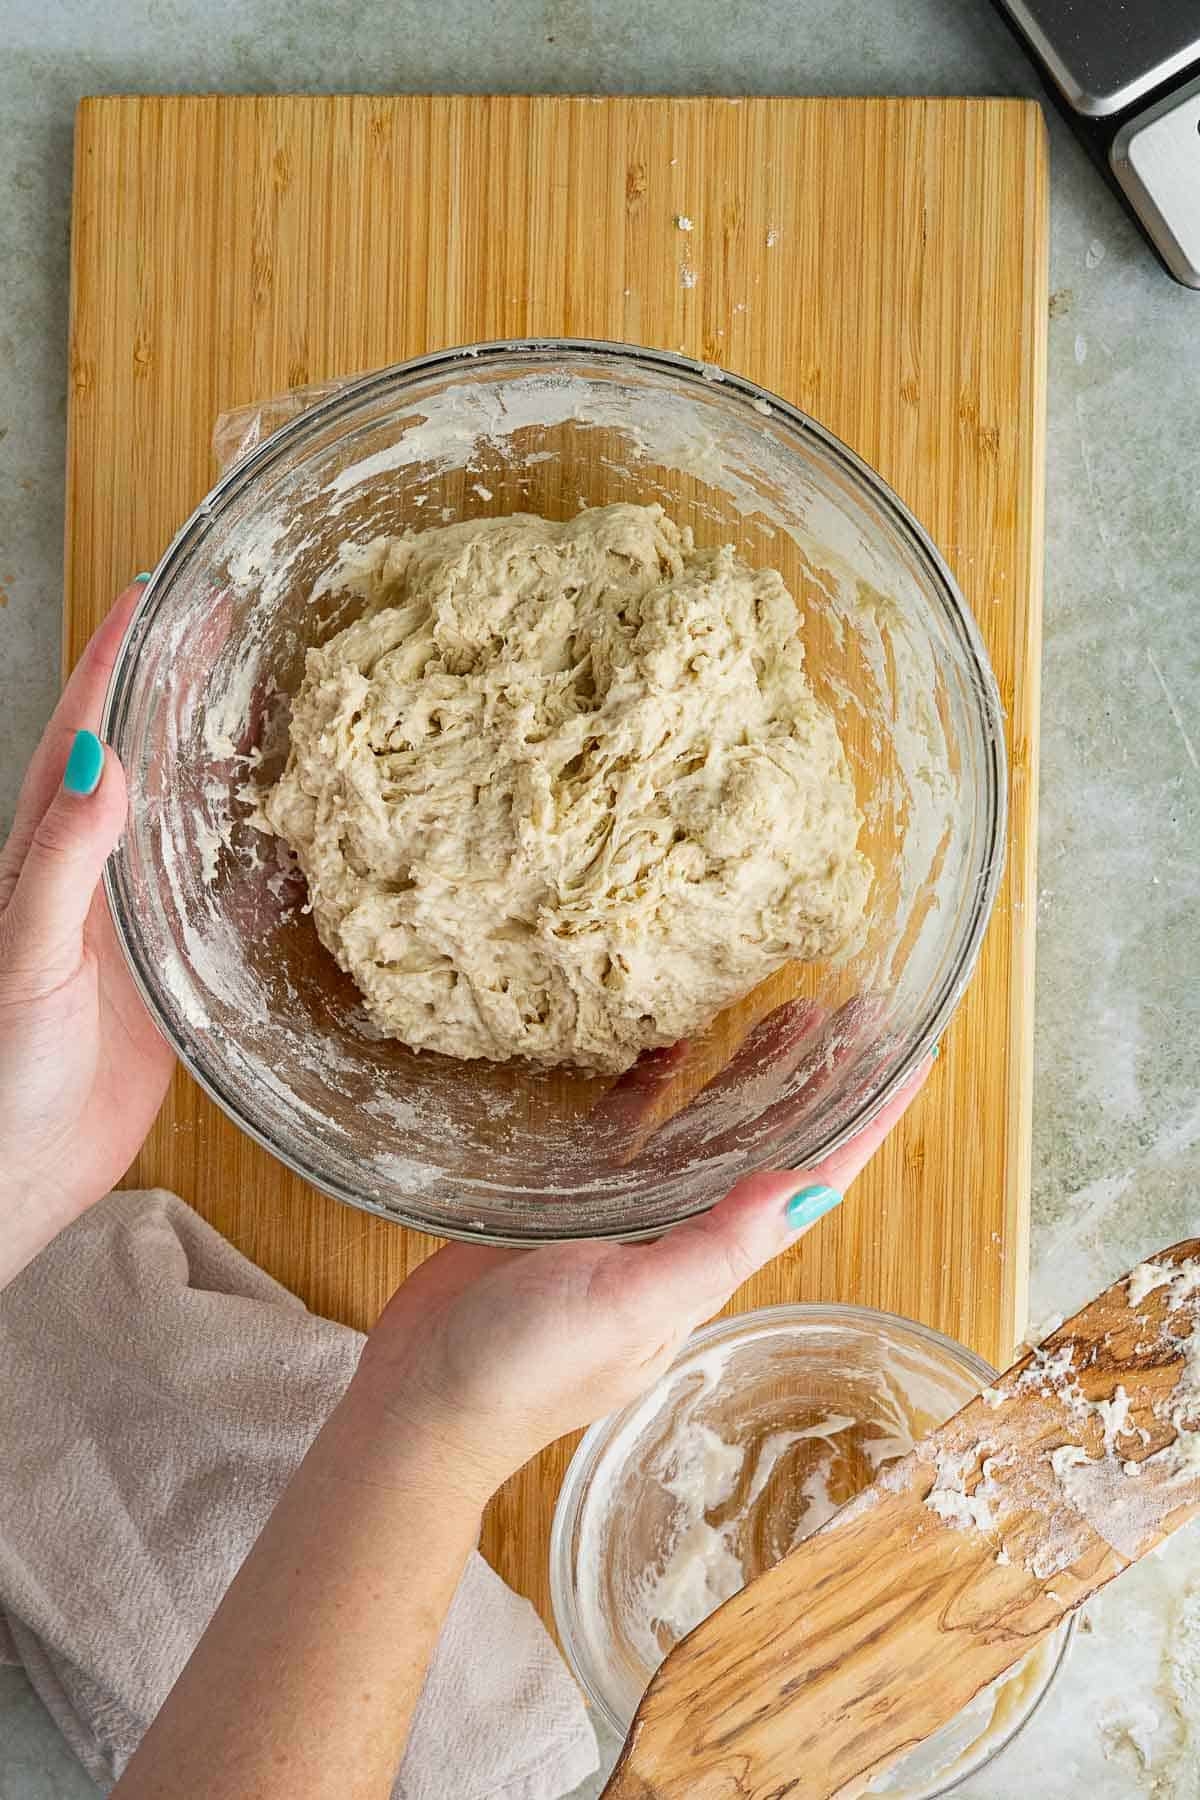
2: Cover and let the dough rest for 60 minutes.
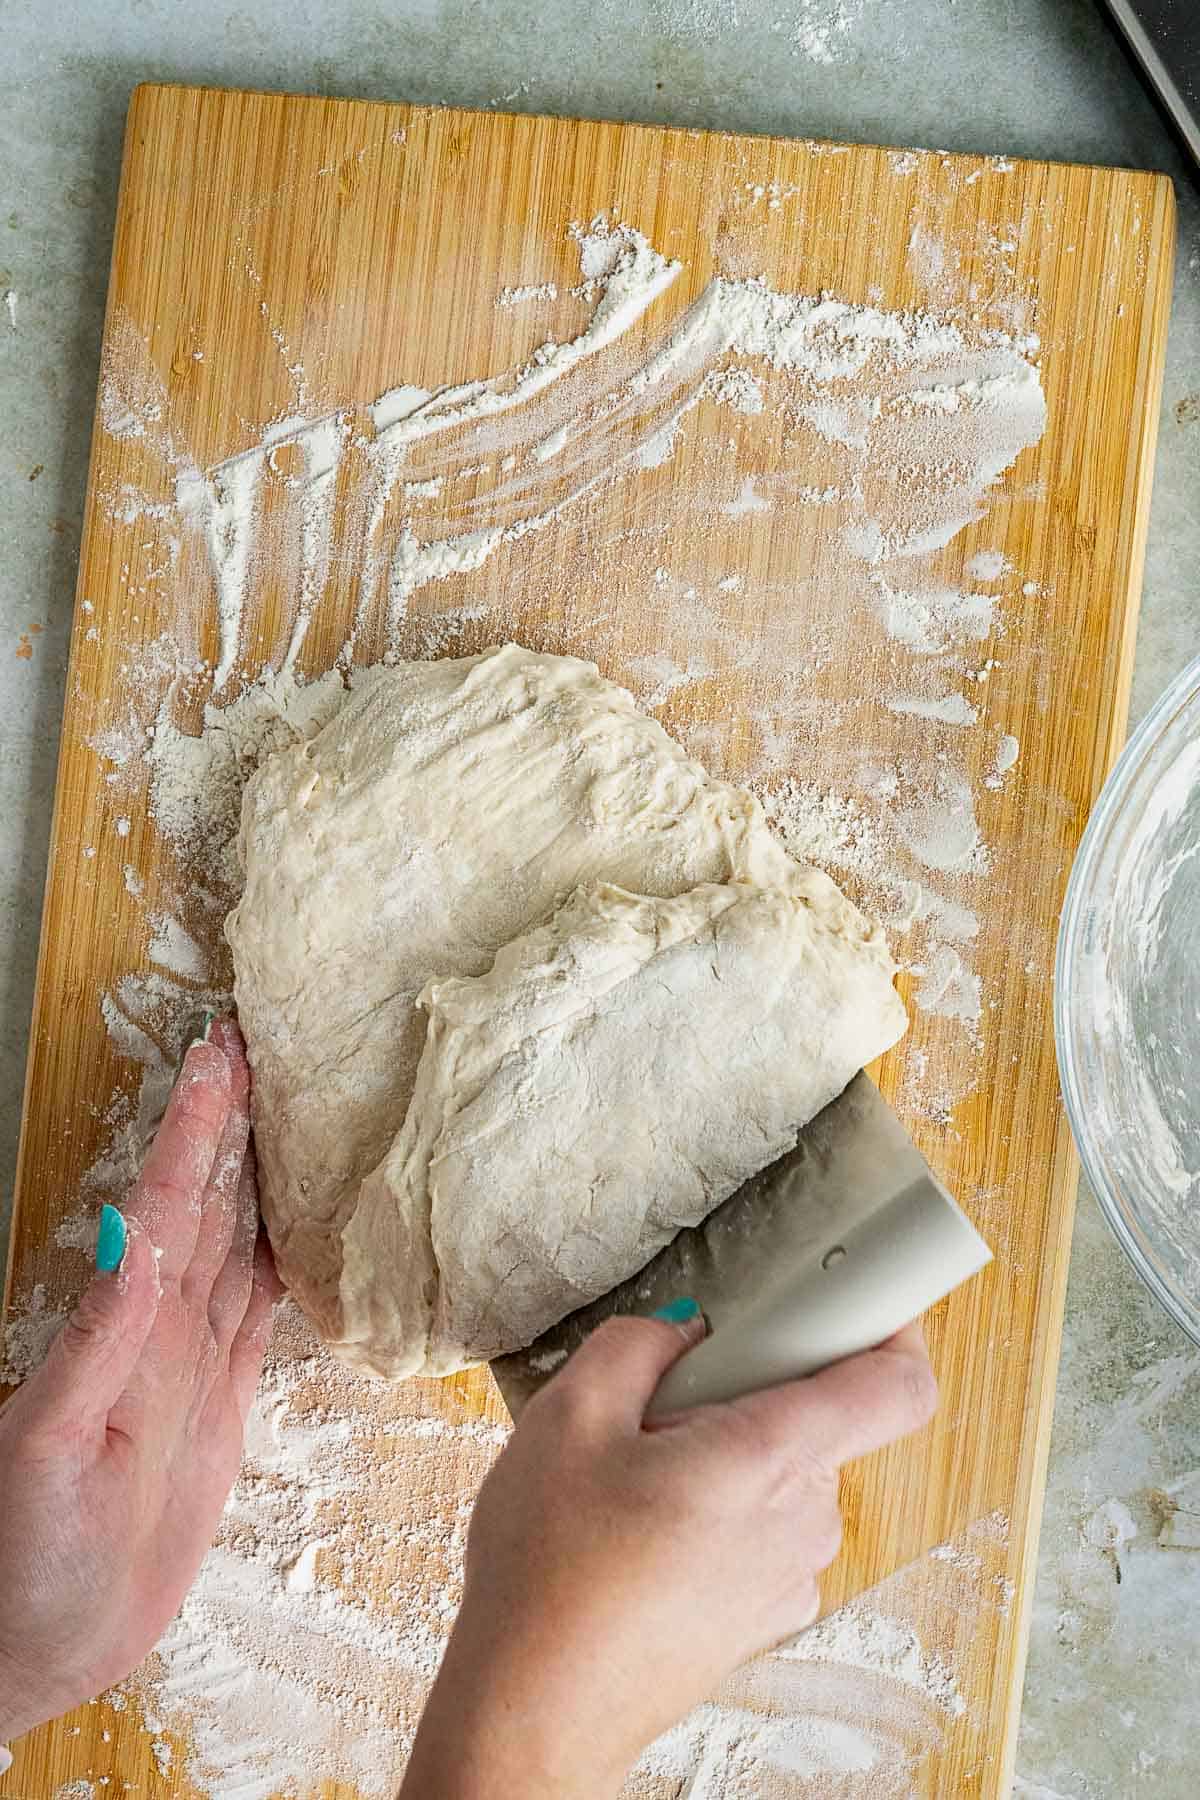
3: Turn the dough out onto a lightly floured surface, then perform a series of stretch and folds. This helps the gluten develop without kneading!
4: Set the dough aside to rest again for another 60 minutes.
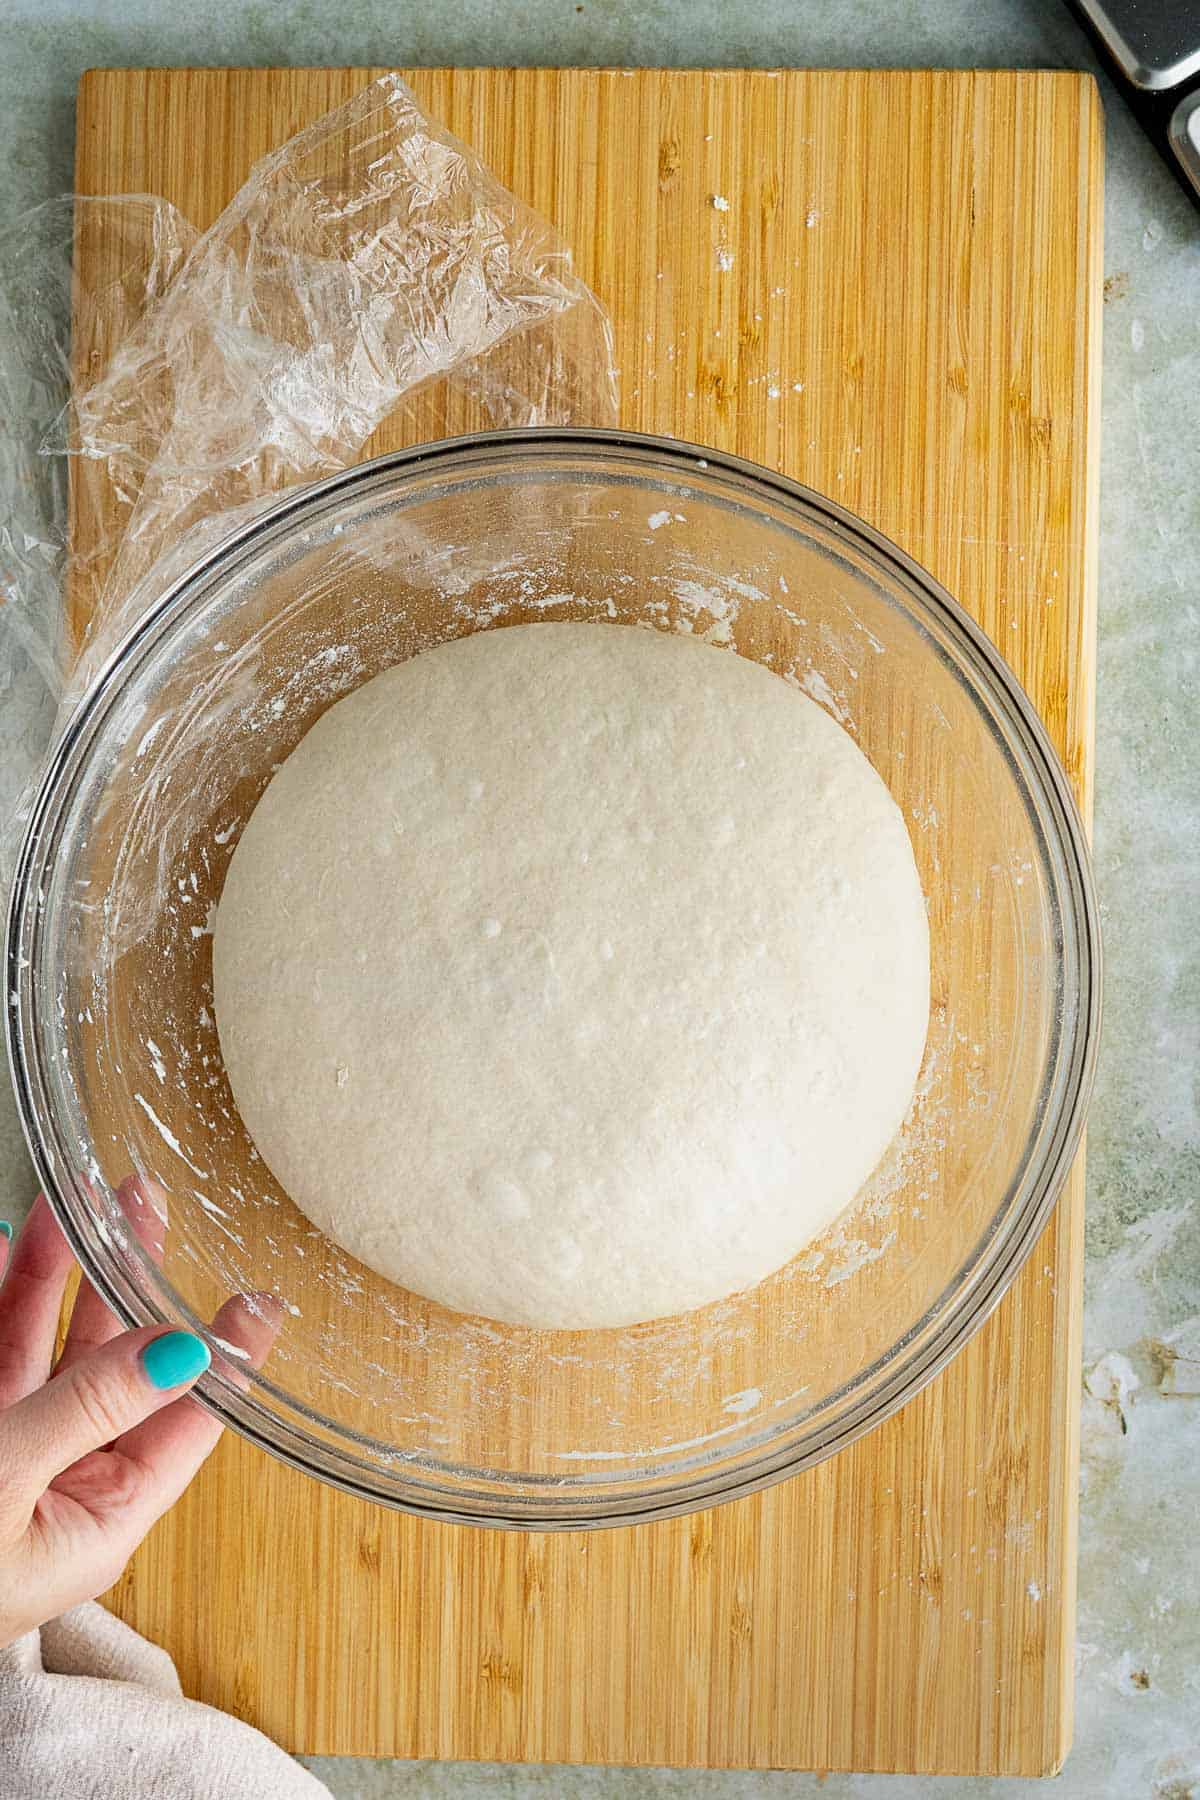
5: Perform another series of stretch and folds, then place the dough in a covered bowl in the fridge for 12-48 hours to help the sourdough flavor and gluten to develop.
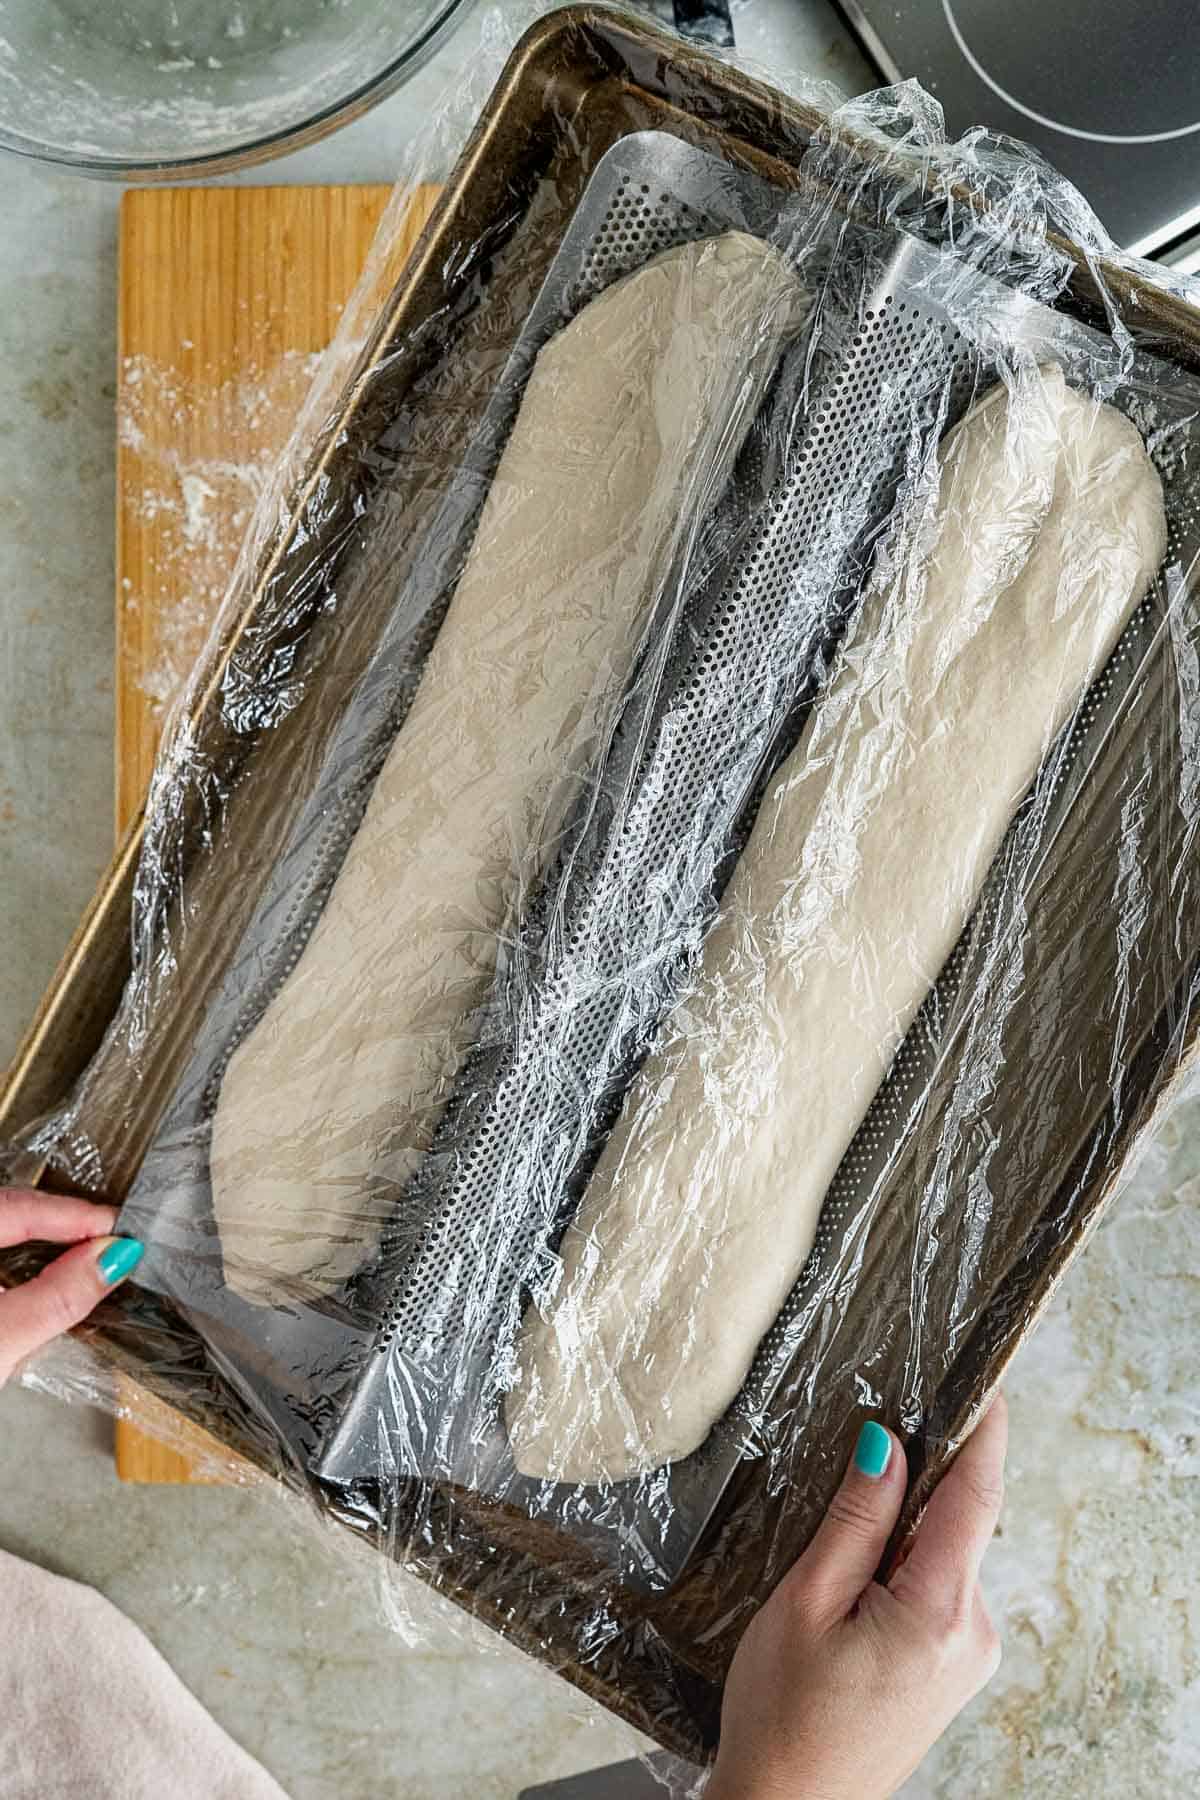
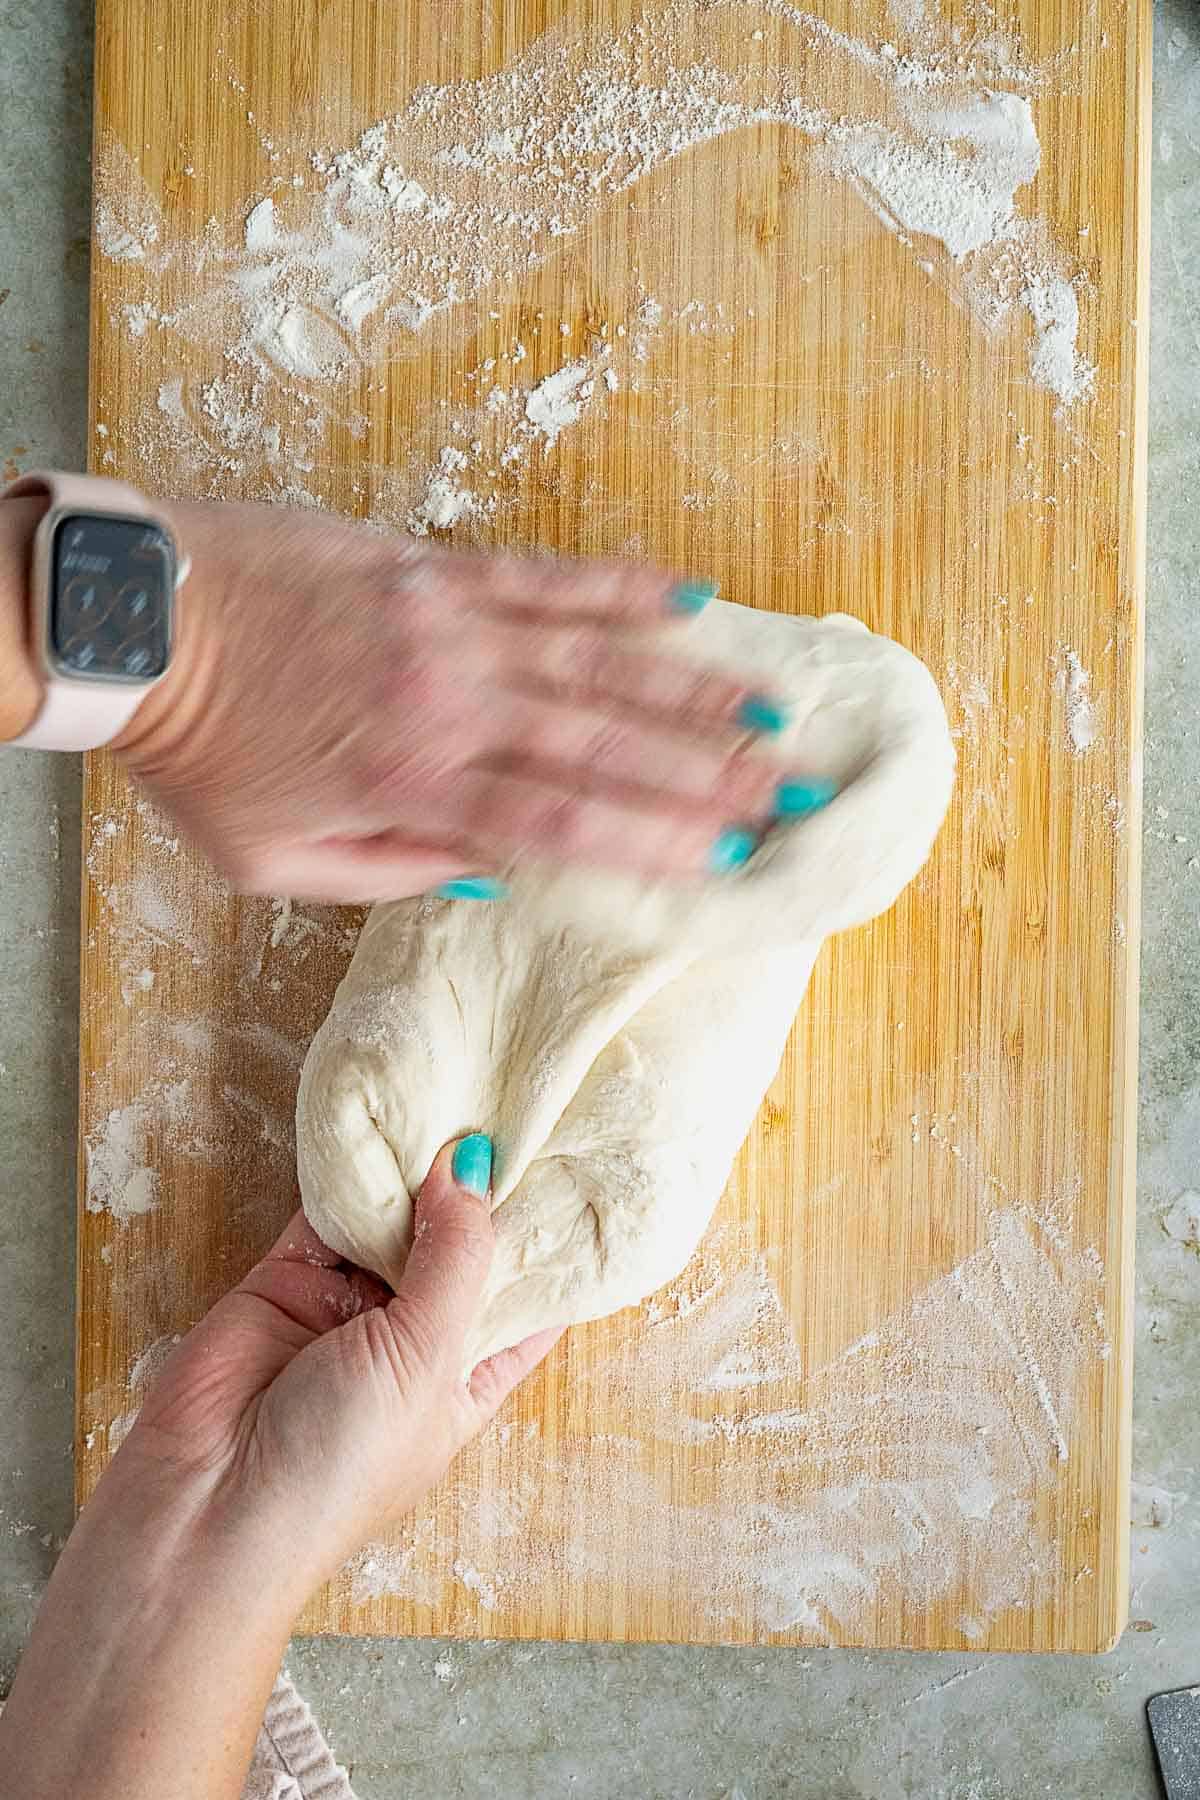
6: Remove dough from fridge and divide into two equal portions, then shape into a baguette by gently stretching and pulling. Allow loaves to rise again until nearly doubled in size.
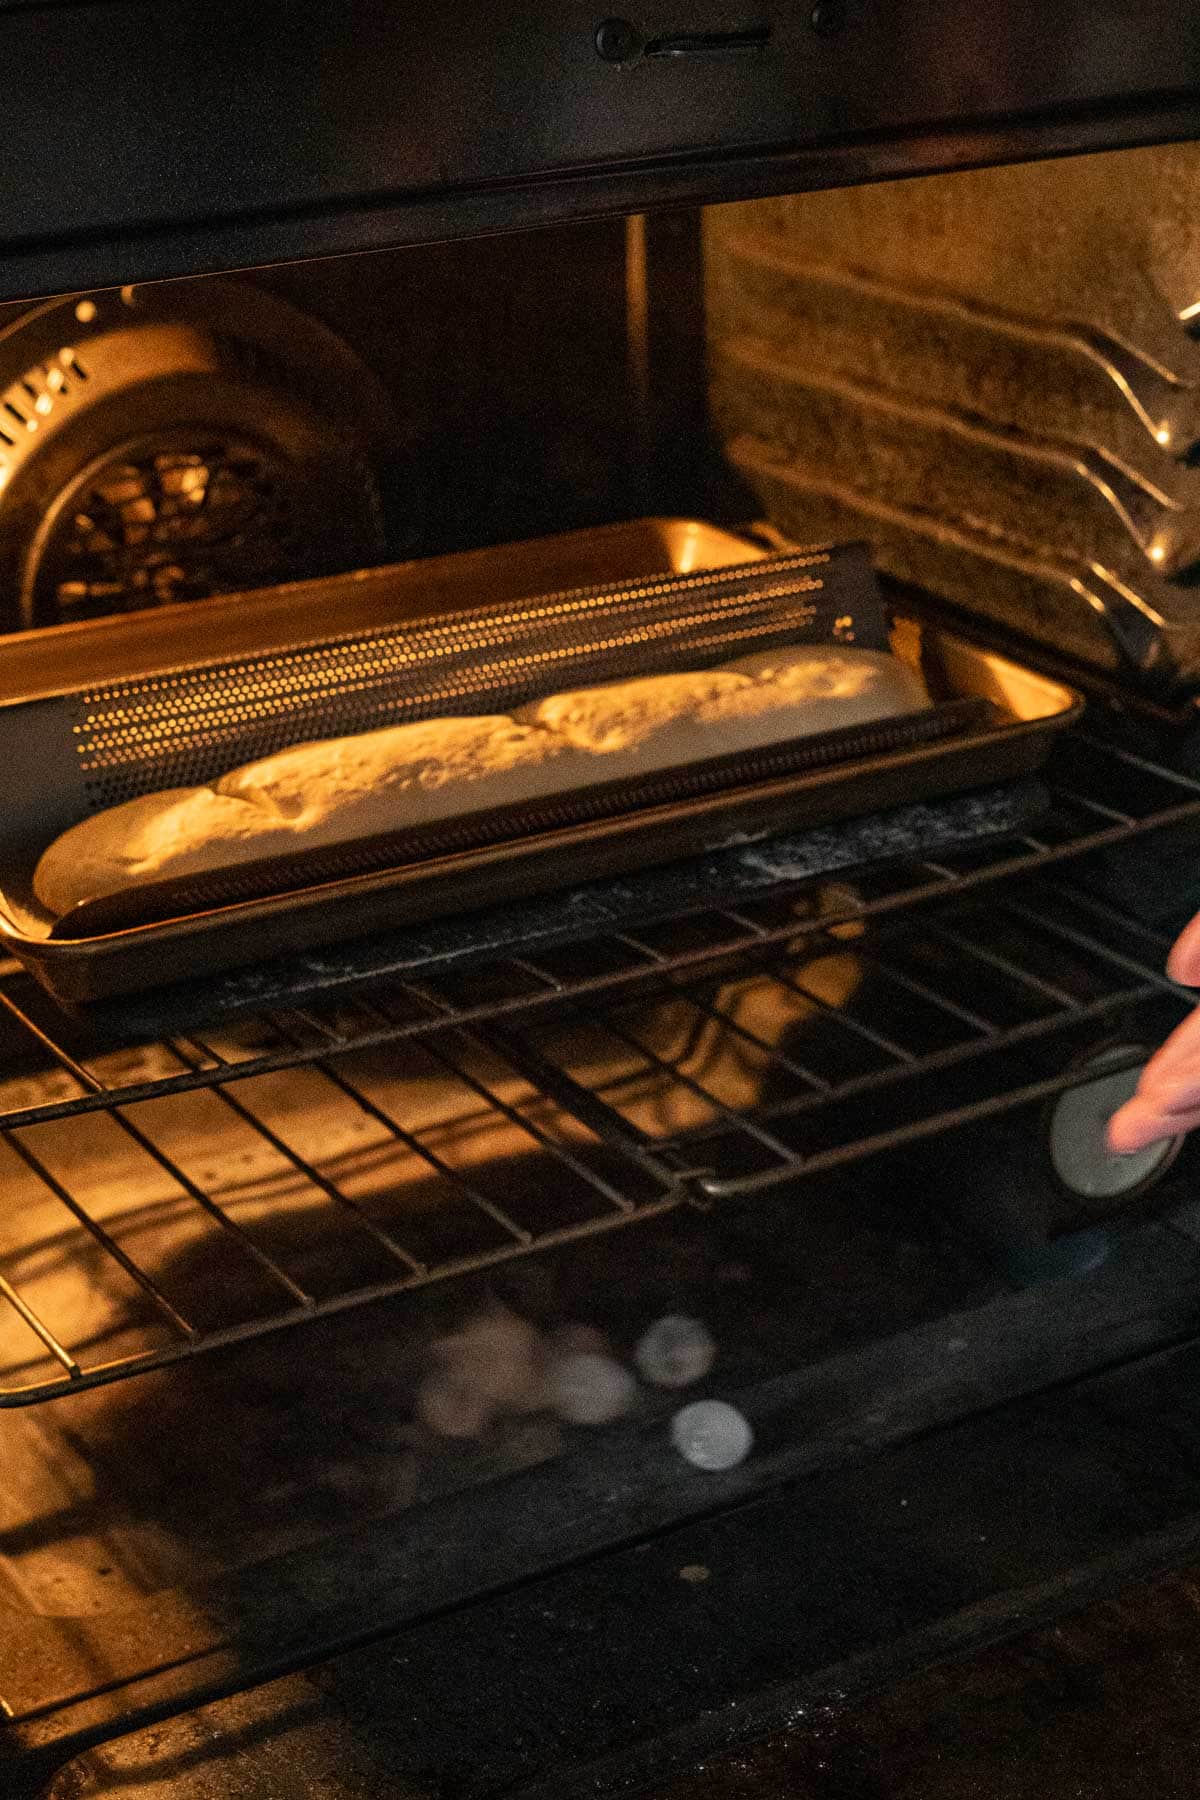
7: Score loaves just before baking. Place the pan in the oven, and toss a handful of ice cubes or a big chunk of ice in the oven to create steam to help the bread rise. Bake for 20-25 minutes until deep golden brown.
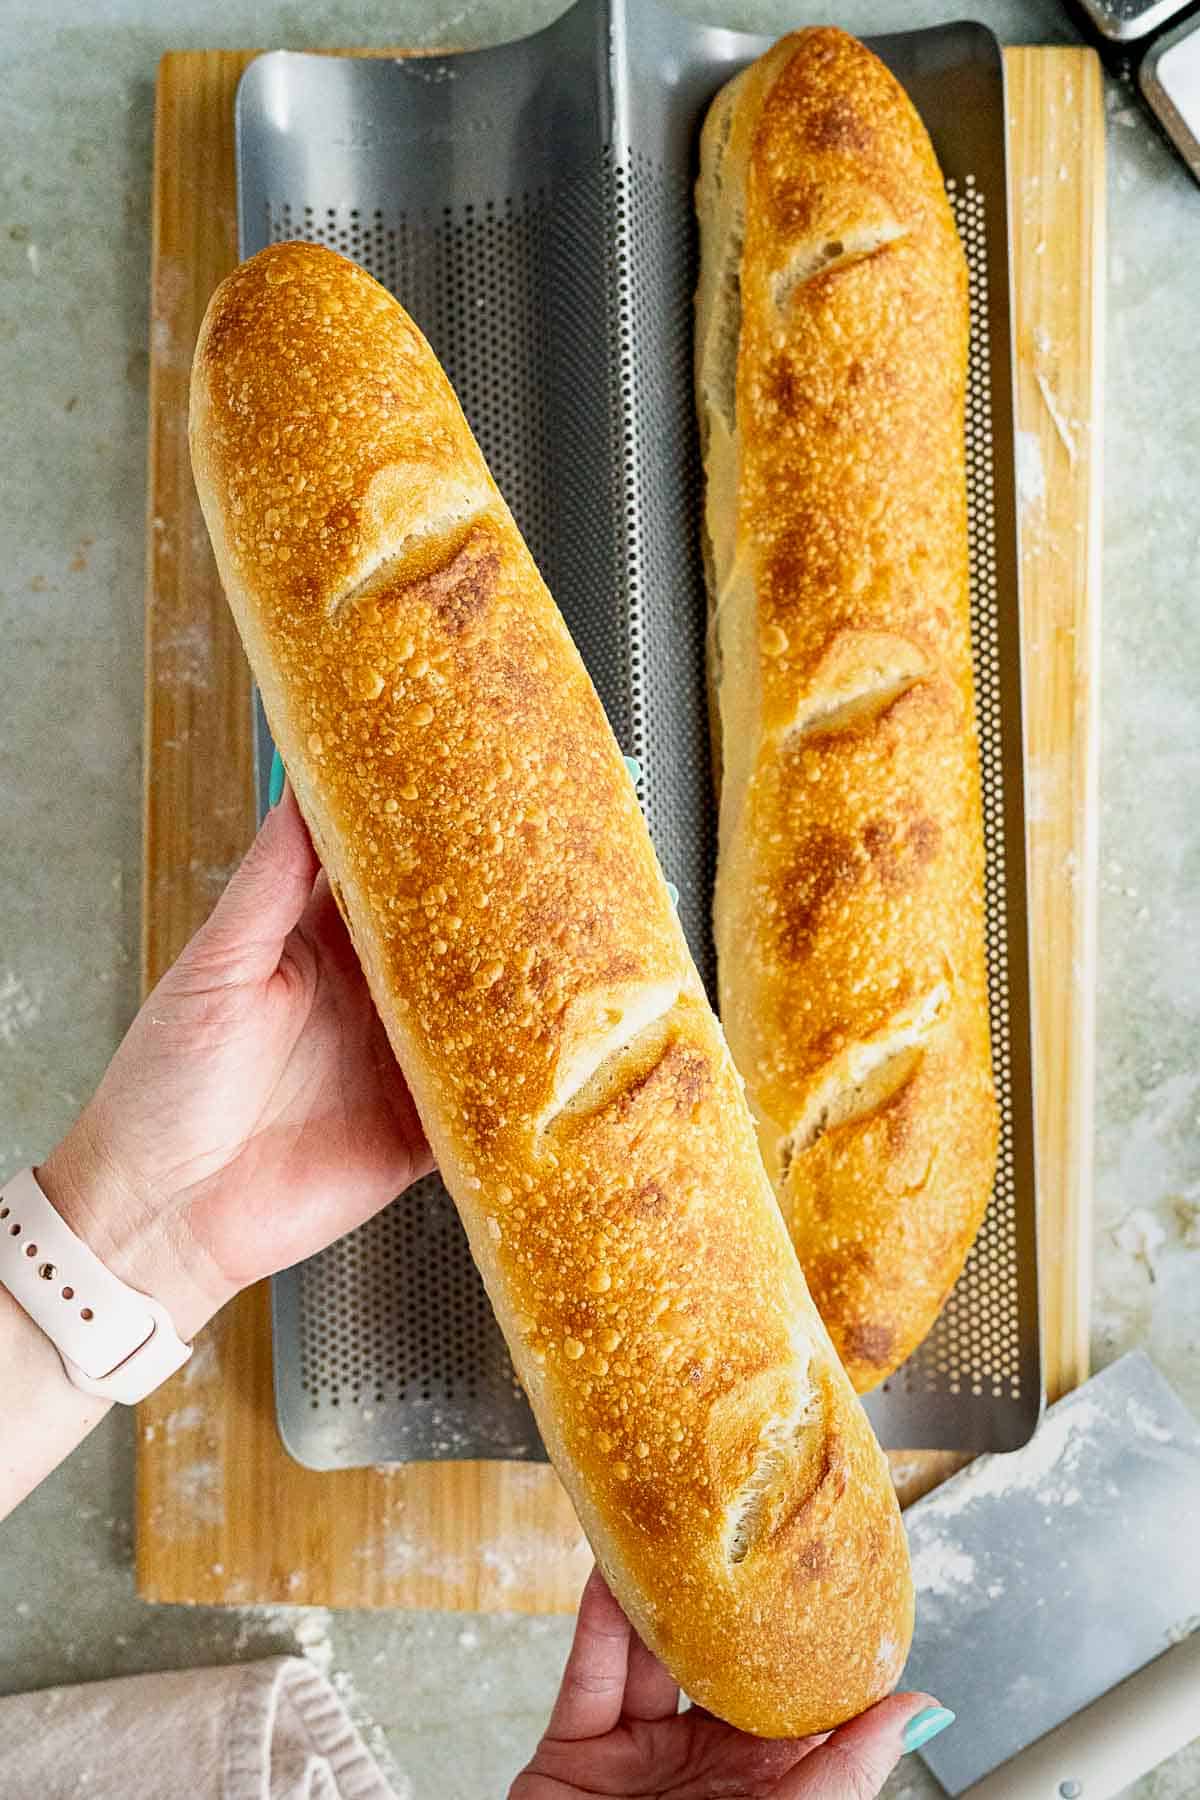
8: Allow the loaves to cool completely before slicing, serving, and storing.
💡tips & tricks for getting it right
ℹ️ troubleshooting tips
- sticky dough – while the dough will be a little bit softer than other studier breads, it shouldn’t be overly sticky. If the dough is too sticky to handle, use wet hands or additional flour when shaping.
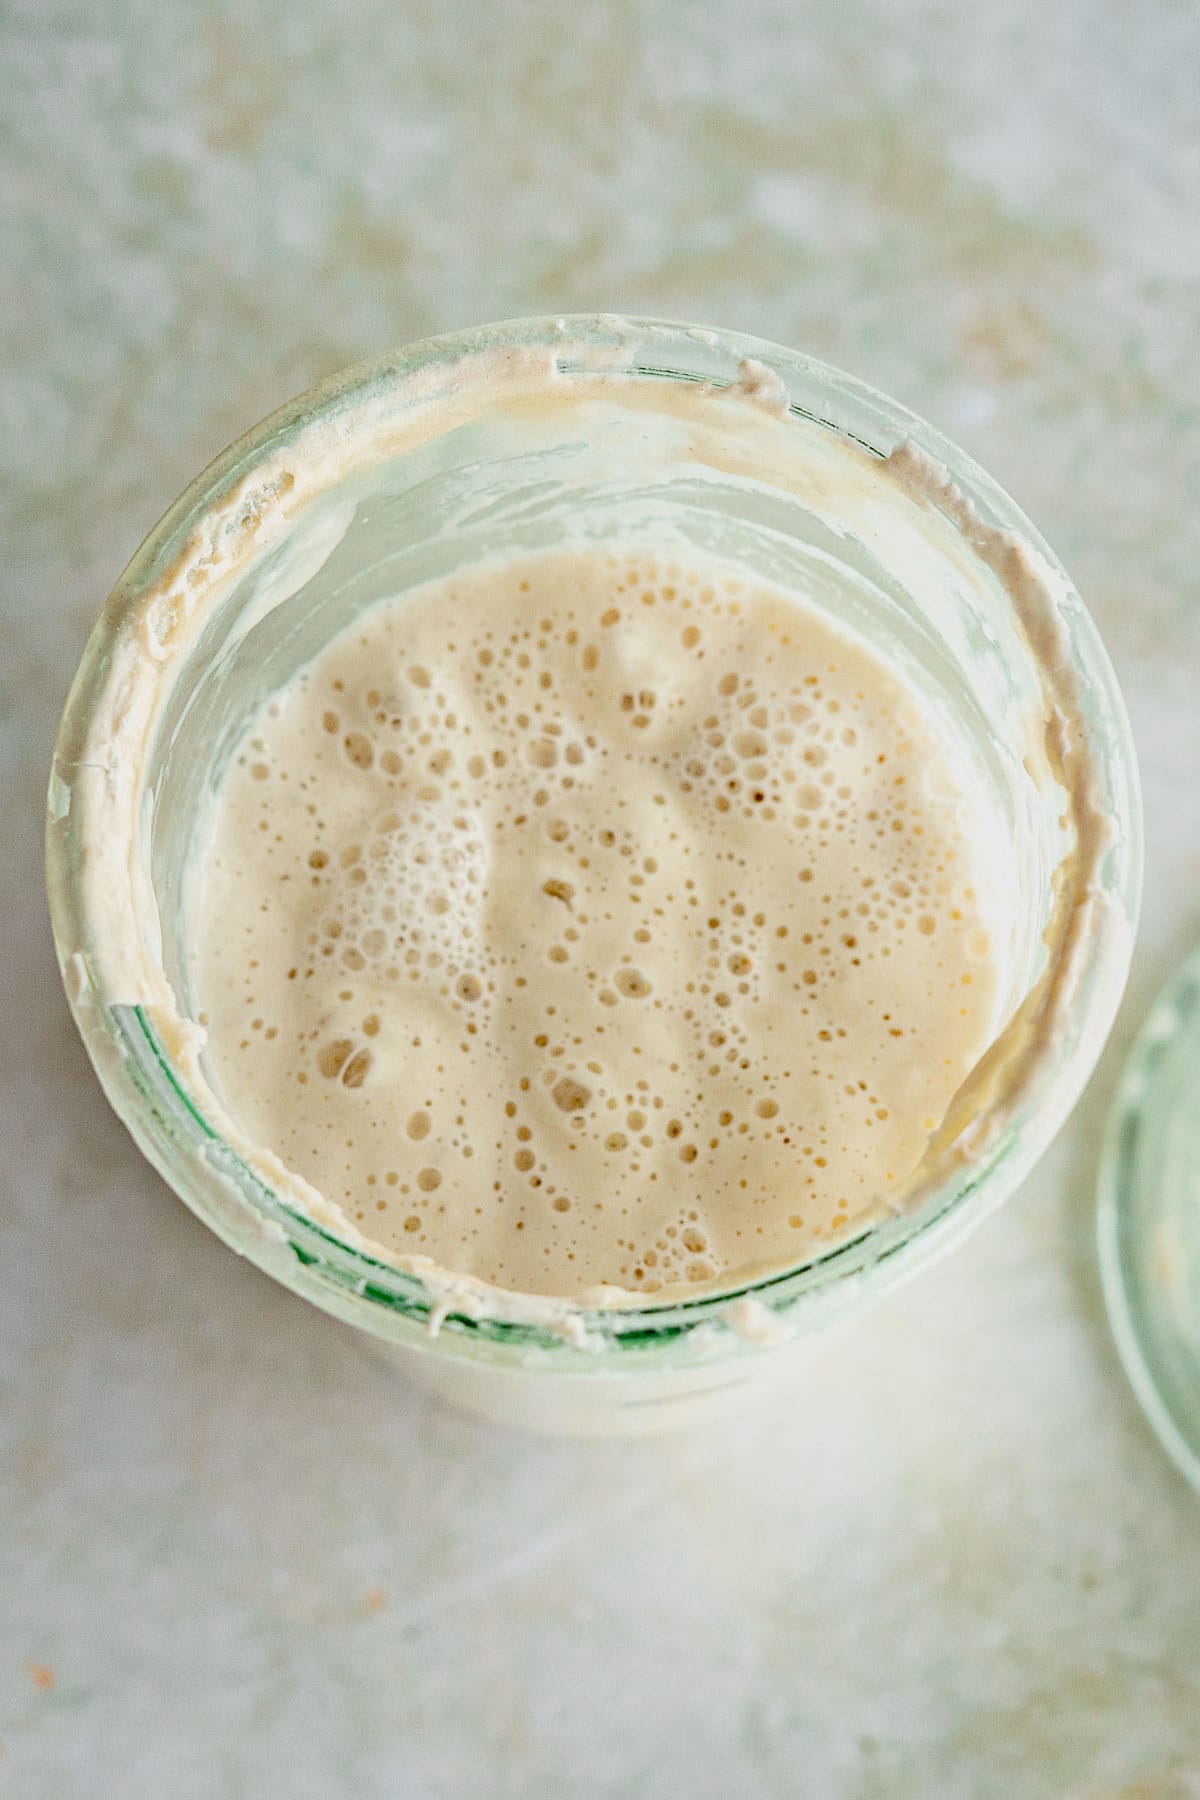
- strong starter – make sure your sourdough starter is extremely active and at its peak when mixing the dough. A good measure is making sure it’s doubled in size, or about to be. I like to feed my starter twice if it doesn’t have enough action after a 2-3 hours to be extra positive that it’s strong and bubbly.
- rustic charm – the best part about these loaves is how easy it is to shape them. You don’t need any fancy bread baskets or shaping cloths, and while I prefer to use a baguette pan for baking, you can just stretch them onto a sheet pan lined with parchment paper! For a more rustic appearance, dust the loaves with flour just before baking.
🍽️ how to serve your stirato
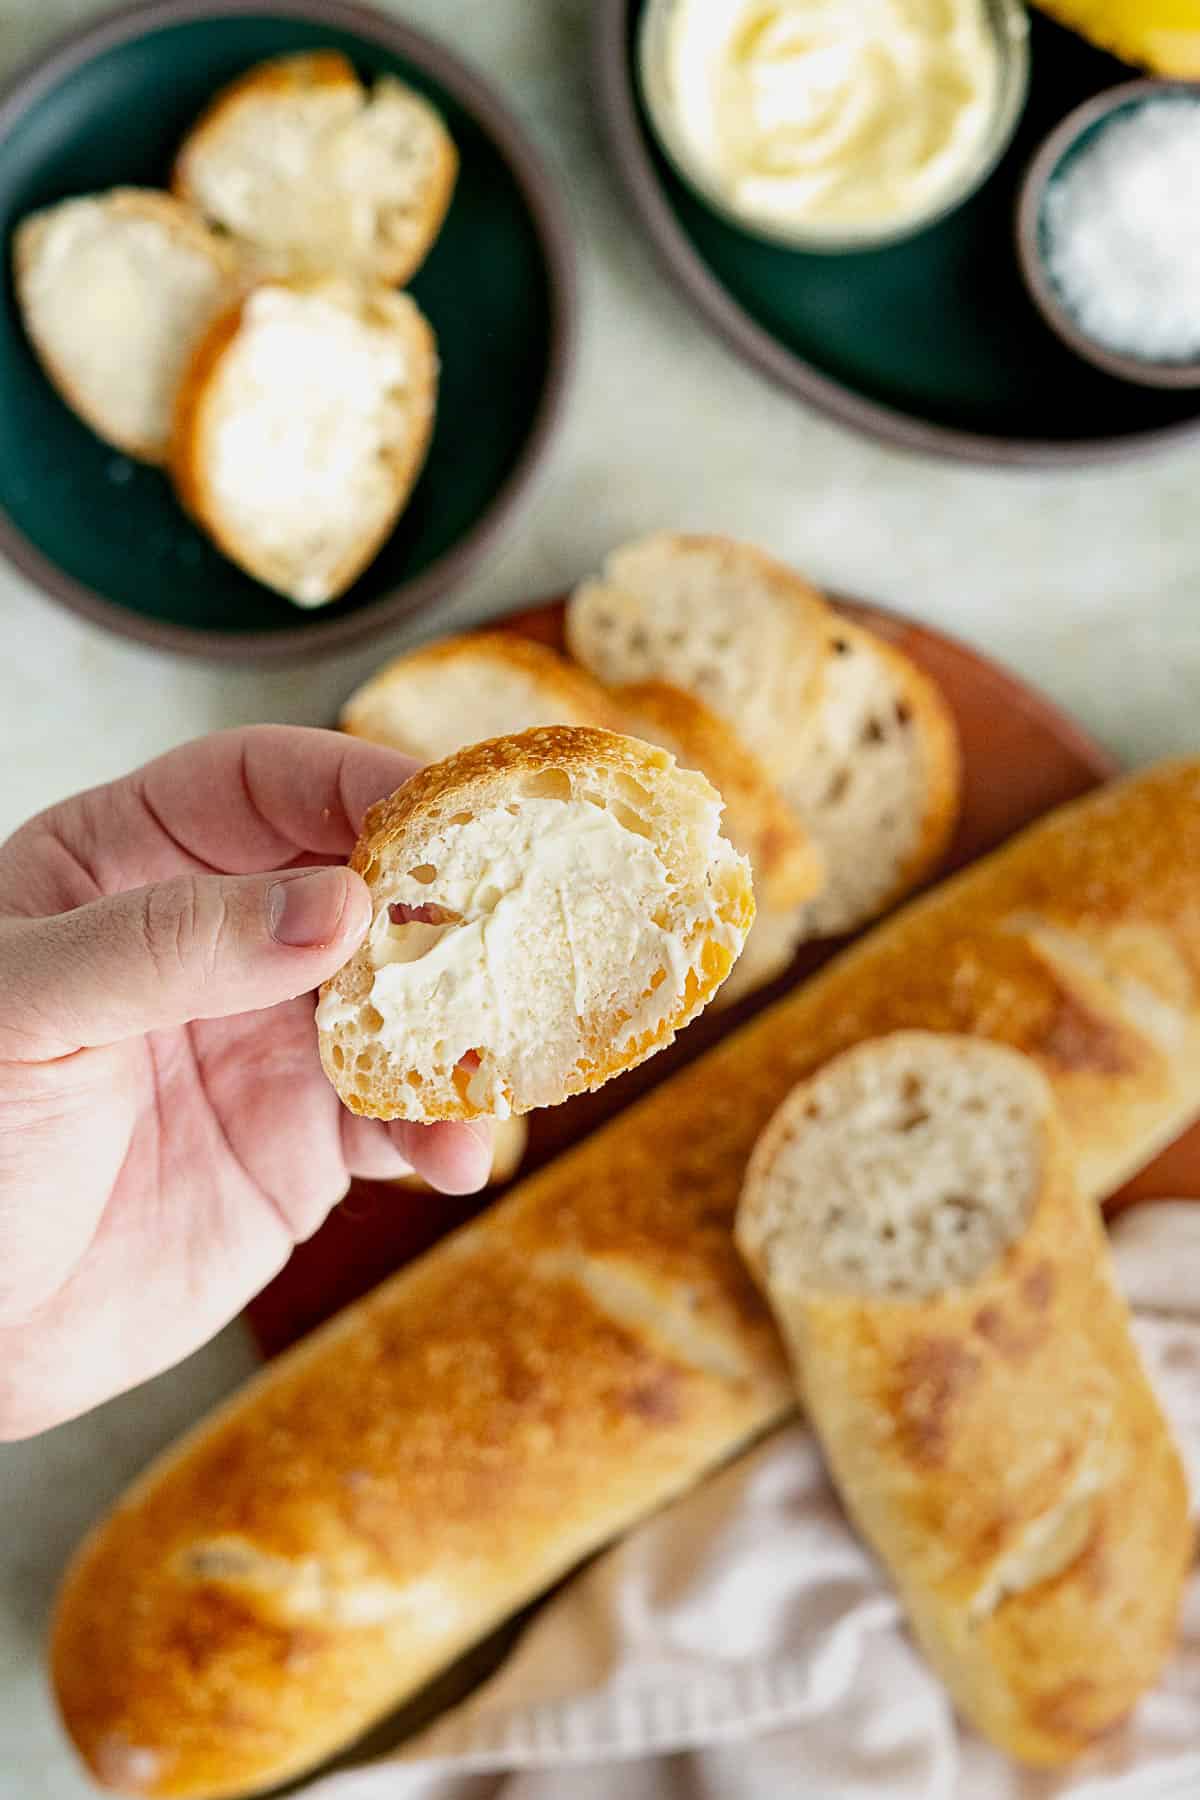
- dip it in olive oil – serve slices of this rustic Italian bread with a small dish of high-quality olive oil for dipping. You can enhance the oil with a sprinkle of flaky sea salt or Italian herbs for extra flavor.
- create crostini – slice the bread thinly, brush with olive oil, and toast for way easy perfect crostini. Top with oven roasted shallots for a lil snackie that’s sure to impress guests during any celebration.
- mini sandwiches – the sturdy structure and incredible flavor make stirato bread ideal for crafting appetizer-sized Italian-style sandwiches jam packed with cured meats, cheeses, and veggies.
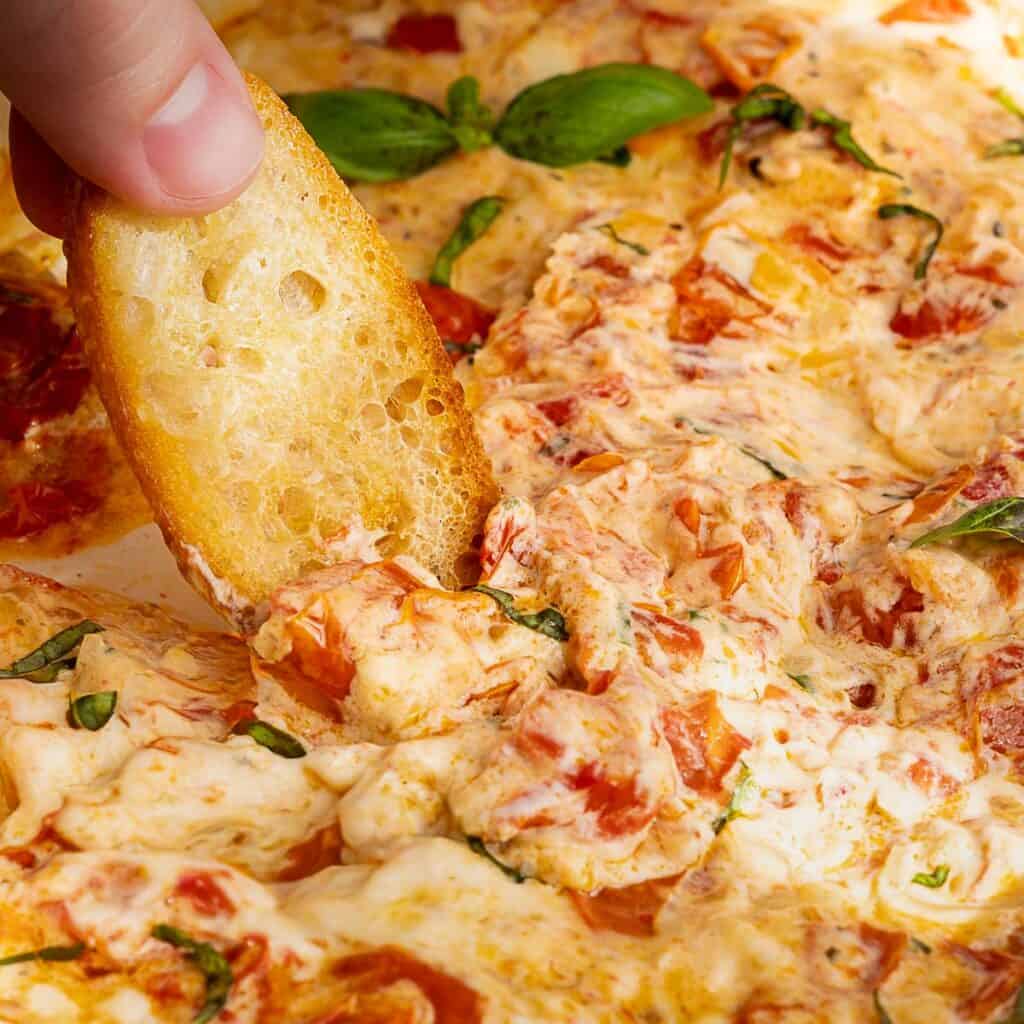
- pair with cheese, dips, and other apps – this loaf is the perfect companion to cheese boards and dips like a creamy whipped honey ricotta. You can also serve it alongside fresh burrata with roasted cherry tomatoes for a super simple appetizer that’s low on work but high on flavor.
- serve with pasta – this bread is perfect for sopping up the last bits of sauce from your pasta bowl, especially dishes with rich, flavorful sauces that are too good to leave behind.
👀 looking for pairing ideas? Try one of these favorites!


Wanna save this recipe for later? 📬
🧰 equipment needed & storage tips
🫙 how to store homemade bread
This bread is best enjoyed the day it’s made, but can be stored in a paper bag at room temperature for 1-2 days. After that, I like to slice and freeze it for longer term storage.
💬 q+a
Why didn’t my sourdough baguettes rise properly?
If your baguettes didn’t rise very well and ended up a bit flat, there could be a few reasons. First, your starter might not have been active enough to support the rise. Second, they could be overproofed. If you left them to rise longer than 2 hours after shaping them, there is a chance they over-proofed. Finally, factors such as humidity or oven temperature could be to blame.
How do I know when my sourdough starter is ready to use?
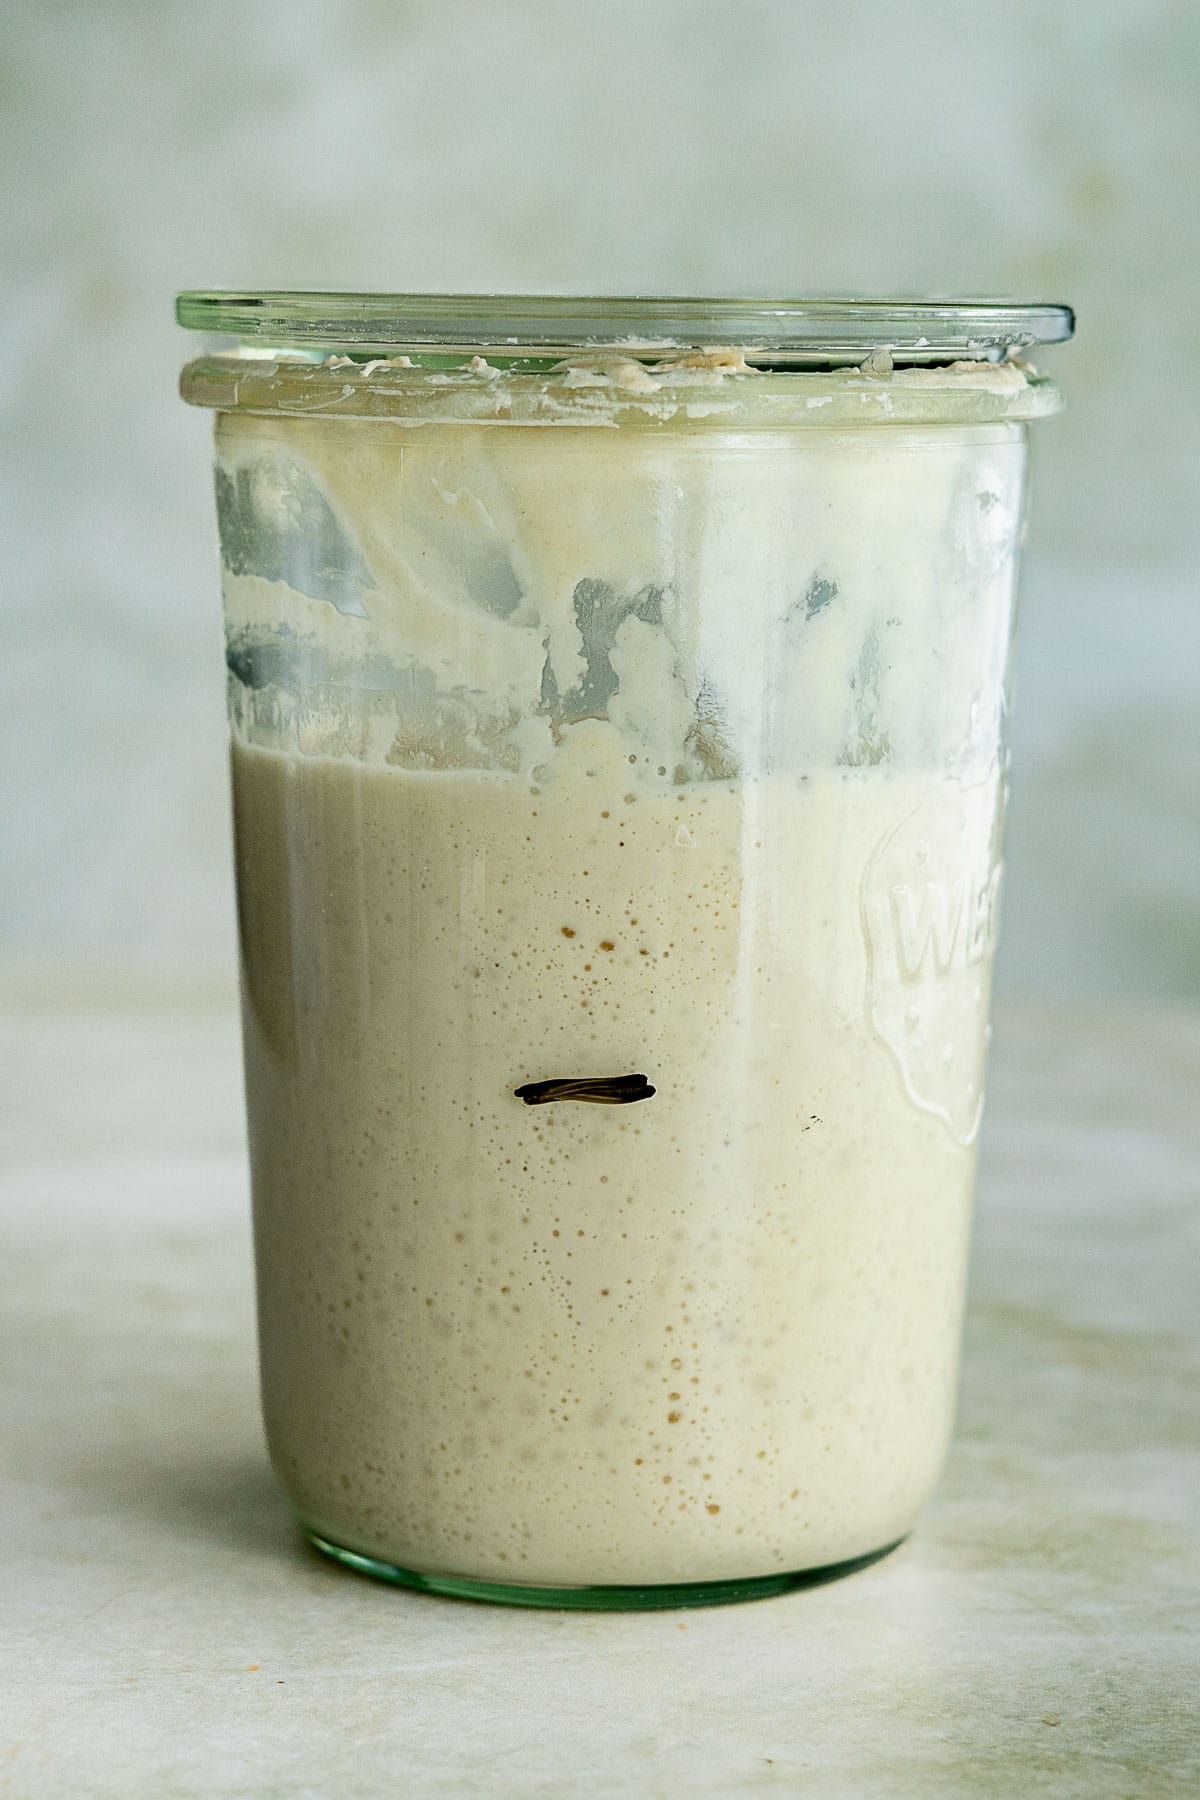
Your starter is ready to use once it is super bubbly and doubled in size. Mark your jar with a rubber band or dry erase marker to easily keep track of the growth.
Can I use all-purpose flour instead of bread flour?
As long as the protein content of your flour is at least 12%, it should be fine to use. All purpose flour is typically lower in protein, so it’s not recommended for breads, especially no-knead recipes like this one. Calculating the protein content of flour isn’t exactly as simple as dividing the grams of protein by total grams in a serving size, either, because not all protein helps form gluten. 🫣
Flour brands that share protein percentages usually account for the EXACT kinds of protein that help form and develop gluten, so if a bag says 12.7% protein (like my favorite brand King Arthur Flour), you can bet that is all gluten forming protein!
A super bubbly active starter is the KEY to making this loaf without kneading!
You’ll know your starter is ready to use once it’s doubled in size. 👌🏻
If you make this recipe, please leave a review in the comments and a star rating!
⭐️⭐️⭐️⭐️⭐️
I read every single comment! I also love connecting on social media, so snap a pic and hashtag it #myrecipeforfun and tag me on Instagram, TikTok, or pin this recipe on Pinterest!
Rustic Italian Stirato Bread (Italian Sourdough Bread)
Wanna save this recipe for later? 📬
Equipment
- 1 kitchen scale for accurate measuring
- 1 large mixing bowl for mixing and fermenting dough
- 1 bench scraper to help handle stick dough
- 1 baking sheet or baguette pan
- 1 mixing spoon or spatula
- plastic wrap
Ingredients
- 227 g sourdough starter fed, active, and bubbly
- 400 g bread flour 3 cups, high protein content, 12-14%
- 237 g water room temperature, about 1 cup
- 6 g kosher salt 1.5 tsp, Diamond brand
Instructions
- Combine all ingredients. In a large bowl, combine sourdough starter, bread flour, water, and salt. Mix until a shaggy dough forms.227 g sourdough starter, 400 g bread flour, 237 g water, 6 g kosher salt
- Rest for 60 mins. Cover the bowl with plastic wrap and let the dough rest for 60 minutes at room temperature (autolyse period).
- Stretch + fold. Turn your dough out onto a floured work surface. Perform a series of stretch and folds: grab one side of the dough, stretch it up, and fold it over itself. Rotate the bowl 90° and repeat one more time.
- Rest for another 60 mins. Cover and let rest for 30 minutes, then perform another set of stretch and folds.
- Proof overnight in fridge. Cover the bowl with plastic wrap and refrigerate for 12-48 hours. This slow fermentation helps the dough slowly form more gluten and develop a deeper sourdough flavor.
- Preheat oven, remove dough from fridge, and divide in half. Preheat oven to 450°F (232°C). Remove dough from refrigerator and turn out onto a lightly floured work surface, then divide the dough into two equal halves.
- Shape baguettes. Gently shape each into an elongated loaf, being careful not to deflate too much. Use a gentle stretching motion to lengthen each baguette.
- Allow to rise on pan. Transfer shaped loaves to a floured baking sheet or baguette pan. Let rest for 60-90 minutes, or intil the baguettes appear risen and poofy.
- Score loaves. Just before baking, score the tops of loaves with a sharp knife, kitchen shears, or bread lame.
- Place in oven + add steam. Place bread in oven. Alternatively, place an oven-safe pan with ice cubes on the bottom rack.
- Bake. Bake for 20 minutes with steam, then remove steam source and continue baking for 15 minutes until crust is golden brown.
- Cool, slice, + store. Remove from oven and let cool completely on a wire rack before slicing. Store sliced bread for up to 24 hours at room temperature, or freeze for longer term storage. Unsliced baguettes can be left for 24 hours at room temperature, loosely wrapped in a tea towel or in a paper bag.
Notes
ℹ️ troubleshooting tips
- sticky dough – while the dough will be a little bit softer than other studier breads, it shouldn’t be overly sticky. If the dough is too sticky to handle, use wet hands or additional flour when shaping.
- strong starter – make sure your sourdough starter is extremely active and at its peak when mixing the dough. A good measure is making sure it’s doubled in size, or about to be. I like to feed my starter twice if it doesn’t have enough action after a 2-3 hours to be extra positive that it’s strong and bubbly.
- rustic charm – the best part about these loaves is how easy it is to shape them. You don’t need any fancy bread baskets or shaping cloths, and while I prefer to use a baguette pan for baking, you can just stretch them onto a sheet pan lined with parchment paper! For a more rustic appearance, dust the loaves with flour just before baking.