Snacks just taste better at Disney World, that’s a fact! But when you can’t make a trip to the parks, recipes like this one help ease the post-Disney blues. This copycat Disney Rice Krispie Treat recipe is the perfect way to enjoy your favorite sweet theme park treat from the comfort of home.
Growing up in Central Florida means you go to Disney. A lot. In elementary school, we went to Epcot on field trips. I’ve been an annual passholder for over 11 years. I’ve even worked at Disney! And anytime you go to Disney, you’re gonna eat some snacks. 😛 This copycat Disney recipe is a dupe for my favorite WDW snack item: the crispy rice treats.
If you want to take tasty treats to the next level, try making them with some easy brown butter. If you want your treats to taste exactly like they do on Main Street, though, be sure to follow the recipe exactly. There are two secret ingredients that are not in most other crispy rice treat recipes, and that’s what makes the difference! You can make these mouse-shaped, but I am always too impatient for that extra step.
👀 the secret sauce…
✨ the flavor: This recipe hits The Feels Flavor Factor all the way. Buttery marshmallow + vanilla + a tiny hit of salt = pure Main Street nostalgia. Basically a core memory in dessert form.
🎯 the method: low-n-slow melting, then pull off the heat before you add cereal. Gentle mixing + gentle pressing keeps the bars airy, not dense.
🏆 the win: white chocolate is the not-so-secret secret. The cocoa butter keeps the treats soft + gooey for days instead of turning into bricks. You get theme park worthy treats without buying a park ticket!
2023 Update:
Cast Members have confirmed for me that since the pandemic, these treats are no longer being made onsite at the Main Street Confectionary. 😭 They are now being made in a separate facility, which means this recipe is the closest you’ll get to pre-pandemic treats!
🛒 ingredients
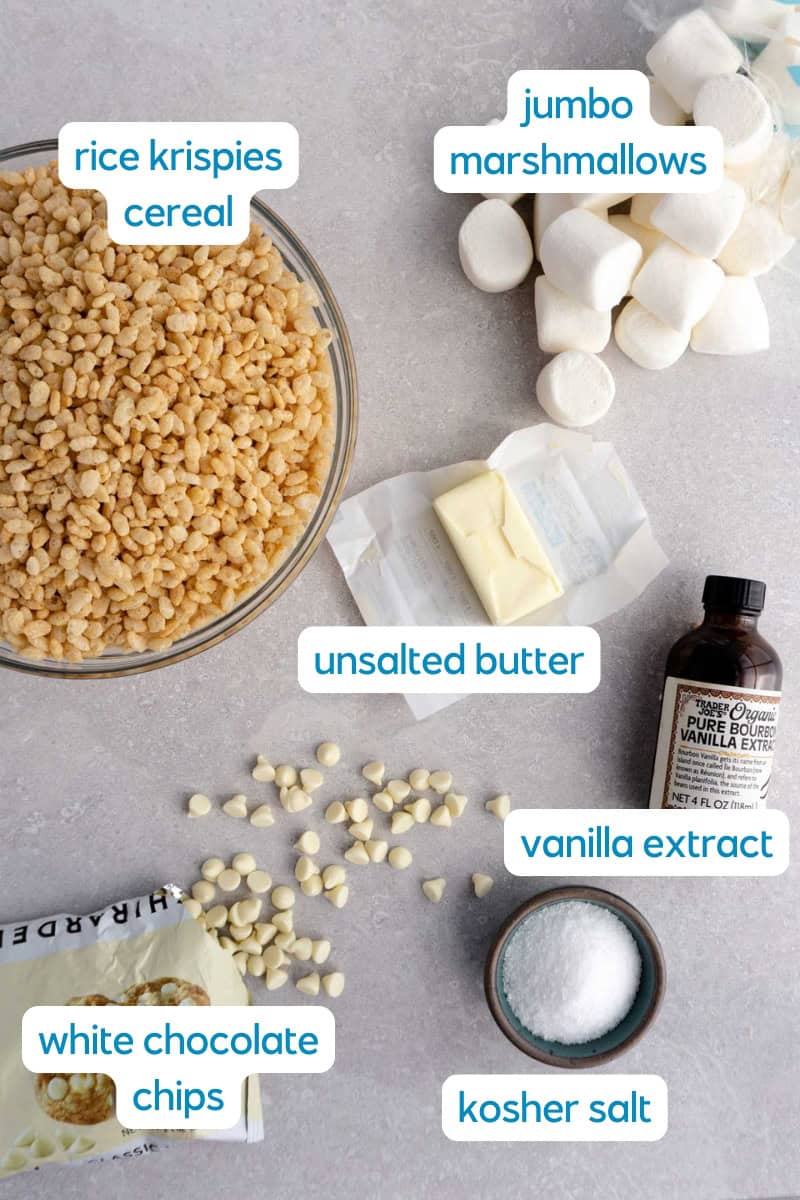
See the recipe card for the exact quantities.
🍳 instructions
1: Start by lining a 9 x 9-inch pan with parchment paper, leaving a bit of overhang so you can lift the bars out of the pan later.
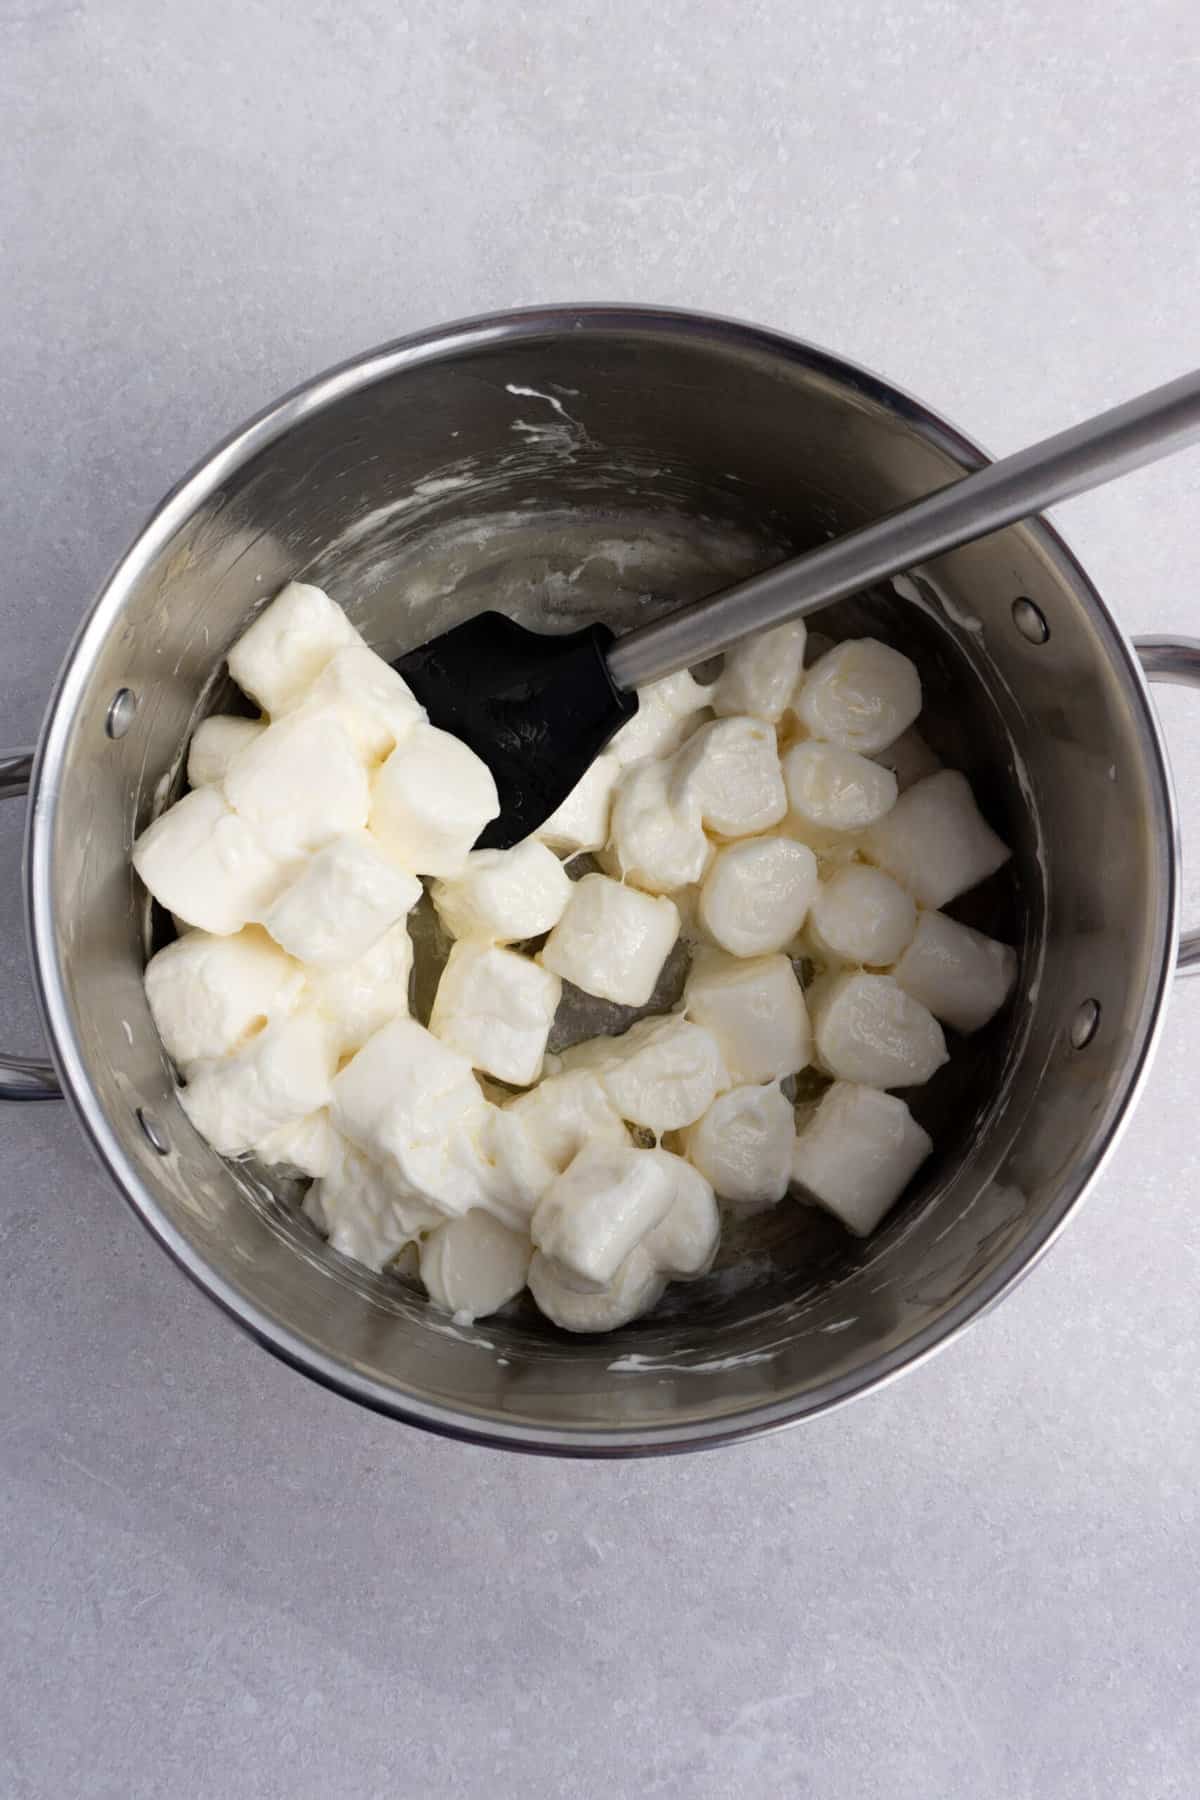
2: Melt the butter over medium-low heat, then add in the marshmallows and allow them to slowly melt.
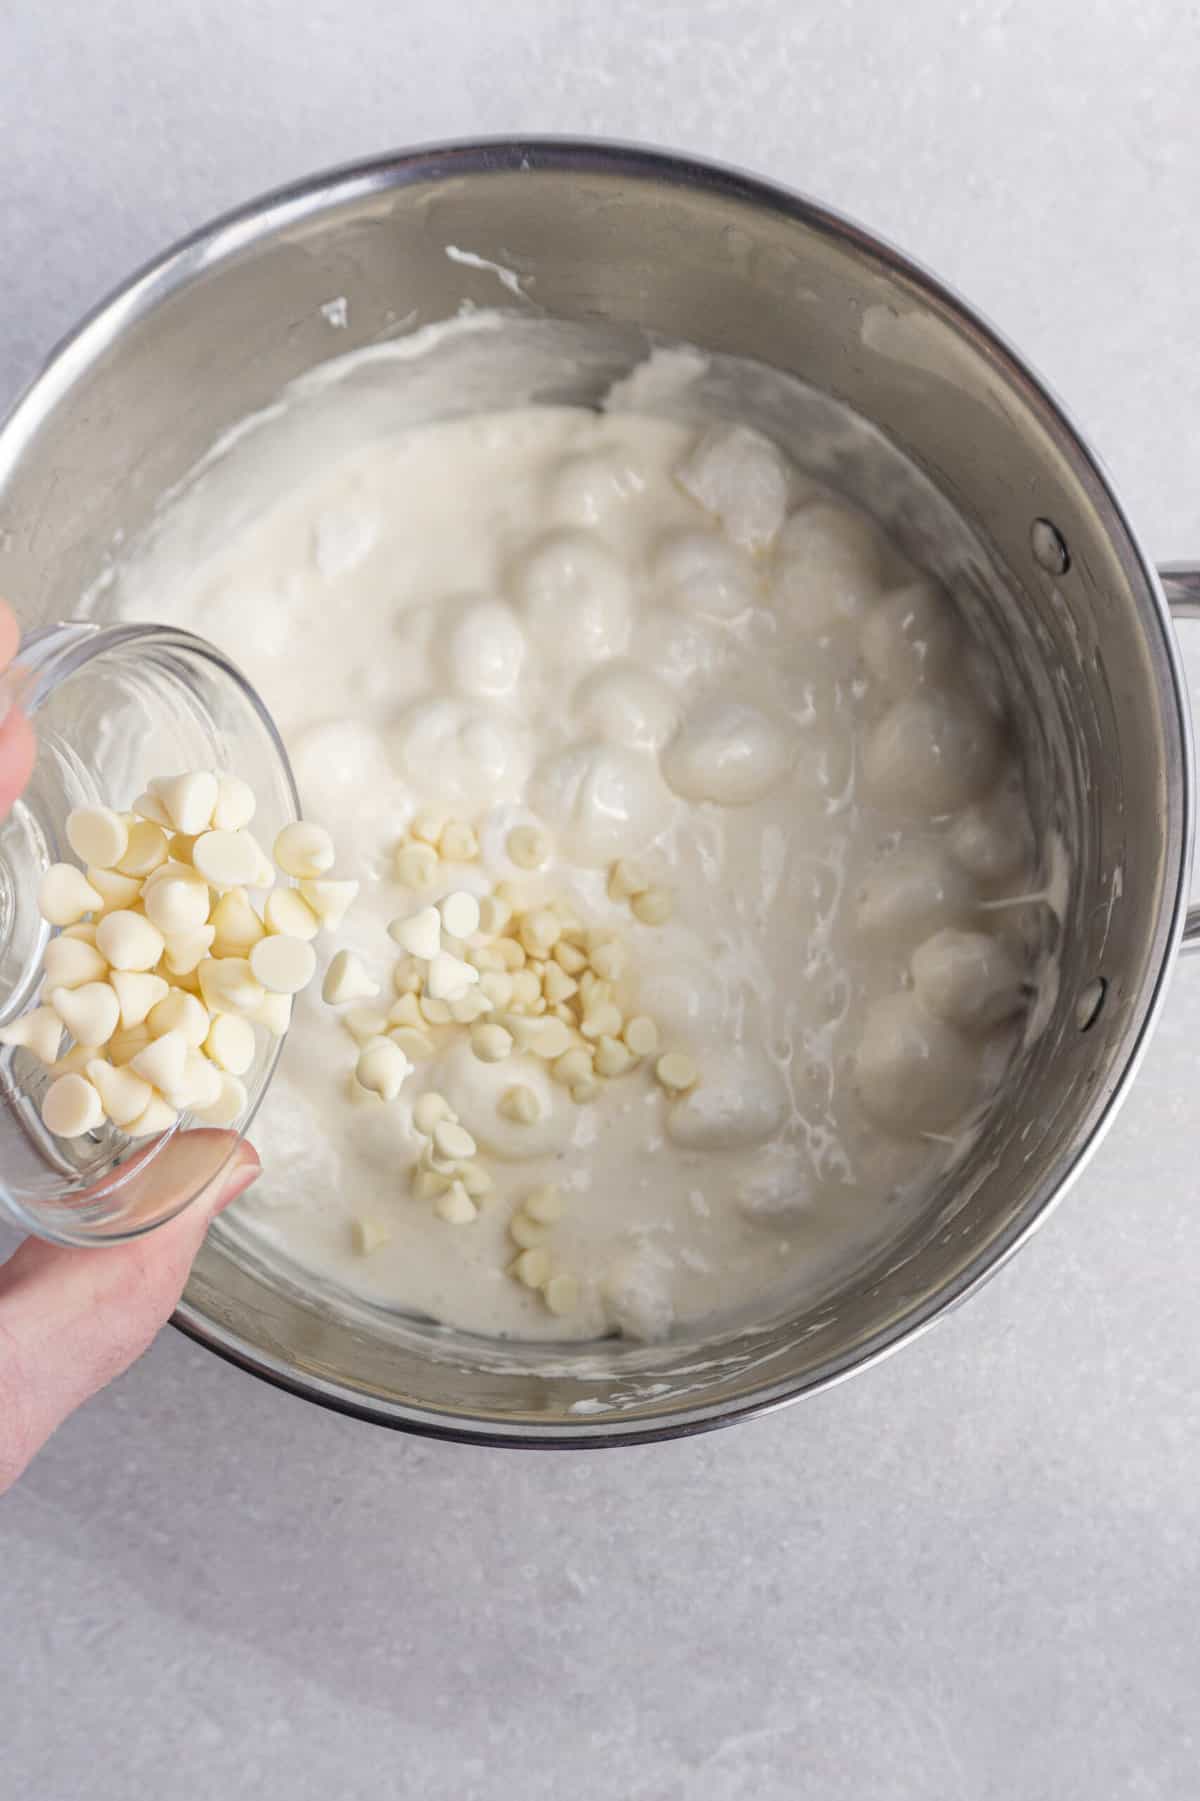
3: Once the marshmallows are almost fully melted, add in the white chocolate, vanilla extract, and kosher salt. Stir until melted and incorporated, then remove the pan from the heat.
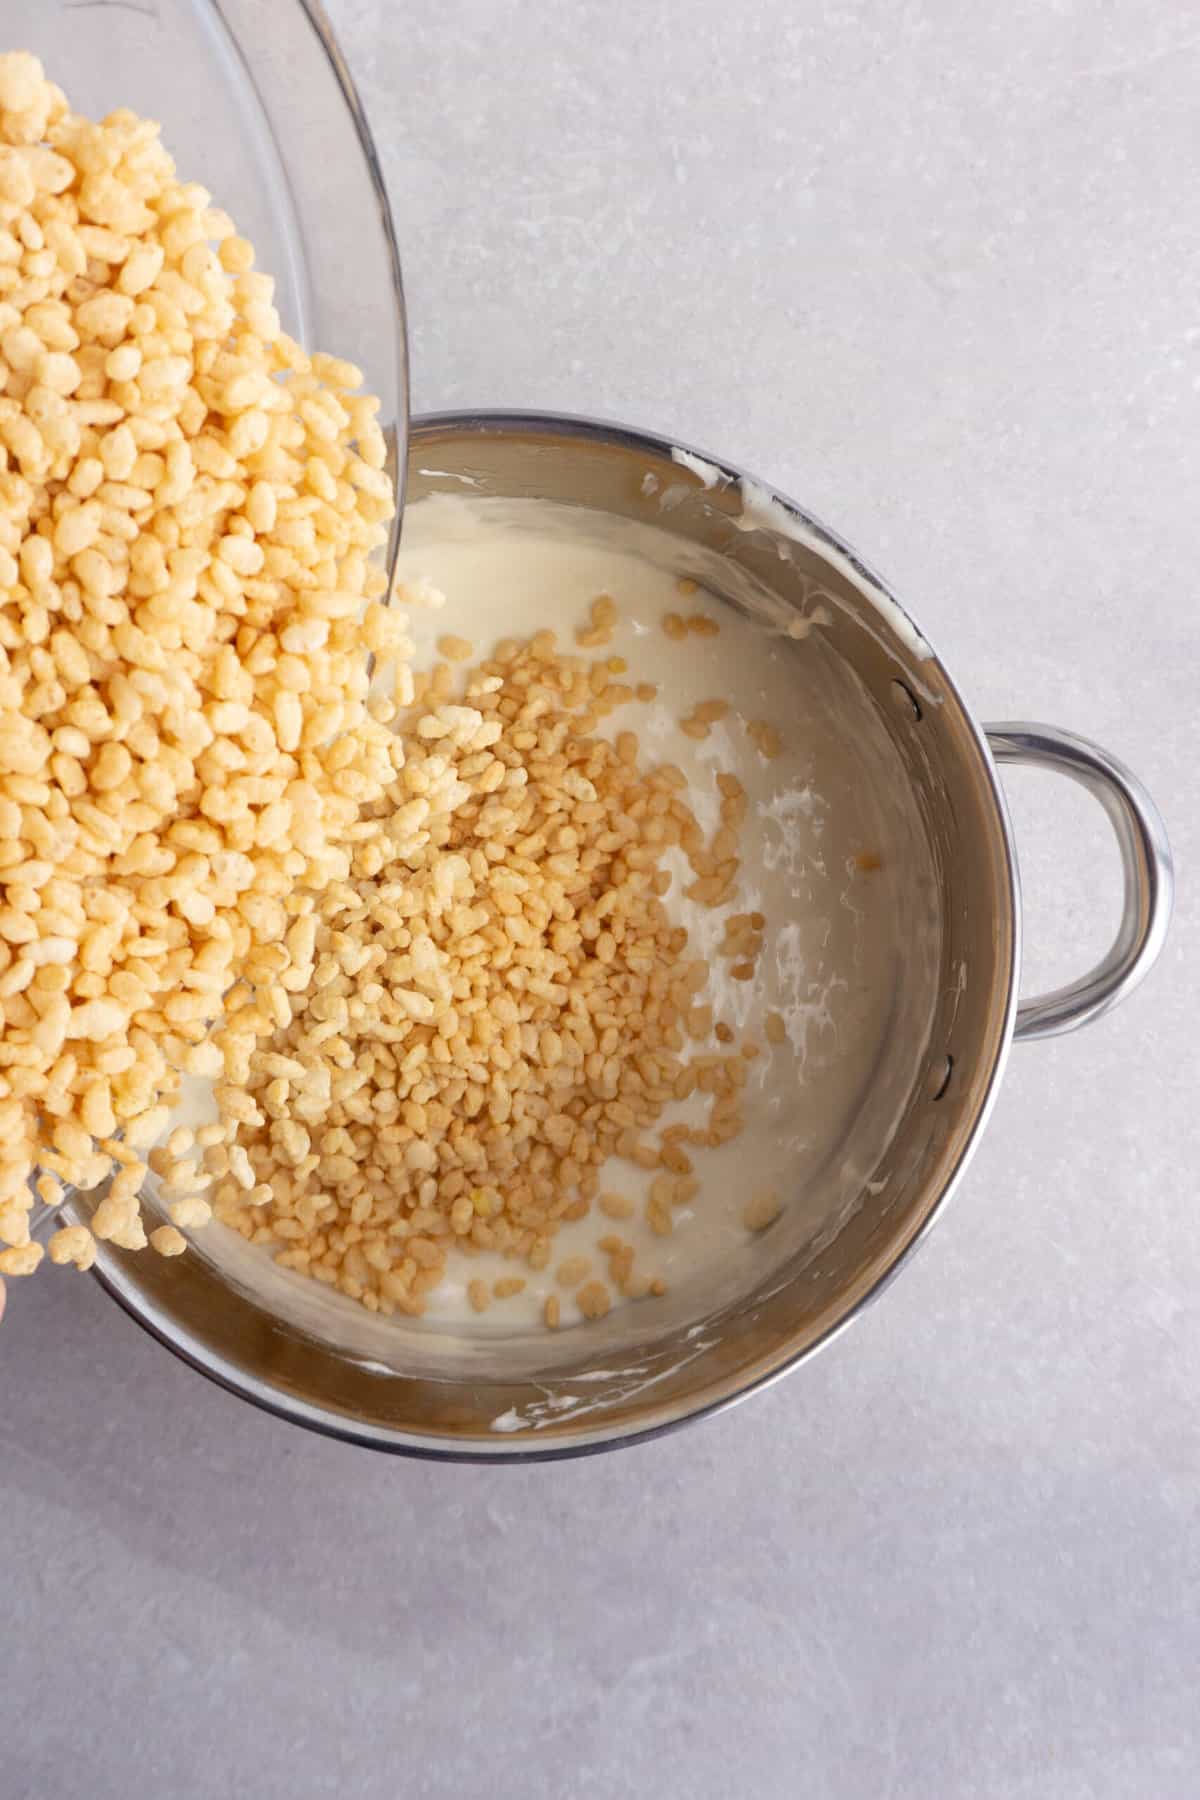
4: Add in the crisp rice cereal, and mix thoroughly to combine. It may seem like you don’t have enough marshmallow mixture at first, but keep stirring until the cereal is evenly coated!
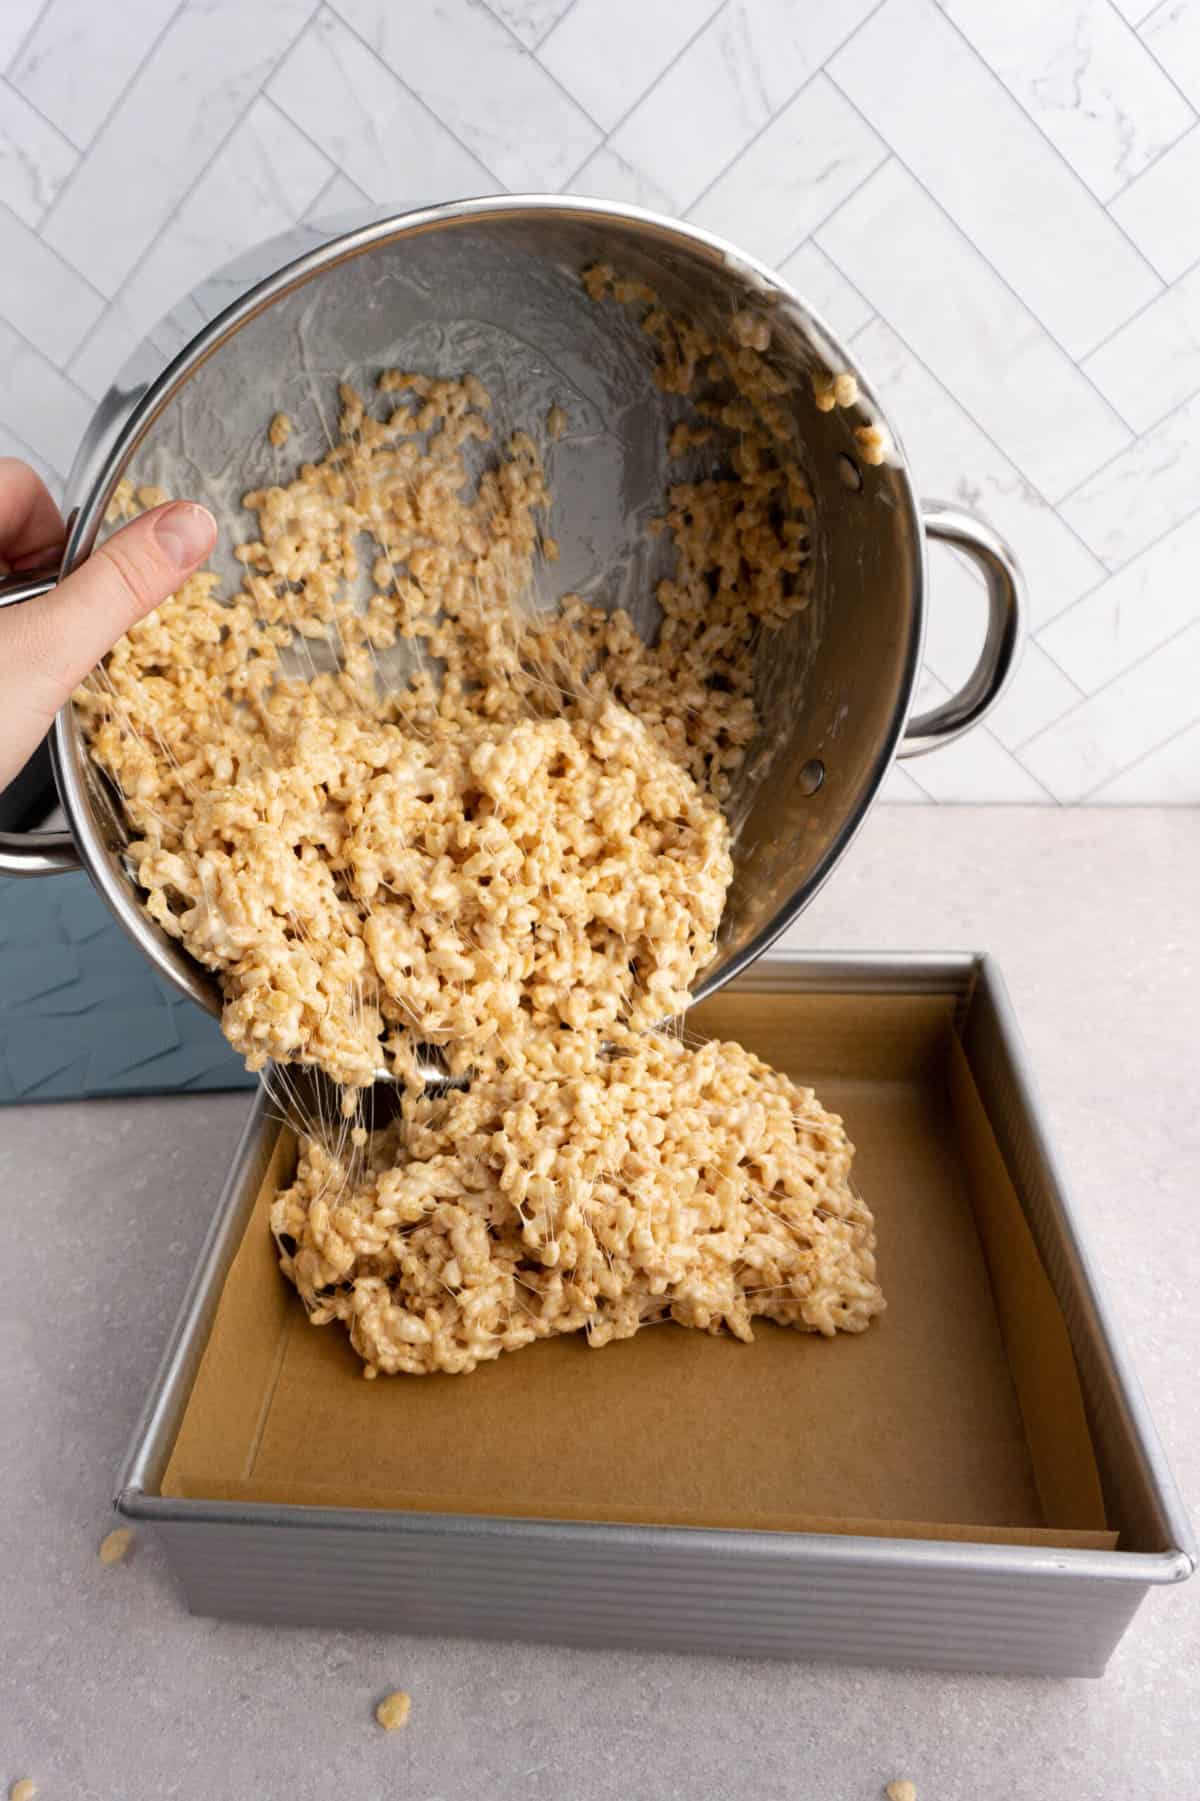
5: Scoop the mix into your prepared pan lined with parchment paper.
6: Using a clean silicone spatula, press the mix down into the pan. Don’t pack it in too firmly, or your treats will be very dense and tough to take a bite out of.
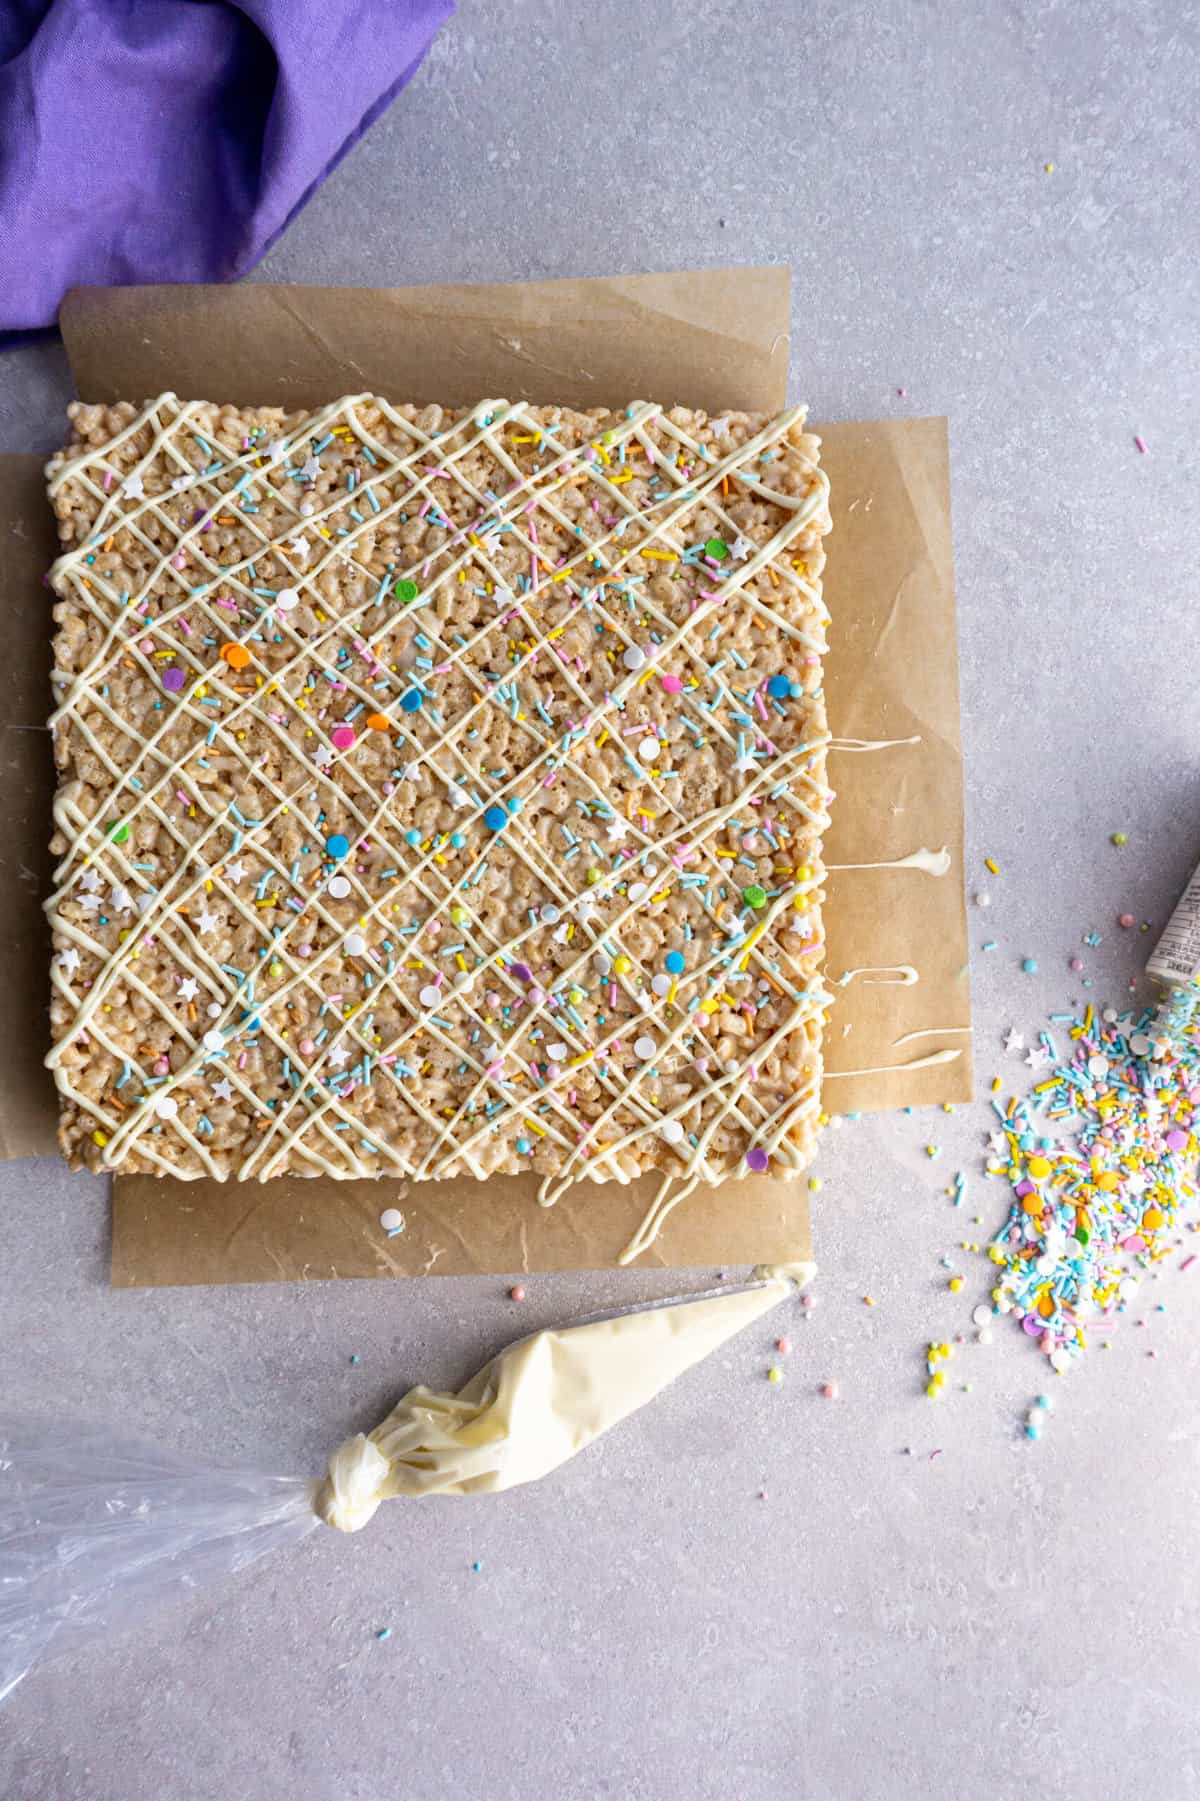
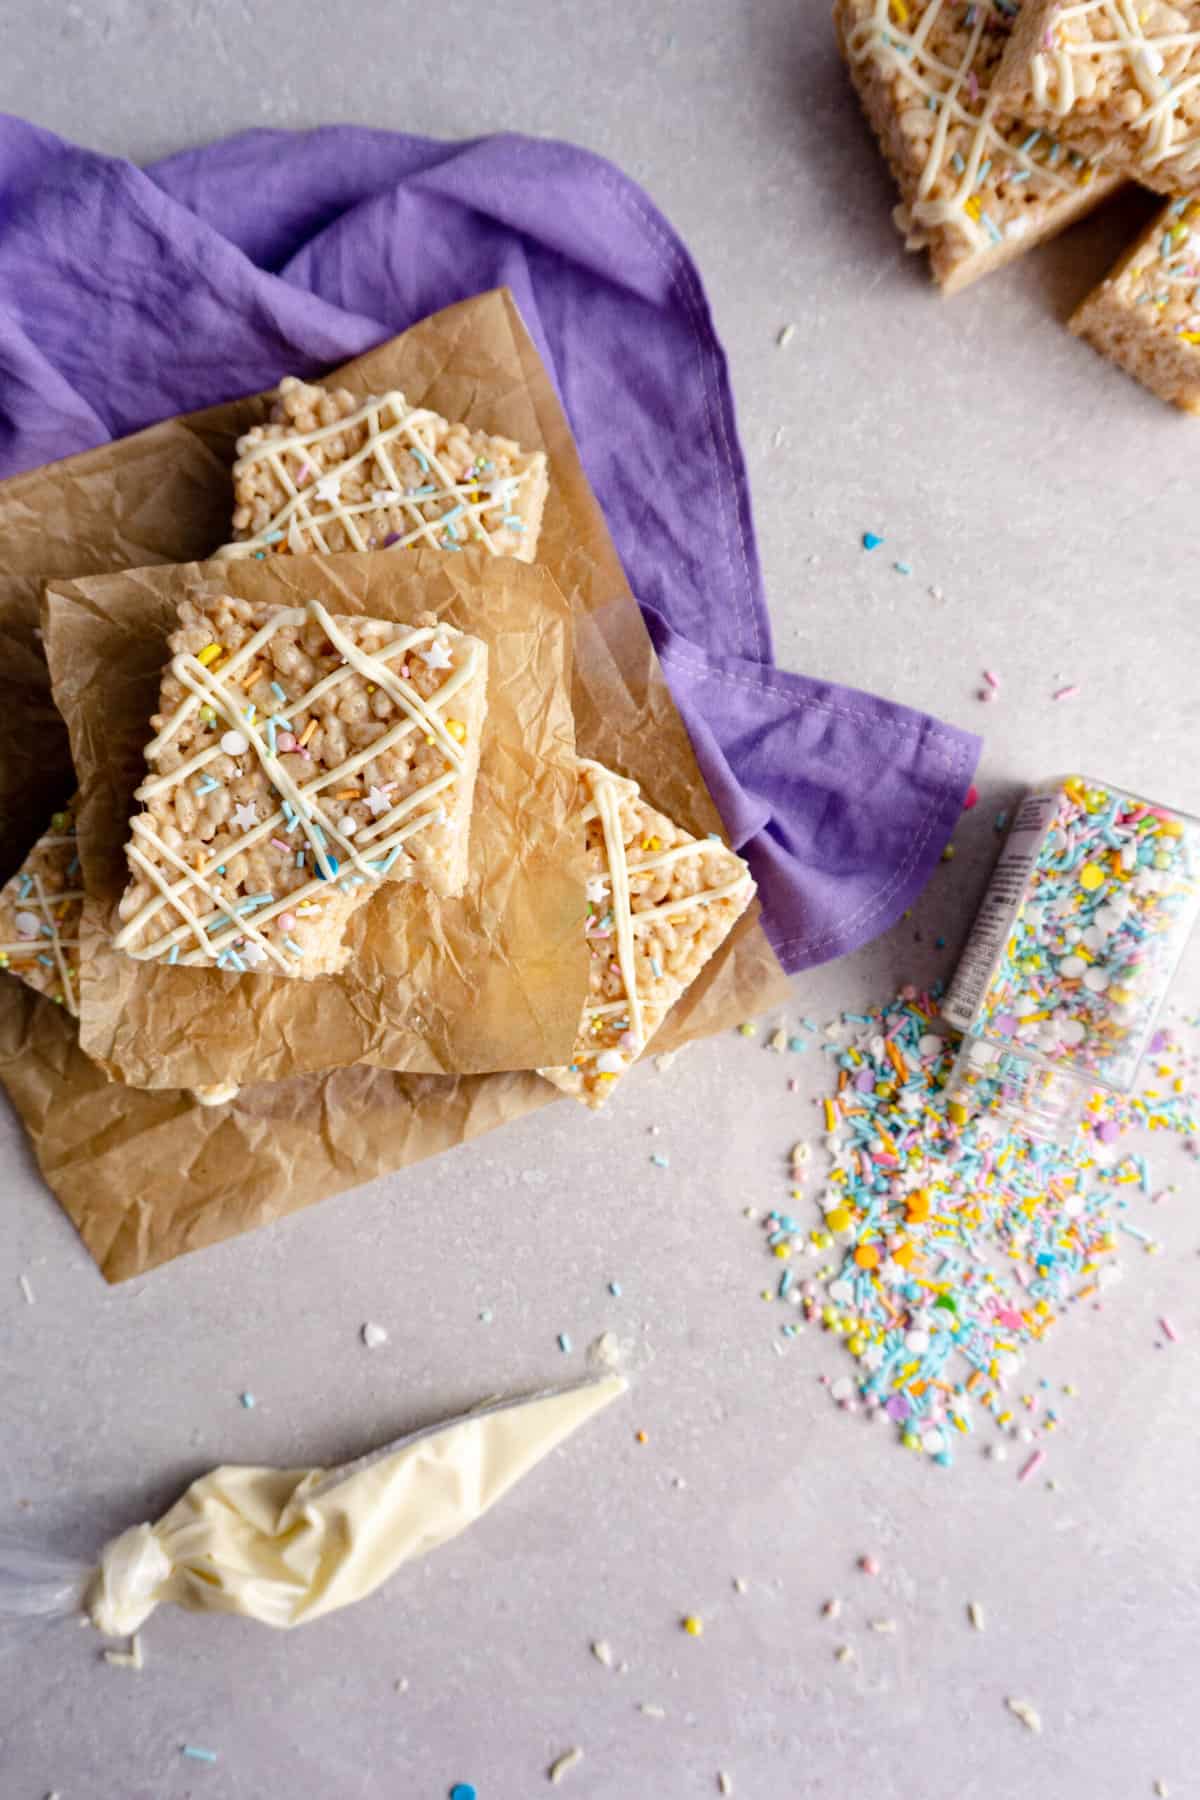
7: If desired, you can decorate your treats with more white chocolate and sprinkles!

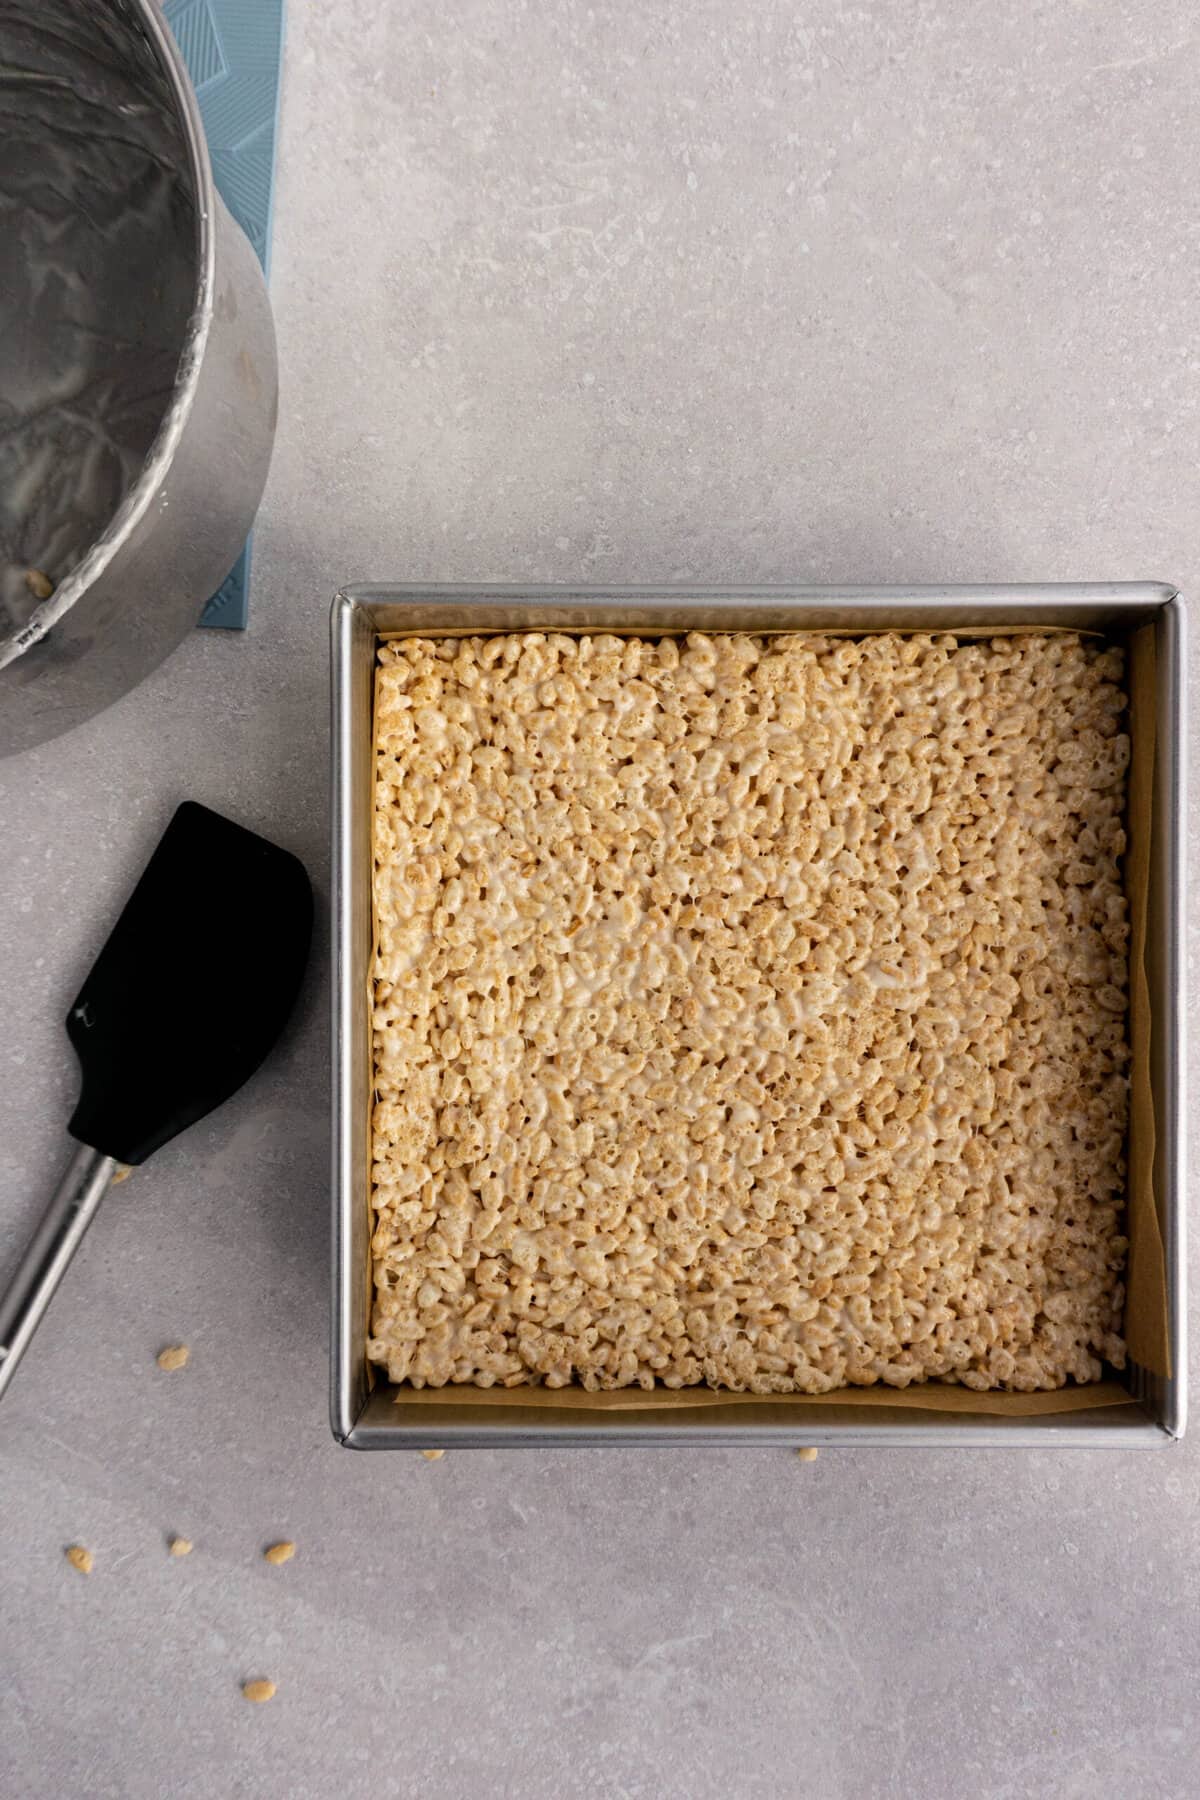
8: Slice and serve once totally cooled and set.
Hint: Using medium-low heat may take a little longer, but you’ll be sure not to scorch the marshmallows, butter, or white chocolate. Low-n-slow is the key! 😉
💡tips & tricks for getting it right
🍽️ serving tips
- get sharp cuts – use a sharp knife to cut these treats because they are super sticky! You may need to clean your knife between cuts or spray it with nonstick spray.
- party perfect – these are the PERFECT snacks for parties, especially kid’s parties! Pair them with a fun berry cream soda or a salty snack mix for a real treat!
ℹ️ troubleshooting tips
- fresh marshmallows – make sure to use FRESH marshmallows. Don’t use ones that have been open in the bag for months, and make sure they aren’t expired. This is the KEY to better treats!
- too hard – do NOT turn the temperature higher than medium-low when melting the butter and marshmallows. Higher temperatures can lead the sugars in the marshmallow to crystallize and cause the gelatin to break down. This means rock hard rice krispie treats. Cook low and slow for soft and chewy treats.
- too soggy – when your mix has too many marshmallows or too much butter, the butter and marshmallow mixture will seep to the bottom of the pan as the treats are cooling, leaving you with soggy-bottomed treats.
⚖️ scaling tips
If you need to make a bigger batch, it’s best to do so one batch at a time. Otherwise, you’ll need a REALLY BIG pot or bowl to mix in 12 cups of rice krispies. 🤣
🔆 top tip
Lining the pan with parchment paper makes for quick and easy release without the need for cooking spray!
Wanna save this recipe for later? 📬
♻️ customize your krispies
- salted butter – Only have salted butter on hand? Just omit the additional salt from the recipe and substitute in salted butter.
- brown butter – use browned butter instead of regular butter for a deep, nutty, toasted flavor.
- chocolate chips – want a cocoa flavor? Add regular chocolate chips in place of white chocolate chips for a chocolaty spin on this recipe. You can also drizzle extra chocolate on top!
- Mickey shaped – you can use a Mickey cookie cutter to cut these into the classic mouse head shape if you like! I never have the patience, so I go for the classic rectangle!
🧰 equipment needed & storage tips
🫙 how to store rice krispie treats
Slice into bars just before serving to keep them fresher for longer. Store any uneaten bars in an airtight container or zip-top storage bag for up to 5 days. Don’t store them in the fridge, as this actually leads to them dry out faster.
💬 q+a
Why are my rice krispie treats hard?
Heating the mixture to high temperatures can cause the sugars in the marshmallows to reach the “hard crack” stage of sugar melting, which means…yup…your treats will be brittle and hard once they cool. Be sure to melt your marshmallows at a medium-low temperature and remove them from heat once they are almost all melted.
How long does it take for the rice krispie treats to cool?
It takes about an hour for these treats to fully cool. While it may be tempting to cut into them sooner, they will be stickier and harder to cut if they are warm at all. As long as you don’t mind eating them in a sticky, lumpy pile, you’re good. 🤣
Why are my rice krispie treats soggy?
You may have used too much butter or not enough crisped rice cereal. When your mix has too many marshmallows or too much butter, the butter and marshmallow mixture will seep to the bottom of the pan as the treats are cooling, leaving you with soggy-bottomed treats.
Additionally, make sure you cover them tightly with plastic wrap or store them in an airtight container so that the treats don’t take on moisture from the surrounding air. This is especially important in a high-humidity area like Florida!
If you make this recipe, please leave a review in the comments and a star rating!
⭐️⭐️⭐️⭐️⭐️
I read every single comment, and each rating is helpful to other readers, too! 🥹
I also love connecting on social media, so snap a pic and hashtag it #myrecipeforfun and tag me on YouTube, TikTok, Threads, or pin this recipe on Pinterest!
Disney World Rice Krispie Treats (Copycat Disney Recipe)
Wanna save this recipe for later? 📬
Equipment
- 1 large stockpot or pan
- 1 9 x 9-inch non-stick square pan
- 1 silicone spatula
Ingredients
- 57 grams butter unsalted, 4 TBSP
- 340 grams jumbo marshmallows 1 large 12 ounce bag
- 50 grams white chocolate chips 1/4 cup
- ½ tsp vanilla extract
- ½ tsp kosher salt
- 175 grams crisped rice cereal 6 cups
Instructions
- Prep your pan. Line a 9 x 9-inch pan with parchment paper, leaving a bit of overhang to lift the crisped rice squares out of the pan.
- Melt butter. Place the stockpot or large saucepan over medium-low heat, and melt butter.57 grams butter
- Gently melt marshmallows. Once the butter is melted, add in jumbo marshmallows and melt slowly over medium-low heat.340 grams jumbo marshmallows
- Add white chocolate, vanilla, and salt. Add in the white chocolate chips, vanilla extract, and salt. Stir just until melted. Remove the pan from the heat.50 grams white chocolate chips, 1/2 tsp vanilla extract, 1/2 tsp kosher salt
- Add cereal. Pour in crisped rice cereal and stir until combined using a silicone spatula.175 grams crisped rice cereal
- Spread in pan. Pour the mixture into the prepared parchment lined pan, and spread out using a clean silicone spatula to reduce stickiness.
- Cool, slice, and store. Allow to cool for at least one hour before lifting the rice krispies out of the pan and slicing. Store in a covered container or zip top bag for up to 5 days.


I can finally have my favorite treats again!! I was sad when I went to WDW and they weren’t making them in the confectionery any more. These taste just like I remember!
Oh I’m SO happy you love these treats, Debbie!! They’re my favorite Disney snack too, and I was so sad they started making them offsite. Thank you so much for your review! 💕
I can’t tell you how often I think about the rice krispie treats I’ve eaten at Disney World… This recipe brought all those happy memories to life in my kitchen! Now I just need a mickey cookie cutter for the next time I make these! 10/10!!
I’m so happy to hear that, Carissa! Let me know if you’re patient enough to use the Mickey cutter, I can never wait and always end up eating squares lol! 🤣
These are the best rice krispies ever!!!
I agree!!! 🥳
These Rice Krispie treats were a huge hit with the kiddos! Made them for a school party and not one was left!
I’m so happy to hear that these were enjoyed! They don’t last long around my house, either! Thank you for your review, Maria!! 💕
This is soo easy to make super delicious 😋
Thank YOU so much for your rating and review, Pihusingh! 🥰 I can’t tell you how much I appreciate you taking the time to rate and review the recipe here, and to follow up with me on YouTube, too! It means the world, and I’m so glad you enjoyed these rice krispy treats!! 🥳
I think I may need a little encouragement…to stop making them now!!!! I’m Rice Krispies treating out of control😂😂😂😂. I did not like them growing up they were dry and void of everything. As many times that I went to WDW, I never had them. I was all about the turkey legs. I do not like the store bought ones, but fooled around and ate a homestyle Rice Krispie and I said home style!!??!! It was fresh and good. But I know the actual homestyle has got to be better. The search began and I came upon your you tube channel. I kept messaging you lol you kept replying lol 😂 and now I can’t stop eating these darn things🤣. I’m so invested. Thank you!! And thank you over and over!!
Ahhh Theresa THANK YOU SO MUCH for coming here to leave a comment and rating!!!🥹🥰 I am ALWAYS happy to chat and connect, and help however I can! I am so so glad you are enjoying these treats so much, hahaha sorry I should have put a disclaimer that they are a little tooooo easy to devour! 😂😜 I appreciate your support so much! THANK YOU for being here!!! 💕