This easy whipped cream dispenser recipe is only 3 ingredients, and in a matter of minutes, you’ll be saving money with each spritz. The secret? This is exactly how all your favorite coffee shops make their whipped cream: with a dispenser, not a mixer.
As a former culinary school student, I can vouch for this method of making whipped cream. It uses the exact same iSi dispensers we used in culinary school and that professional bakeries and restaurants rely on. Once you try it, you’ll never go back to the canned stuff. The texture is thicker, fluffier, and actually gets better as it sits; no deflating in 30 seconds like those grocery store cans. 🙅🏻♀️
This recipe uses simple syrup to sweeten the cream, but I’m also including a variation for you that uses powdered sugar, too. Using vanilla extract and a classic simple syrup is super quick and easy. You can even make a simple syrup in the microwave then pop it in the fridge while you’re waiting for your cream to get super cold.
A quick note: To make a whipped cream that’s exactly like the Starbucks whipped cream, you’ll need to use vanilla syrup instead of classic simple syrup. So if you wanna make that, be sure to check out the specific recipe for it. This recipe gives you a close enough dupe without needing to make a batch of vanilla syrup (though, if you do make a batch of vanilla syrup, you will be in for a treat as far as your morning lattes are concerned 😘).
🏆 dispensers beat mixers every time
Whipped cream made with a mixer tends to be more dense and can break from over-mixing. If you’ve ever accidentally made butter instead of whipped cream, you know what I’m talking about. 😅
This is the ONLY recipe you’ll need because I’m showing you how to make whipped cream using BOTH simple syrup (my preferred way) and powdered sugar (the easy AF way).
why this whipped cream dispenser recipe works:
3️⃣ simple ingredients. No artificial flavors, no fillers, and no cutting corners, just real ingredients you can actually pronounce.
💰 money-saving. Making your own whipped cream at home saves almost 40% compared to store-bought cans.
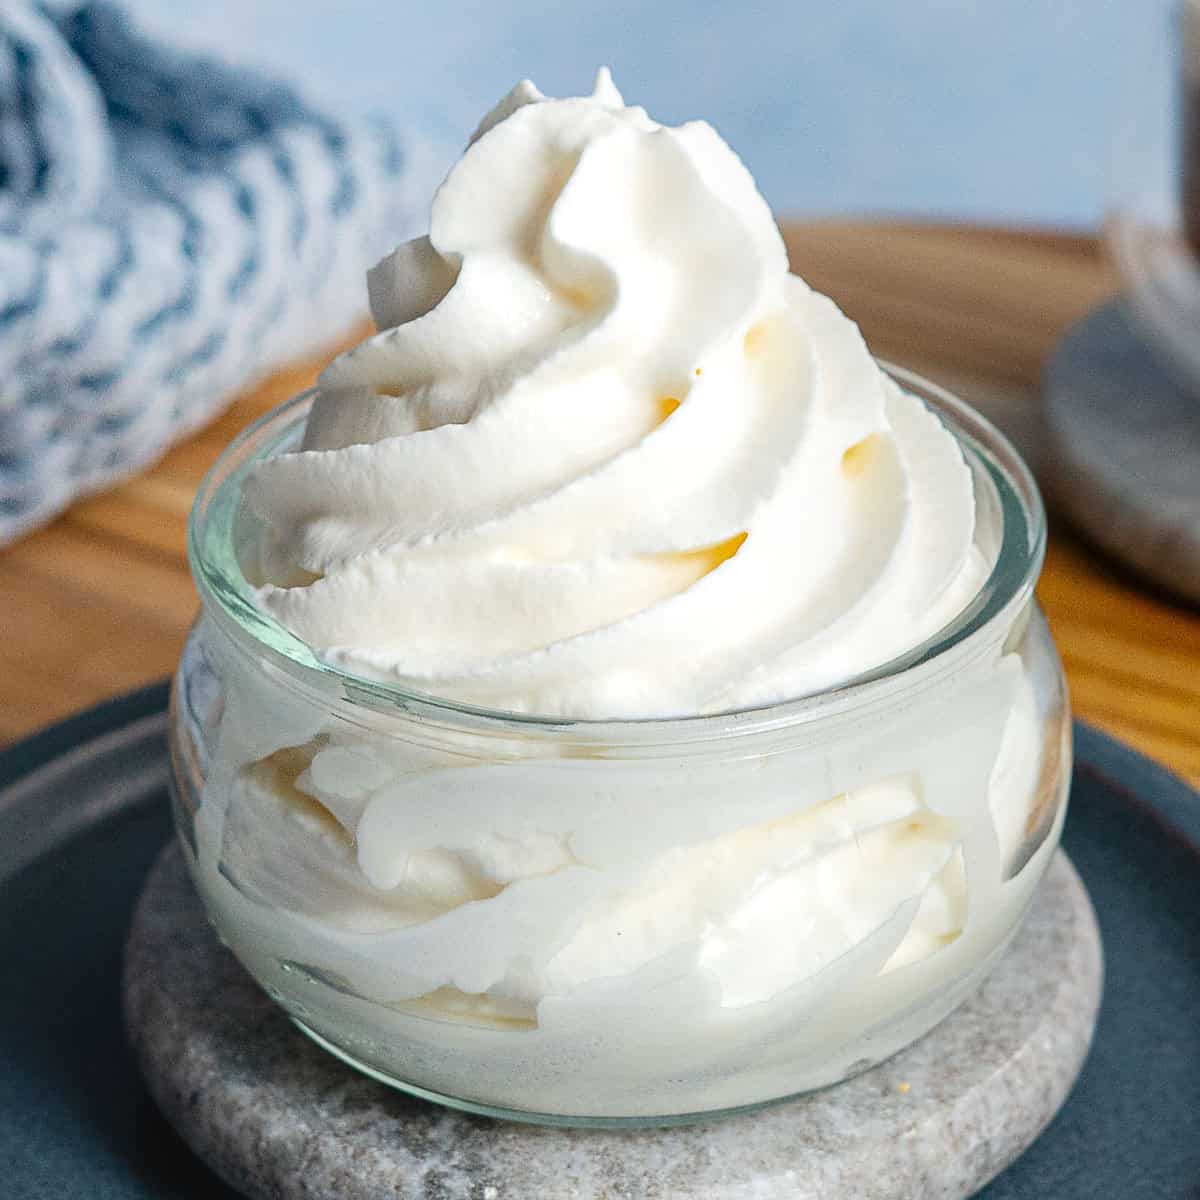
🙌 best texture. This whipped cream is restaurant quality and holds its shape even after you spritz it, no more sad, deflated blobs of whipped cream on your pancakes!
🛒 ingredients
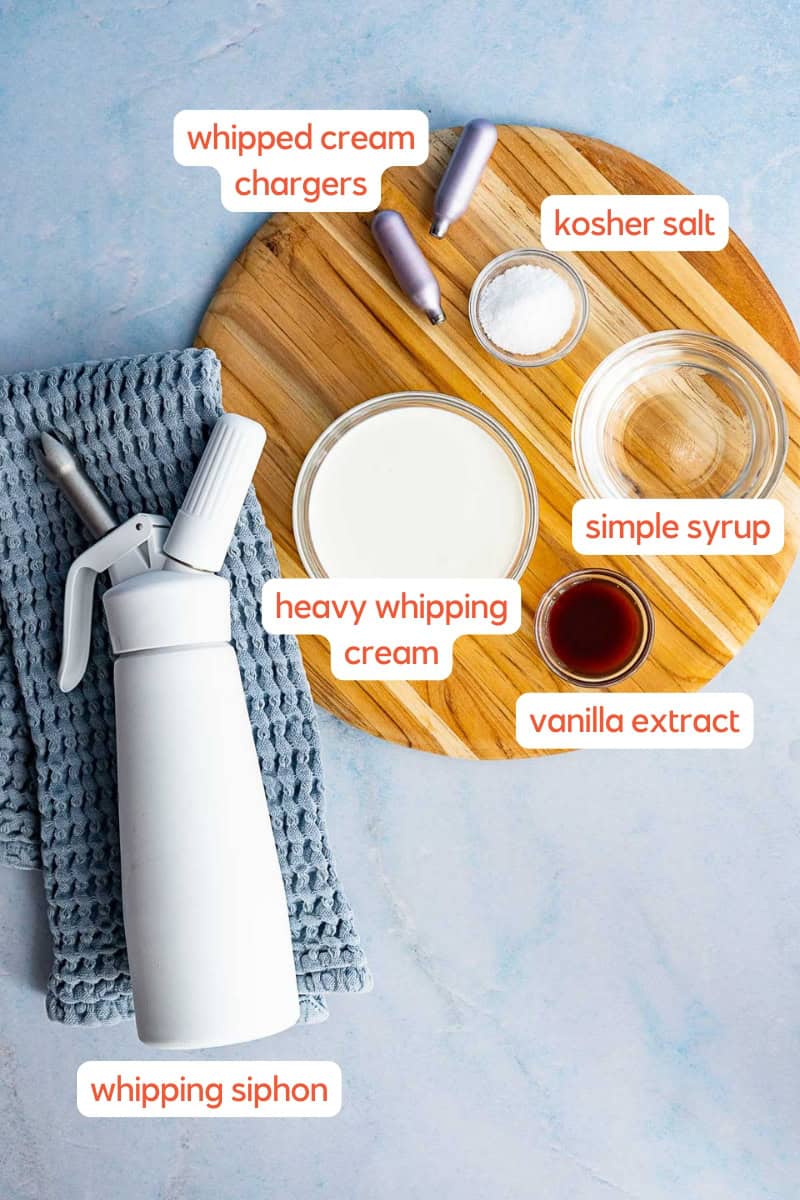
See the recipe card for the exact quantities.
🍳 how to make whipped cream in a siphon
Ensure all ingredients are well chilled before beginning, and work quickly so they don’t get too warm!
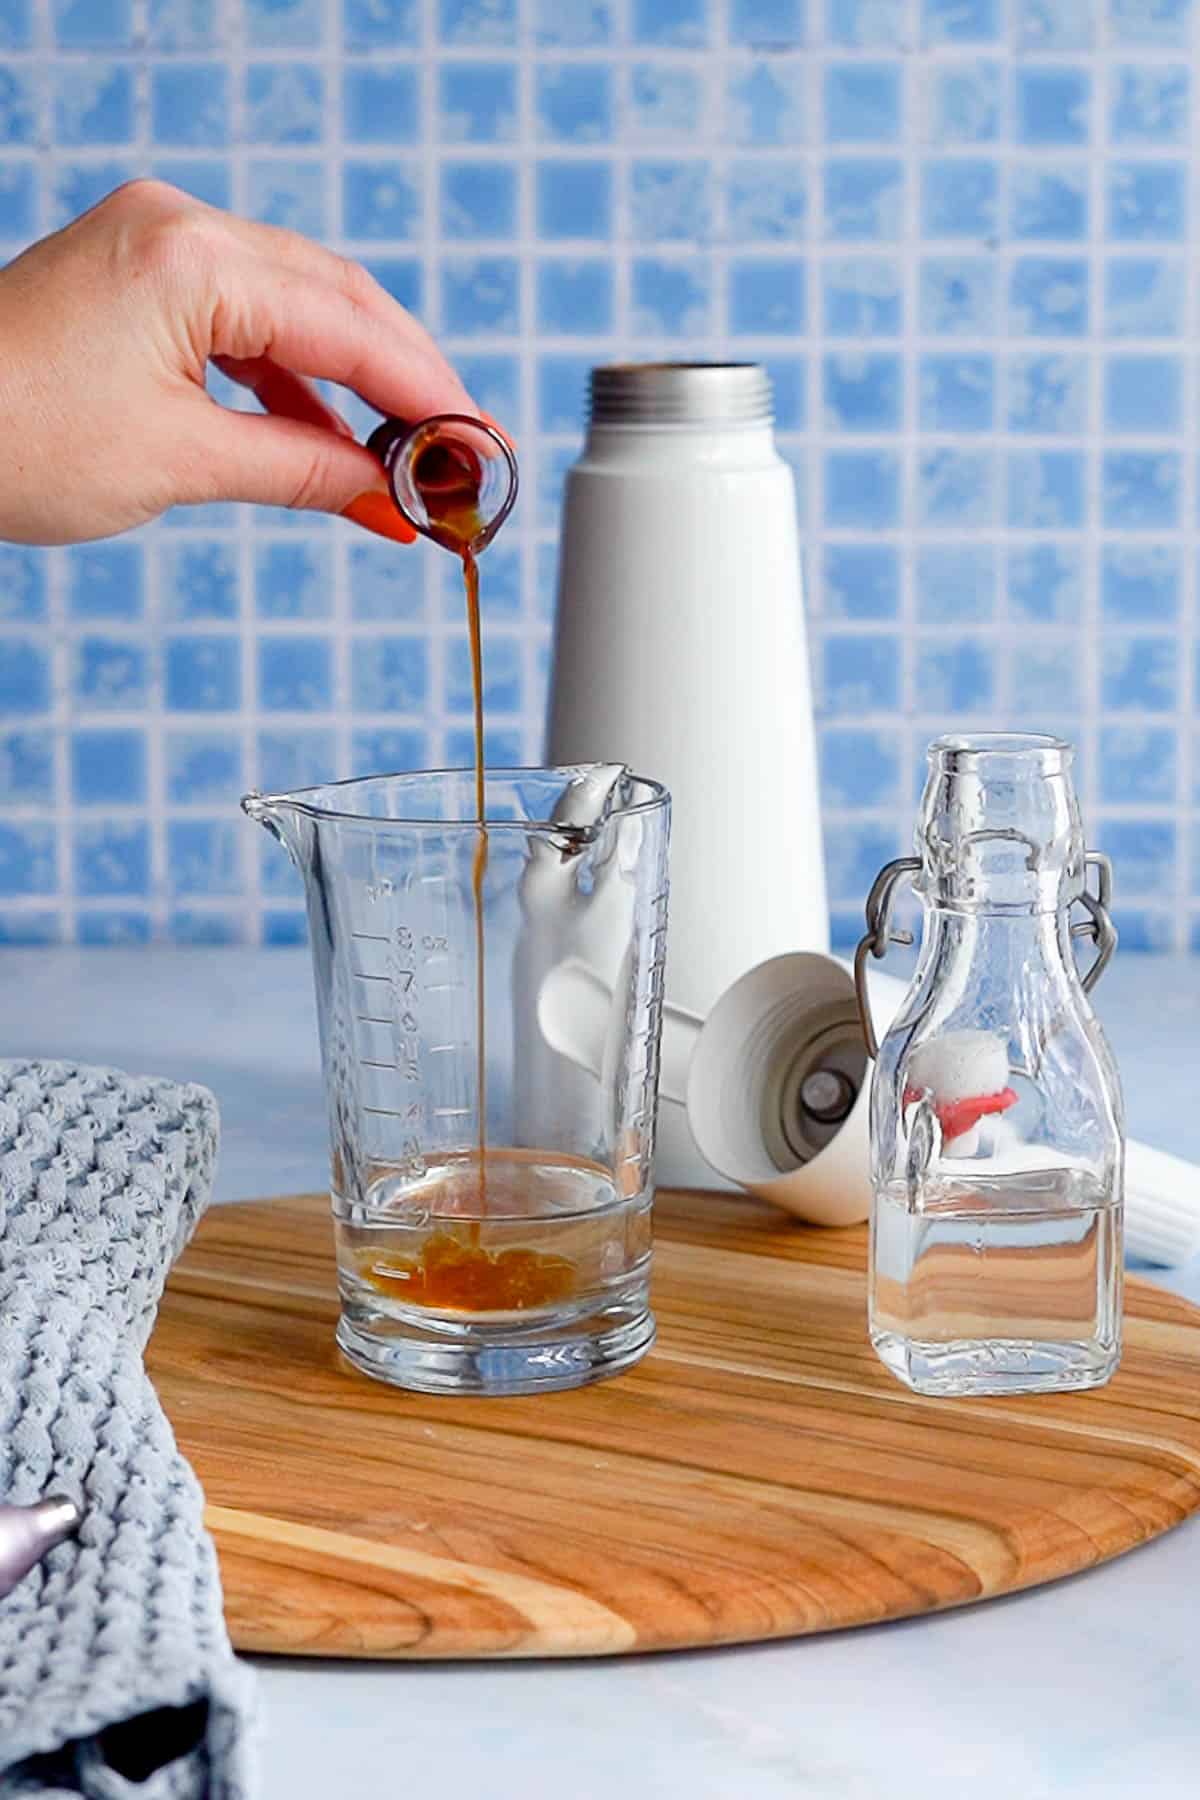
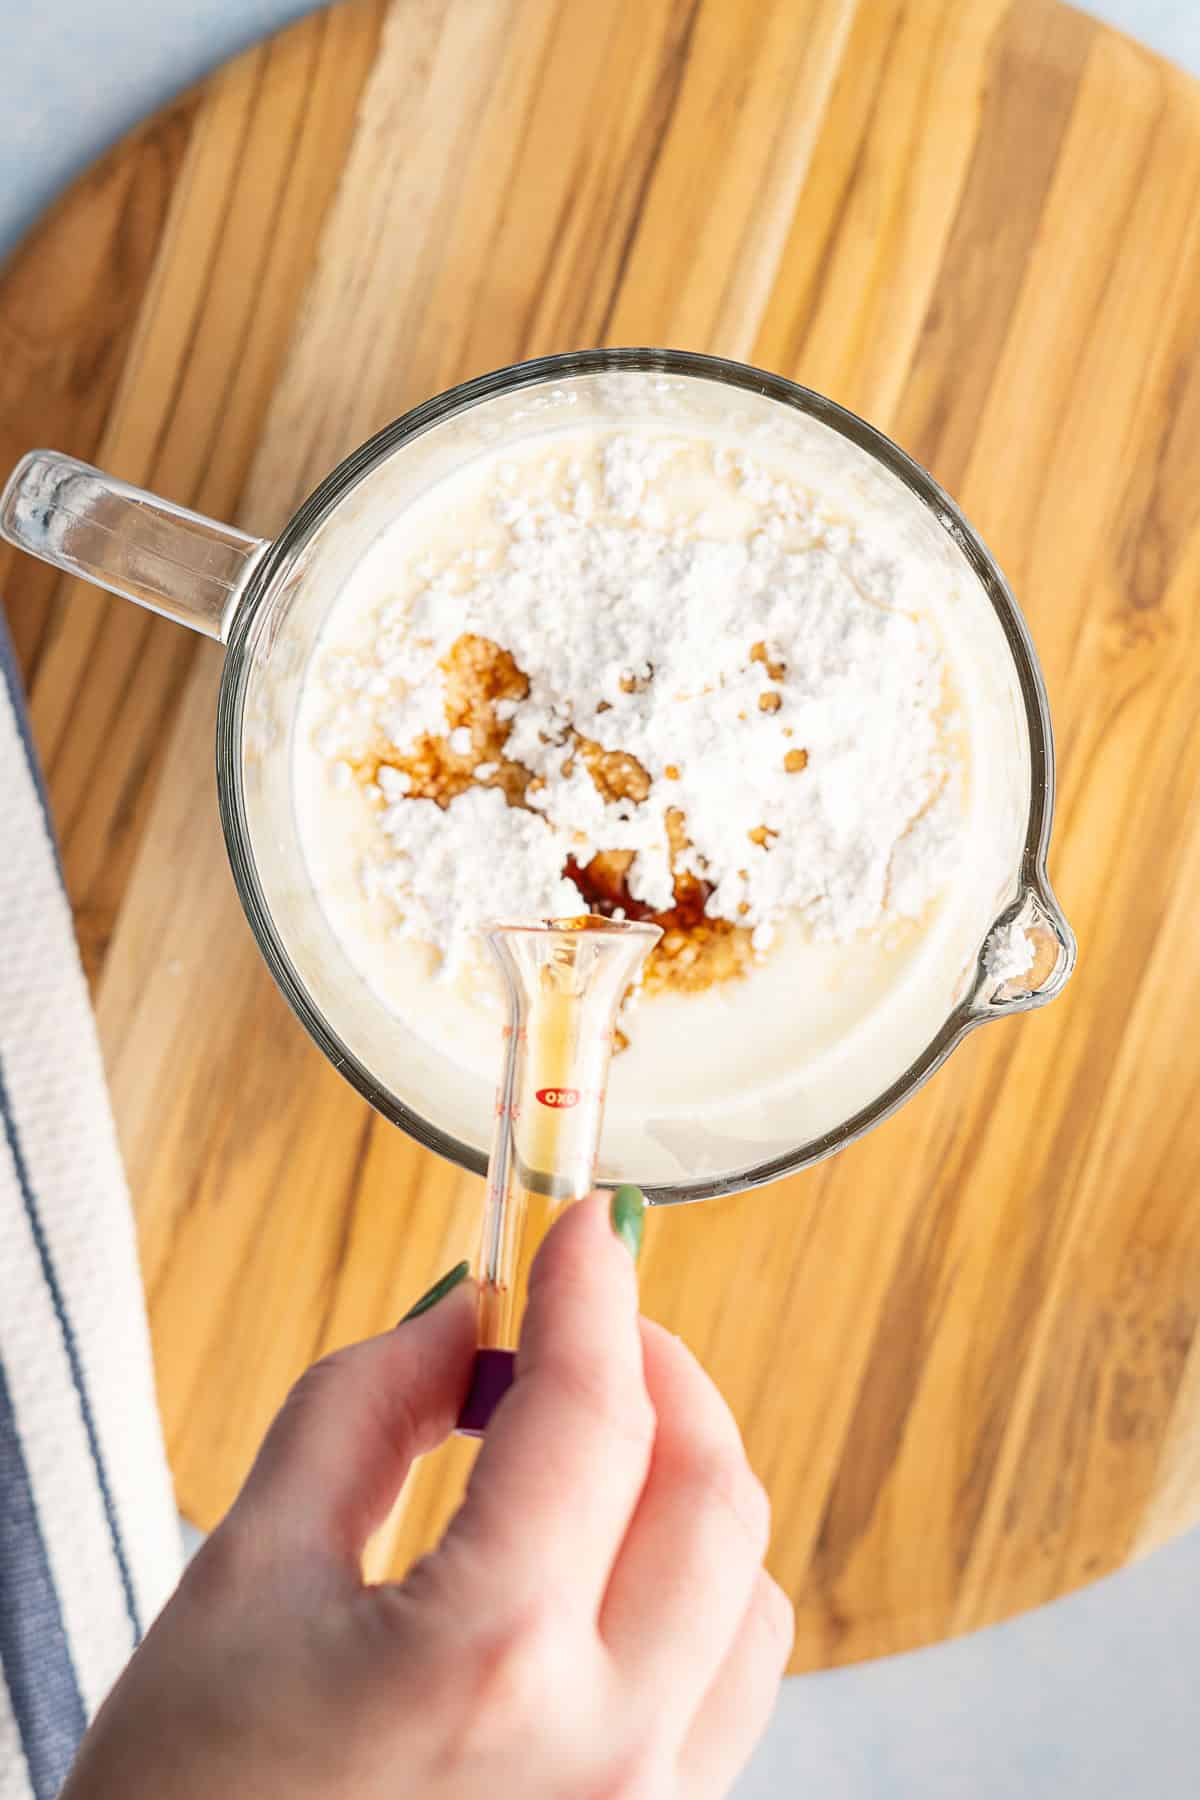
1: Gently mix together cold heavy cream, chilled simple syrup, vanilla extract, and salt in a measuring cup.
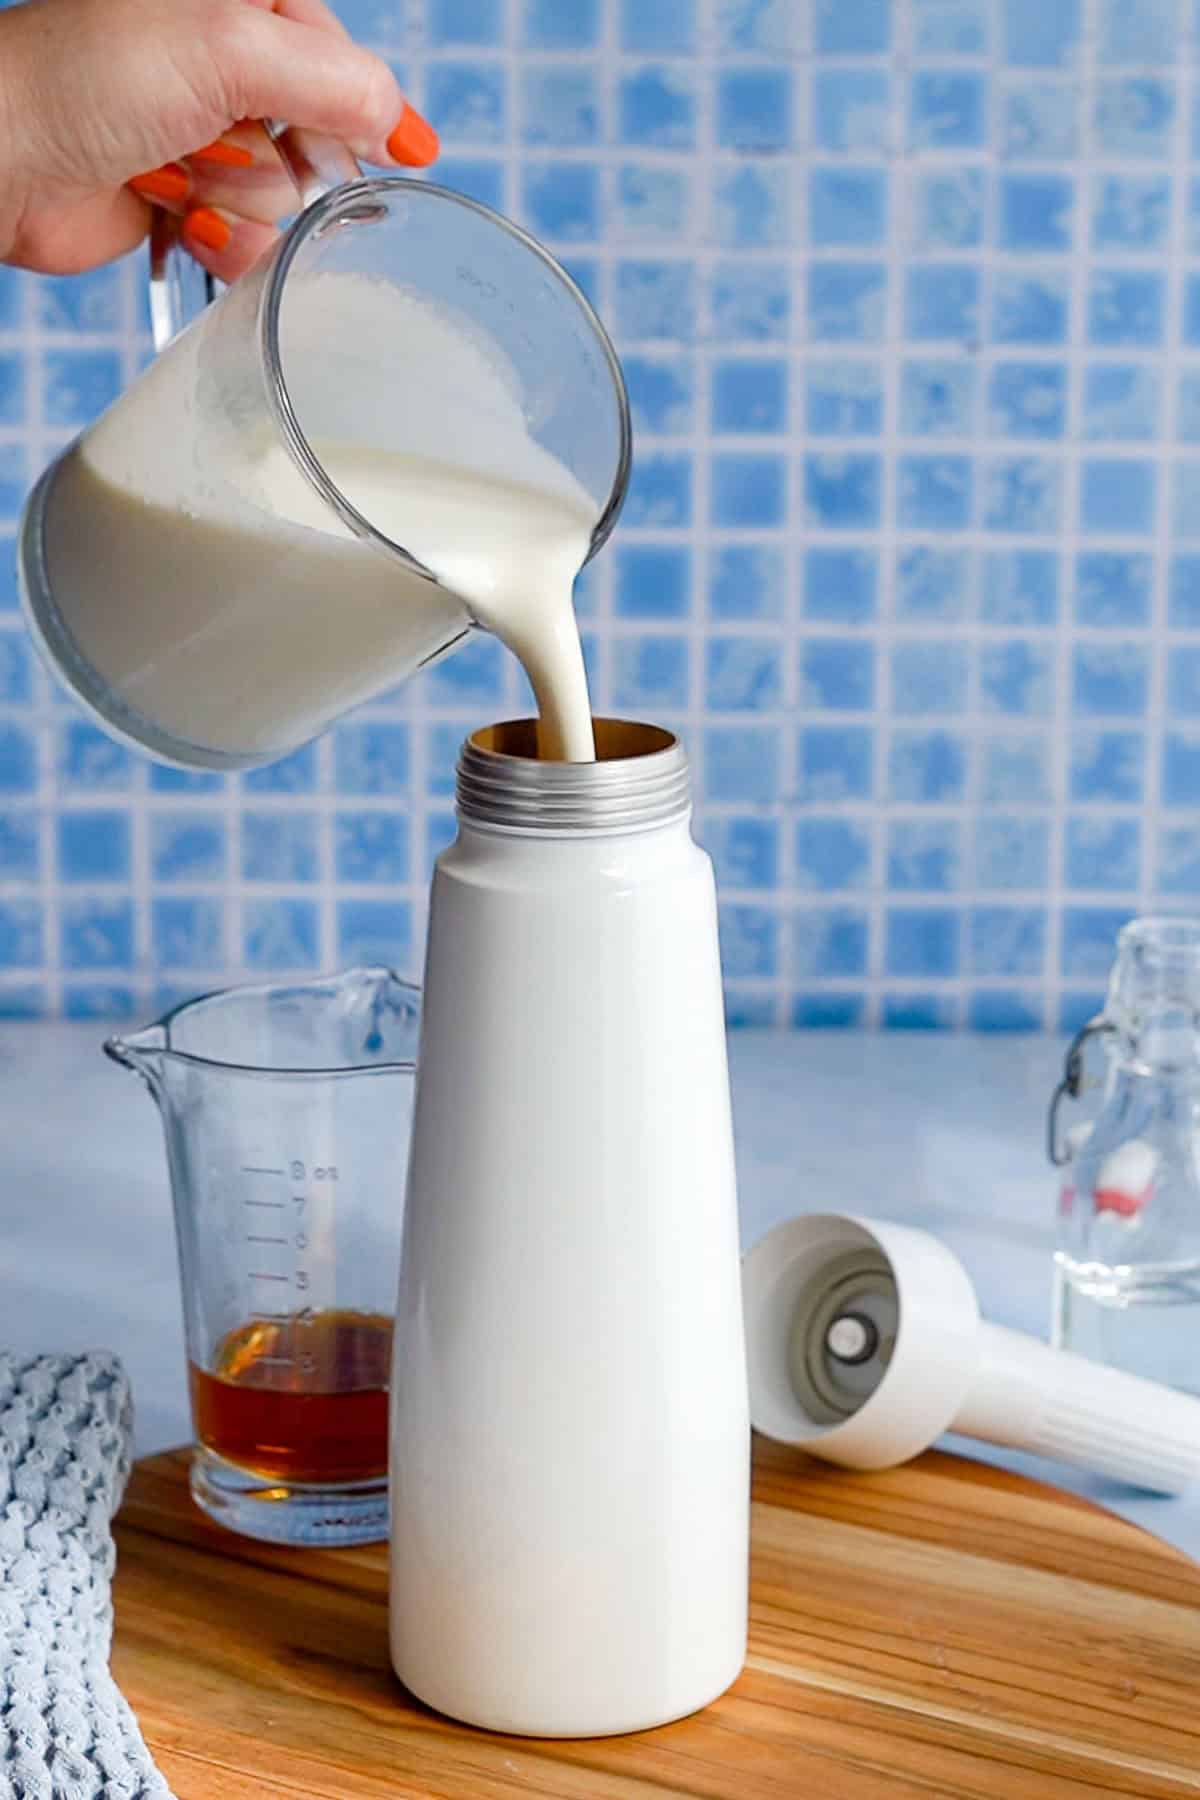
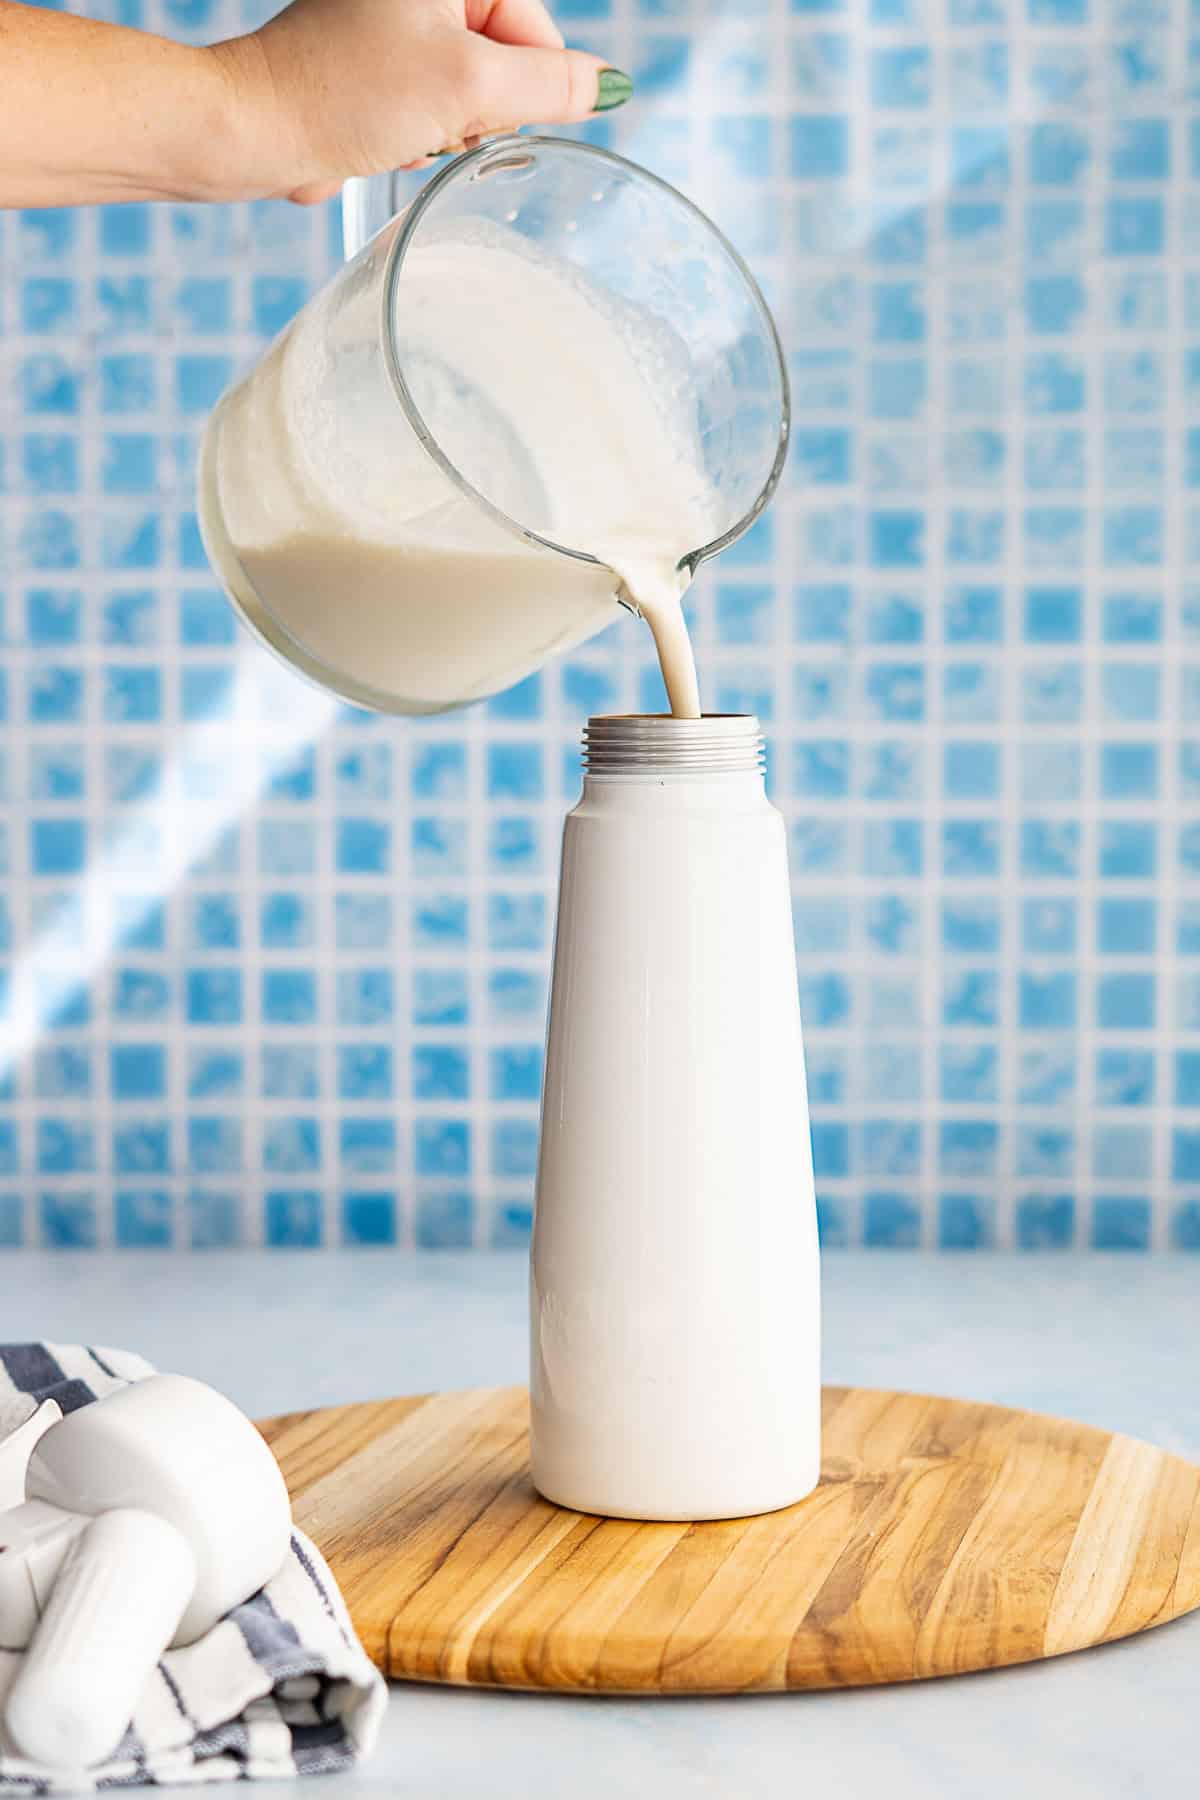
2: Pour the mixture into your whipped cream dispenser (max 2 cups for a 0.5L/1 pint canister).
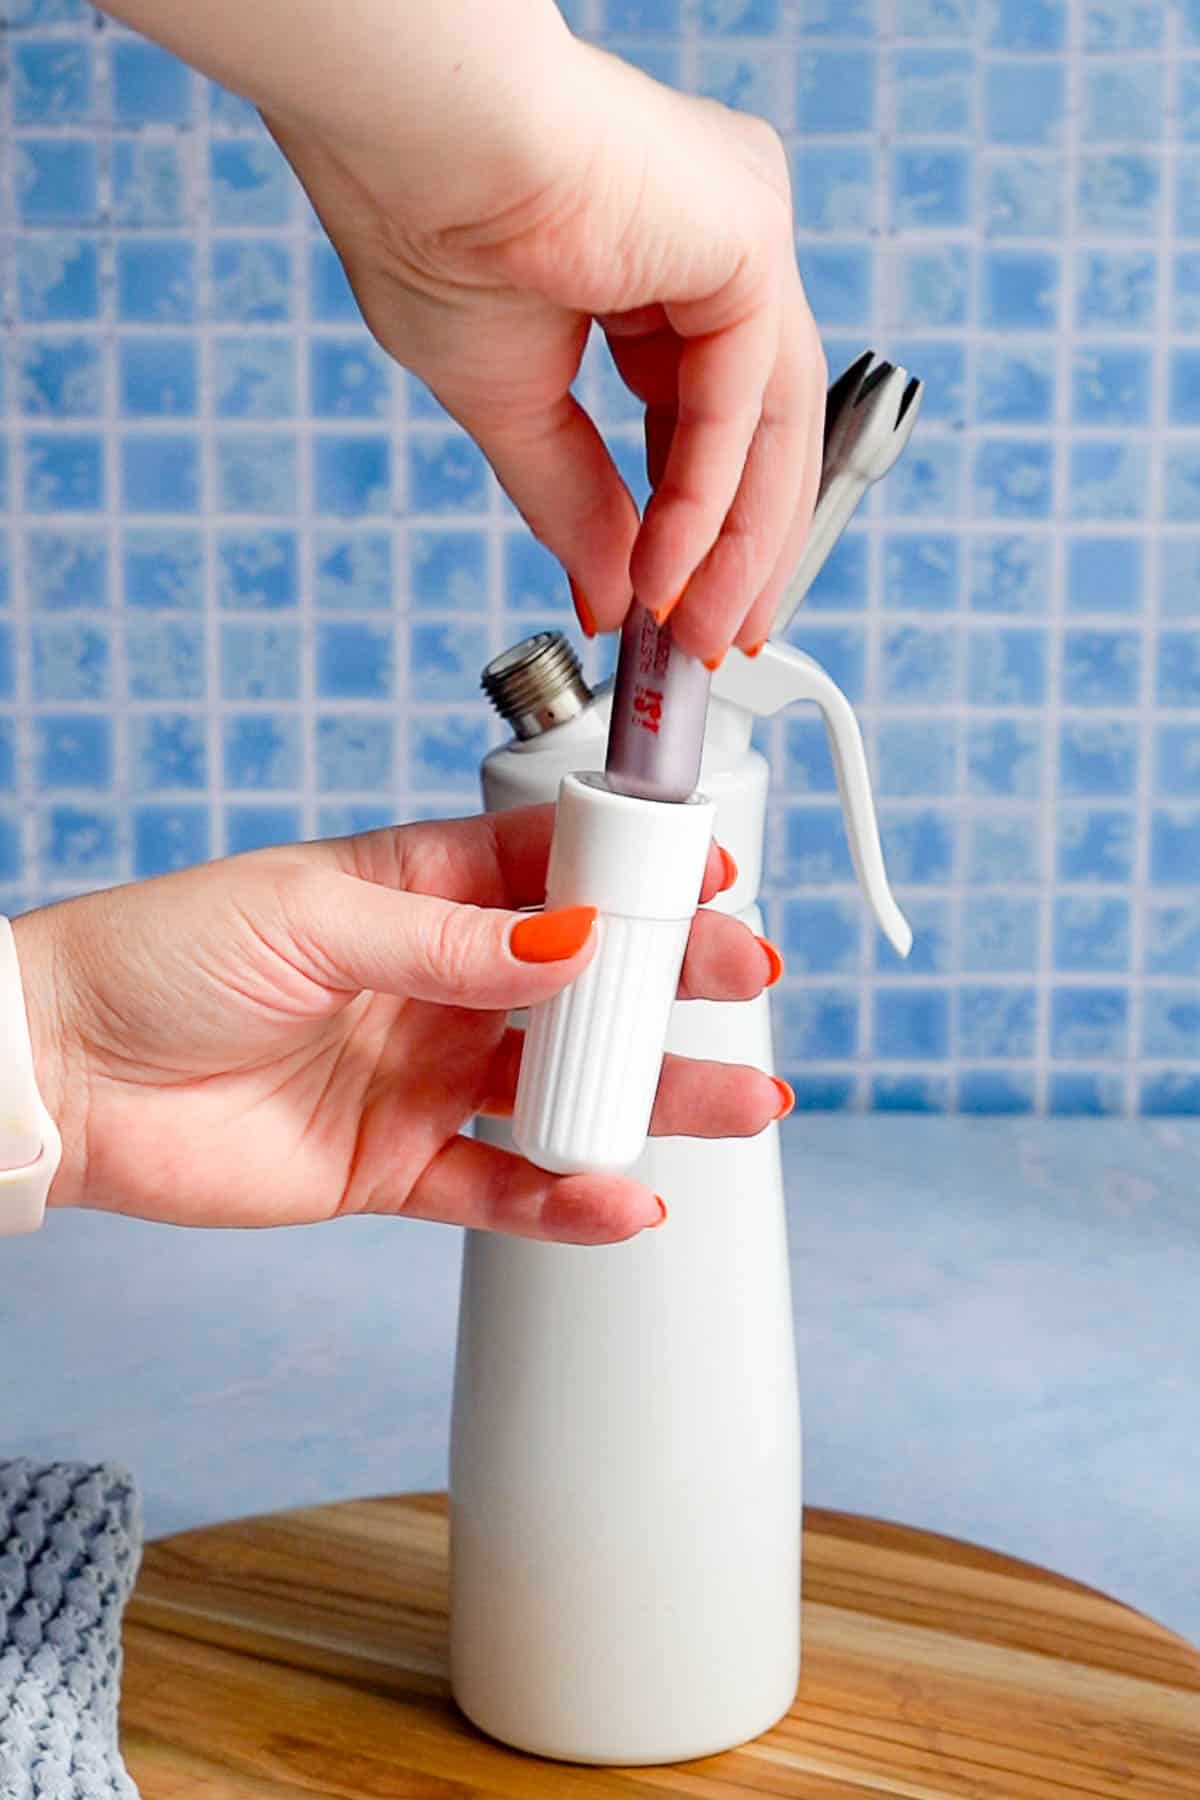
3: Charge the dispenser with an N2O cartridge.
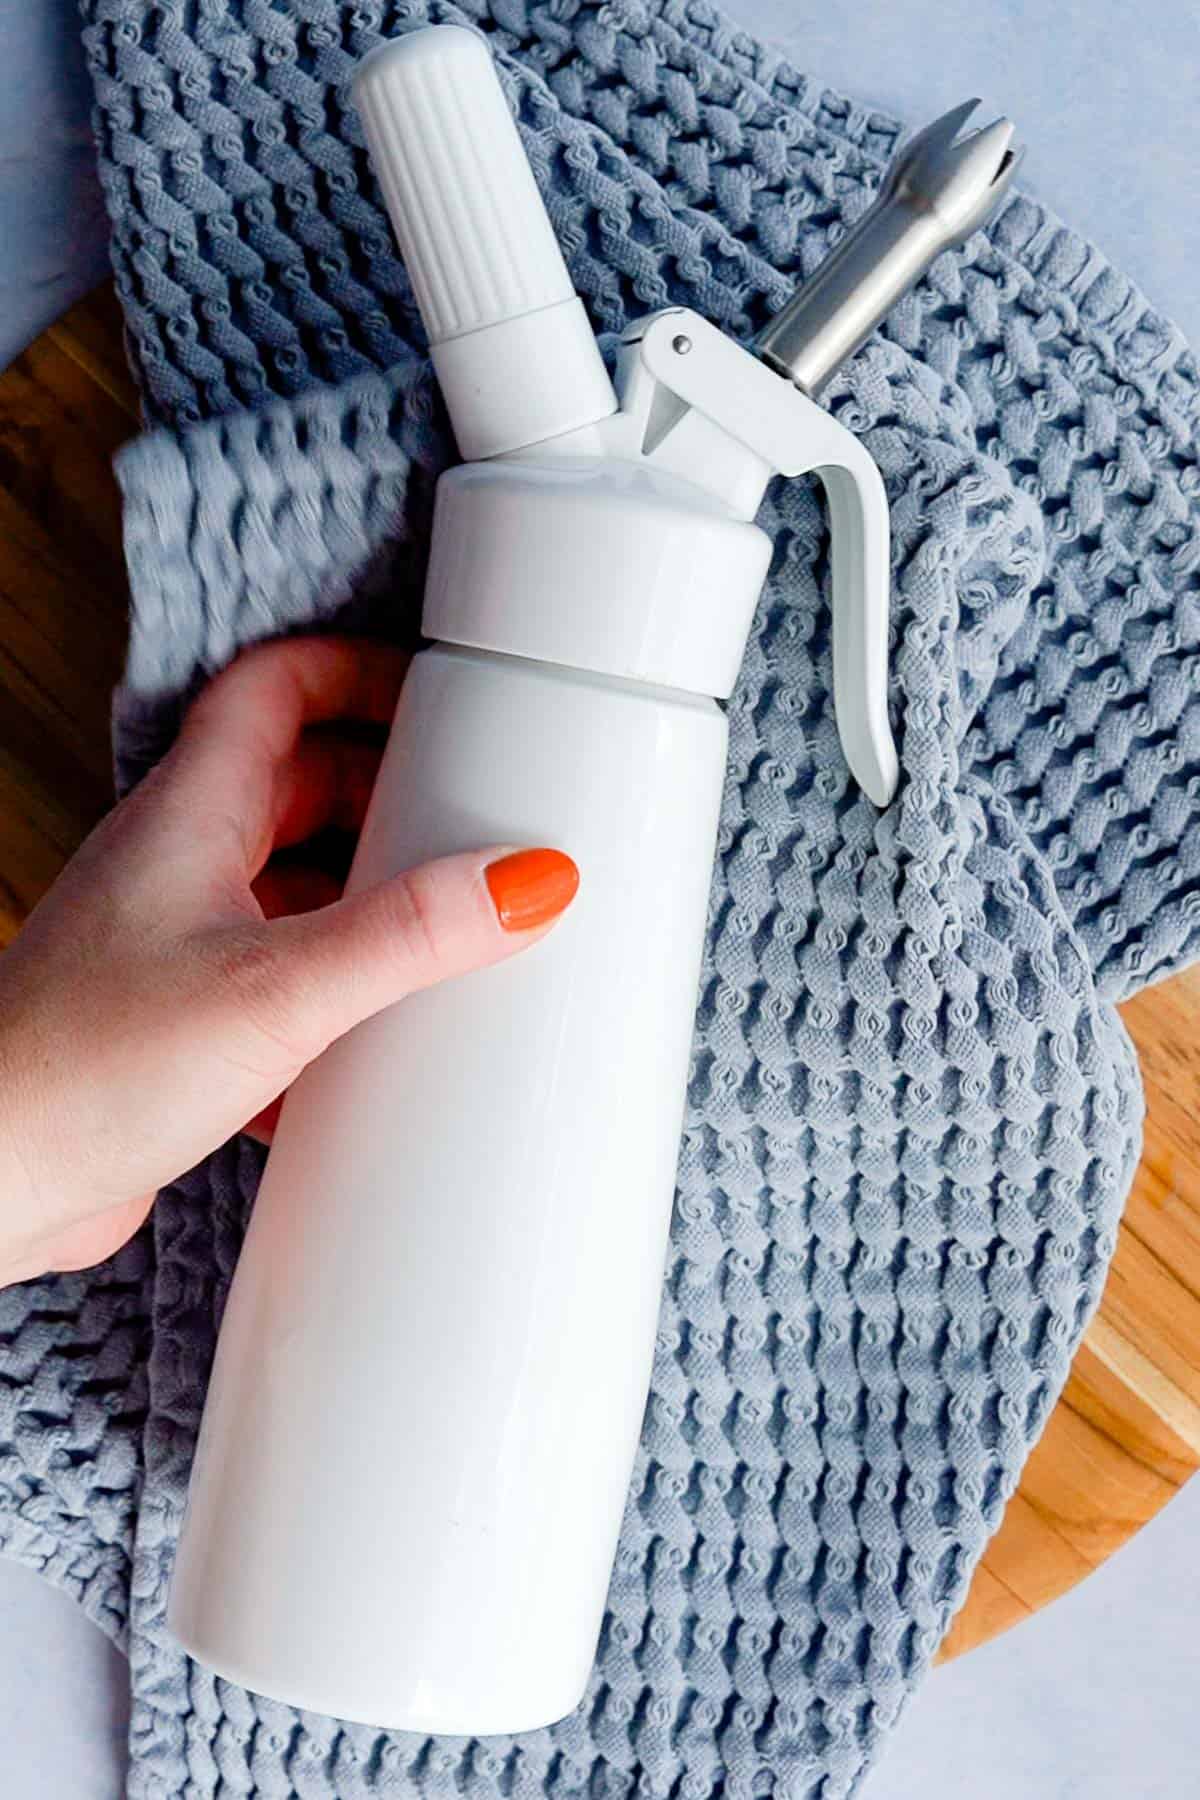
4: Lay the canister on its side for 1-2 minutes to help gases distribute evenly. Pop it back in the fridge if you aren’t going to use it immediately to keep the ingredients cold.
5: Shake vigorously until the mixture feels dense, then stop, about 8-10 shakes.
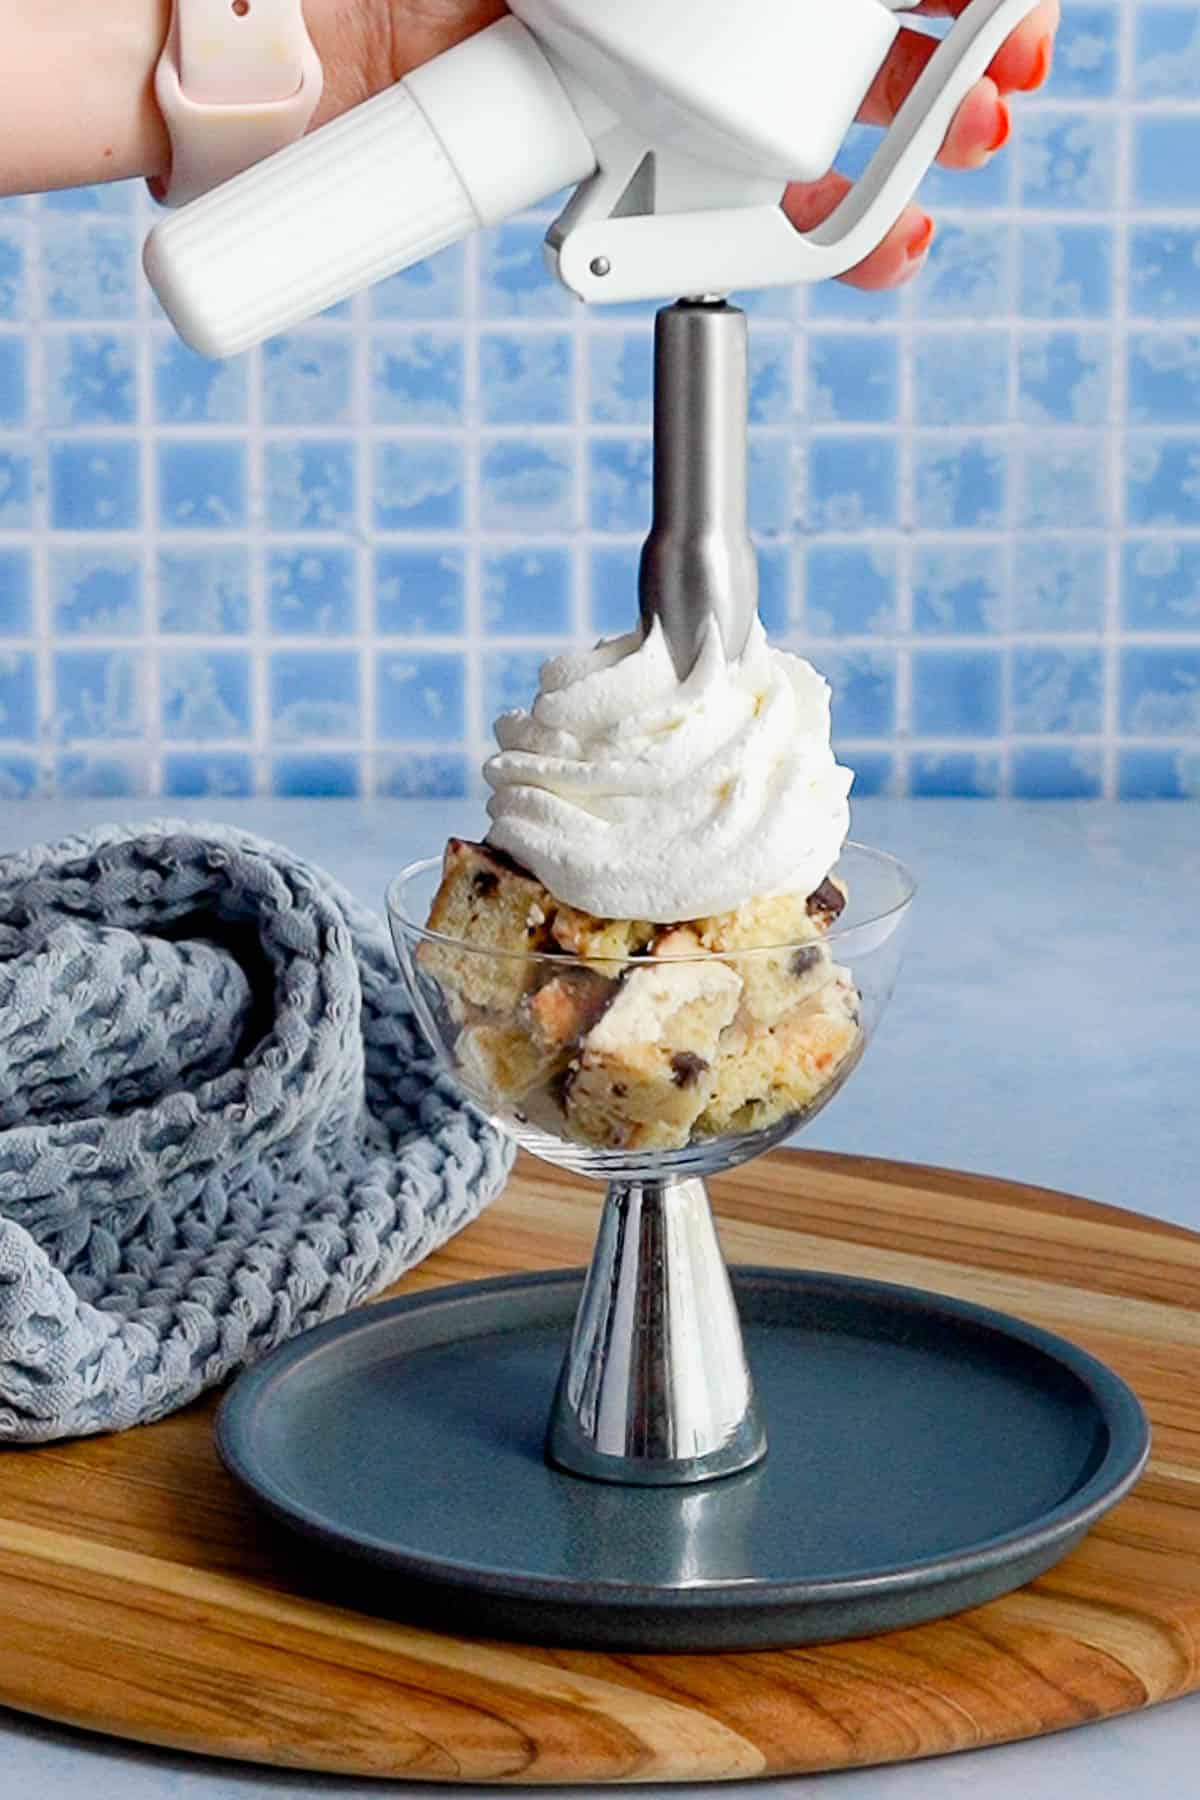
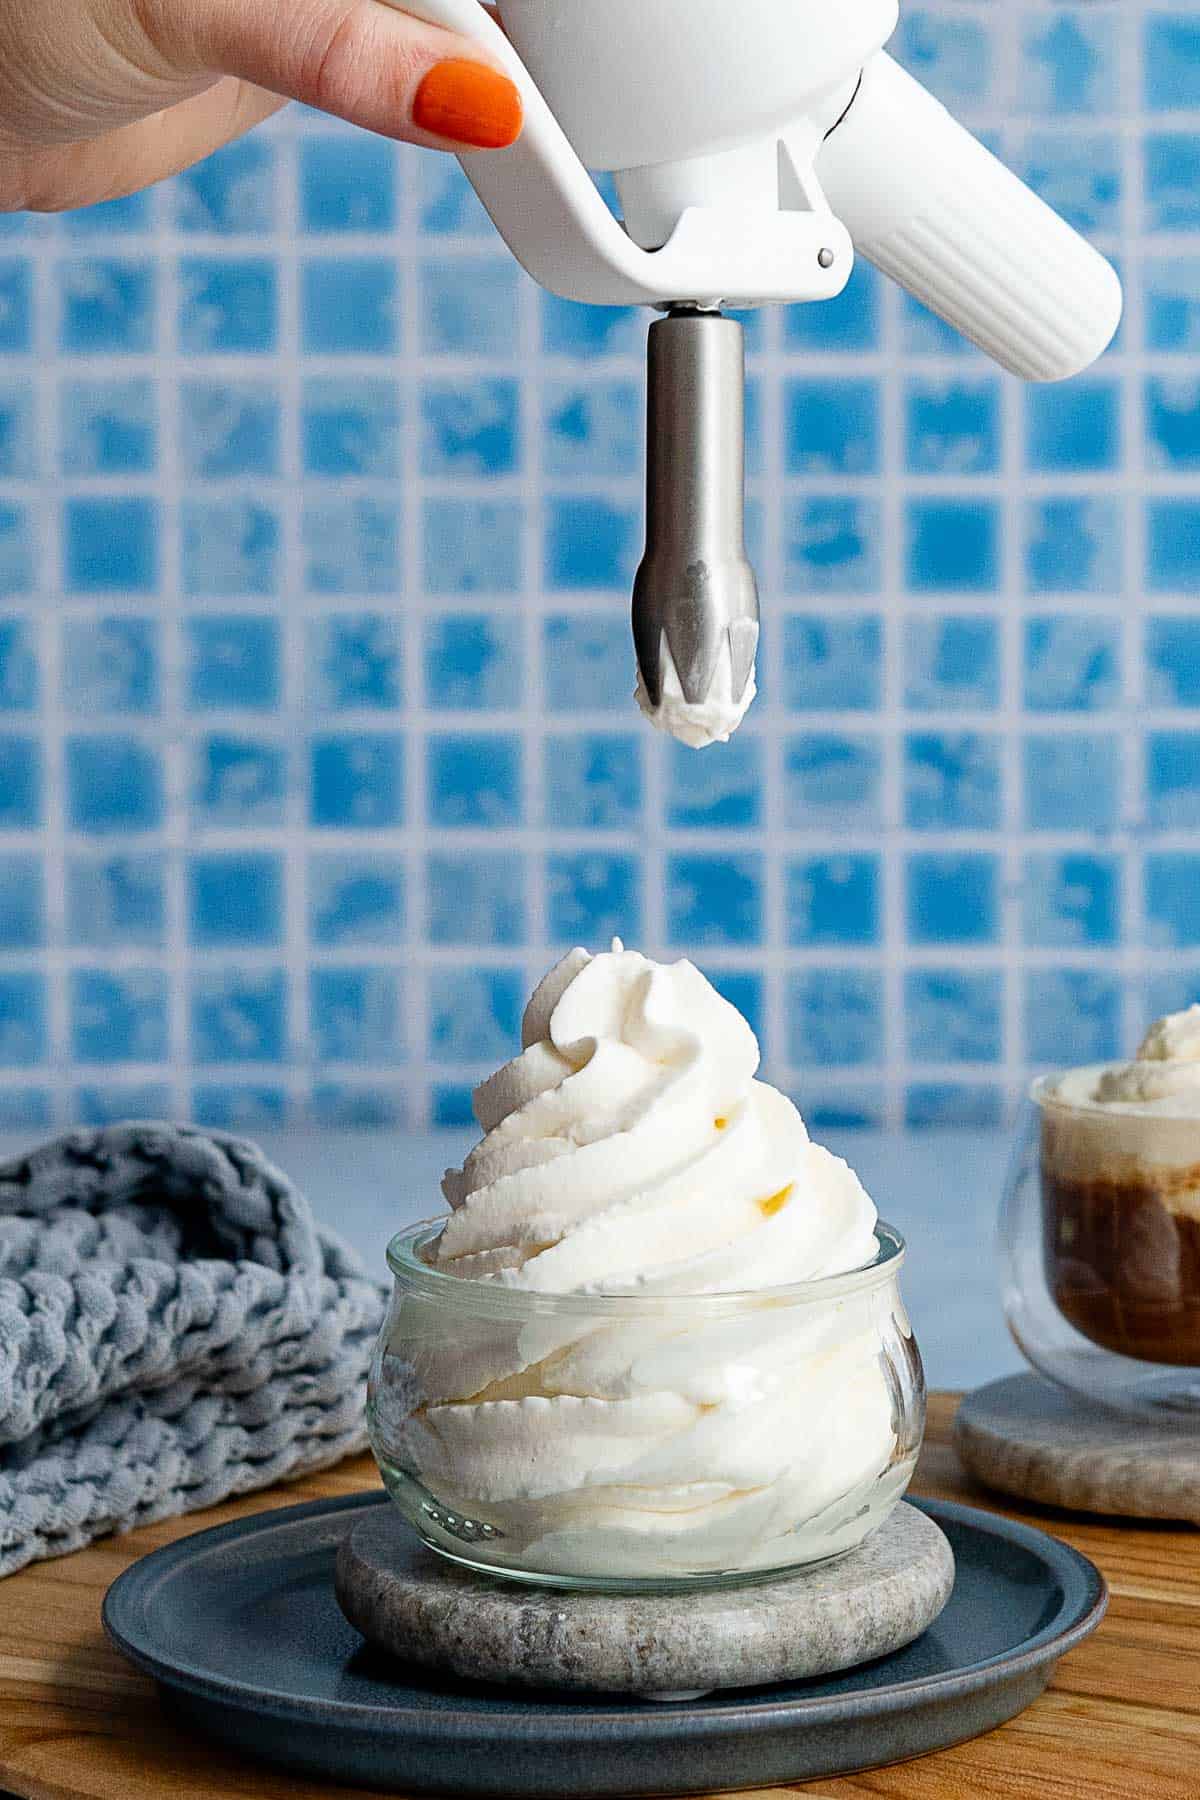
6: Hold the dispenser completely upside down at a 90° angle, and dispense your whipped cream.
💡tips & tricks for getting it right
🍽️ how to serve your homemade whipped cream
- beverages – top your morning lattes, hot chocolate, or iced coffee for that coffee shop experience at home. It’s also perfect on top of homemade sodas!
- food + desserts – you can also add a dollop to all your favorite foods, from your morning oatmeal, pancakes and waffles to after-dinner slices of pie or scoops of ice cream!
- cocktails + mocktails – whipped cream is an indulgent addition to cocktails like dessert martinis or boozy milkshakes, and it’s great for non-alcoholic mocktails as well!
- prep for the week – this easy whipped cream dispenser recipe can be made on Sunday morning and used throughout the week, giving you fluffy-as-a-cloud, sweet whipped cream all week long.
ℹ️ troubleshooting tips
- liquidy, lumpy, or uneven – if your texture is less than ideal, the most common reason is that your ingredients weren’t cold enough. Everything needs to be super cold or it won’t whip properly.
- fat content – for the best consistency, use cream that has 30-36% fat content. Lower fat creams require more shaking to mix, and higher fat creams can become too thick to spray.
- large air holes – large air bubbles mean your ingredients might not be mixed well enough or chilled long enough. This whipped cream gets even better the longer it sits, so pop it in the fridge and give it some more time to chill. Patience is key for perfectly incorporated cream.
- upside-down dispensing – make sure you’re holding the dispenser completely upside down at a 90° angle. Don’t tilt it and don’t spray it upright.
⚖️ scaling tips
Do you have a different sized dispenser? Check out these specifications for the iSi brand siphons.
- quart (1L)– a quart-sized dispenser can hold up to 34 ounces of liquid.
- half-pint (0.25L)– for a half-pint-sized dispenser, use up to 8.5 ounces of liquid.
- pint (0.5L)– a pint-sized siphon can hold up to 17 ounces of liquid.
🤔 wondering what to do with any leftover cream?
Use any leftover heavy cream to make yourself an indulgent Italian soda or a super special seasonal latte. Heavy cream lasts for about 10 days in the container once opened. It doesn’t freeze well, because it can separate when defrosted, so opt to use it in a drink or another recipe instead.
Wanna save this recipe for later? 📬
♻️ customize your whipped cream
- use powdered sugar – use 1/3 cup, or 38 grams, of powdered sugar (aka confectioners sugar) to sweeten your whipped cream instead of using a simple syrup. Since the powdered sugar dissolves quickly in moisture, you can use up 12-16 ounces of heavy cream (338-450g).
- flavor it – if you wanna use an infused simple syrup to sweeten or flavor your whipped cream, use 12 ounces of cream and 4 ounces of syrup. If you want a sweeter foam with stronger flavor, you can use 10 ounces of cream to 6 ounces of syrup. You can also use a teaspoon of another extract flavor, like peppermint, almond, or even butter extract!
- make it exactly like Starbucks – use vanilla syrup instead of simple syrup and vanilla extract for that signature Starbucks sweet whipped cream flavor.
🔀 using powdered sugar to make whipped cream
1: Whisk the ingredients together gently, making sure to mix out any lumps, but being careful to not froth the mixture.
2: Pour the mixture into your whipped cream dispenser (max 2 cups for a 0.5L/1 pint canister).
Once in the canister, the directions are EXACTLY the same as if you’re using simple syrup! Charge you canister with an N2O cartridge, allow it to rest a moment to distribute the gasses, then shake and serve!
🧰 equipment needed & storage tips
⚠️ a note about whipped cream siphons
These versatile tools cost a pretty penny, but it’s worth the cost to get a reputable brand since you’re dealing with compressed gasses.
Safety is key, so don’t go for an off brand dispenser. I love my iSi brand whipper (affiliate link), I’ve had mine so long it’s now considered “vintage.” 🤣
You can use it for much more than whipped cream, too! I love using mine for cocktail foams, dessert toppings, and even WAFFLES (like, yeah…the BATTER!).
🫙 how to store leftover whipped cream
If you don’t use all of the whipped cream in the canister, you can store it in the fridge for up to a week (though I’ve kept mine for up to 10 days and lived to tell the tale 😛).
You may need to shake your whipped cream again to re-combine all of the ingredients before using, and if it’s still flat after shaking, you may need to charge it with another cartridge of N2O.
💬 q+a
What’s the difference between N2O and CO2 chargers?
You MUST use N2O (nitrous oxide) chargers, NOT CO2. CO2 is carbon dioxide, and it will carbonate your cream. This will curdle your cream and it’ll be bitter-tasting. They look almost identical, so always double-check the label before you buy!
Why isn’t my whipped cream coming out?
Three main reasons:
(1) everything is too warm, chill your cream and dispenser, (2) you didn’t shake it enough after charging, give it about 8-10 good shakes, or (3) you’re not holding it completely upside down at a 90° angle when dispensing.
How long does homemade whipped cream last?
Store it in the dispenser in the fridge for up to a week (I’ve kept mine up to 10 days). You may need to give it a quick shake before using again to recombine the ingredients.
If you make this recipe, please leave a review in the comments and a star rating!
⭐️⭐️⭐️⭐️⭐️
I read every single comment, and each rating is helpful to other readers, too! 🥹
I also love connecting on social media, so snap a pic and hashtag it #myrecipeforfun and tag me on YouTube, TikTok, Threads, or pin this recipe on Pinterest!
Easy Whipped Cream Dispenser Recipe
Wanna save this recipe for later? 📬
Equipment
- 1 whipped cream dispenser also called a whipped cream siphon
- 1 N2O cartridge also called a cream cartridge
Ingredients
simple syrup whipped cream
- 150 g simple syrup 4 ounces, 118 mL
- 360 g heavy cream 12 ounces, 355 mL
- 5 g vanilla extract 1 tsp, 5 mL
- pinch kosher salt
powdered sugar whipped cream
- 450 g heavy cream 2 cups, 500 mL
- 38 g powdered sugar 1/3 cup
- 3 g vanilla extract 1 tsp, 5 mL
- pinch kosher salt
Instructions
simple syrup whipped cream
- Combine salt, vanilla, + syrup. Stir together the syrup, salt, and vanilla extract in a measuring glass. Make sure the salt is completely dissolved.150 g simple syrup, 5 g vanilla extract, pinch kosher salt
- Add heavy cream. Pour heavy cream to whipped cream canister.360 g heavy cream
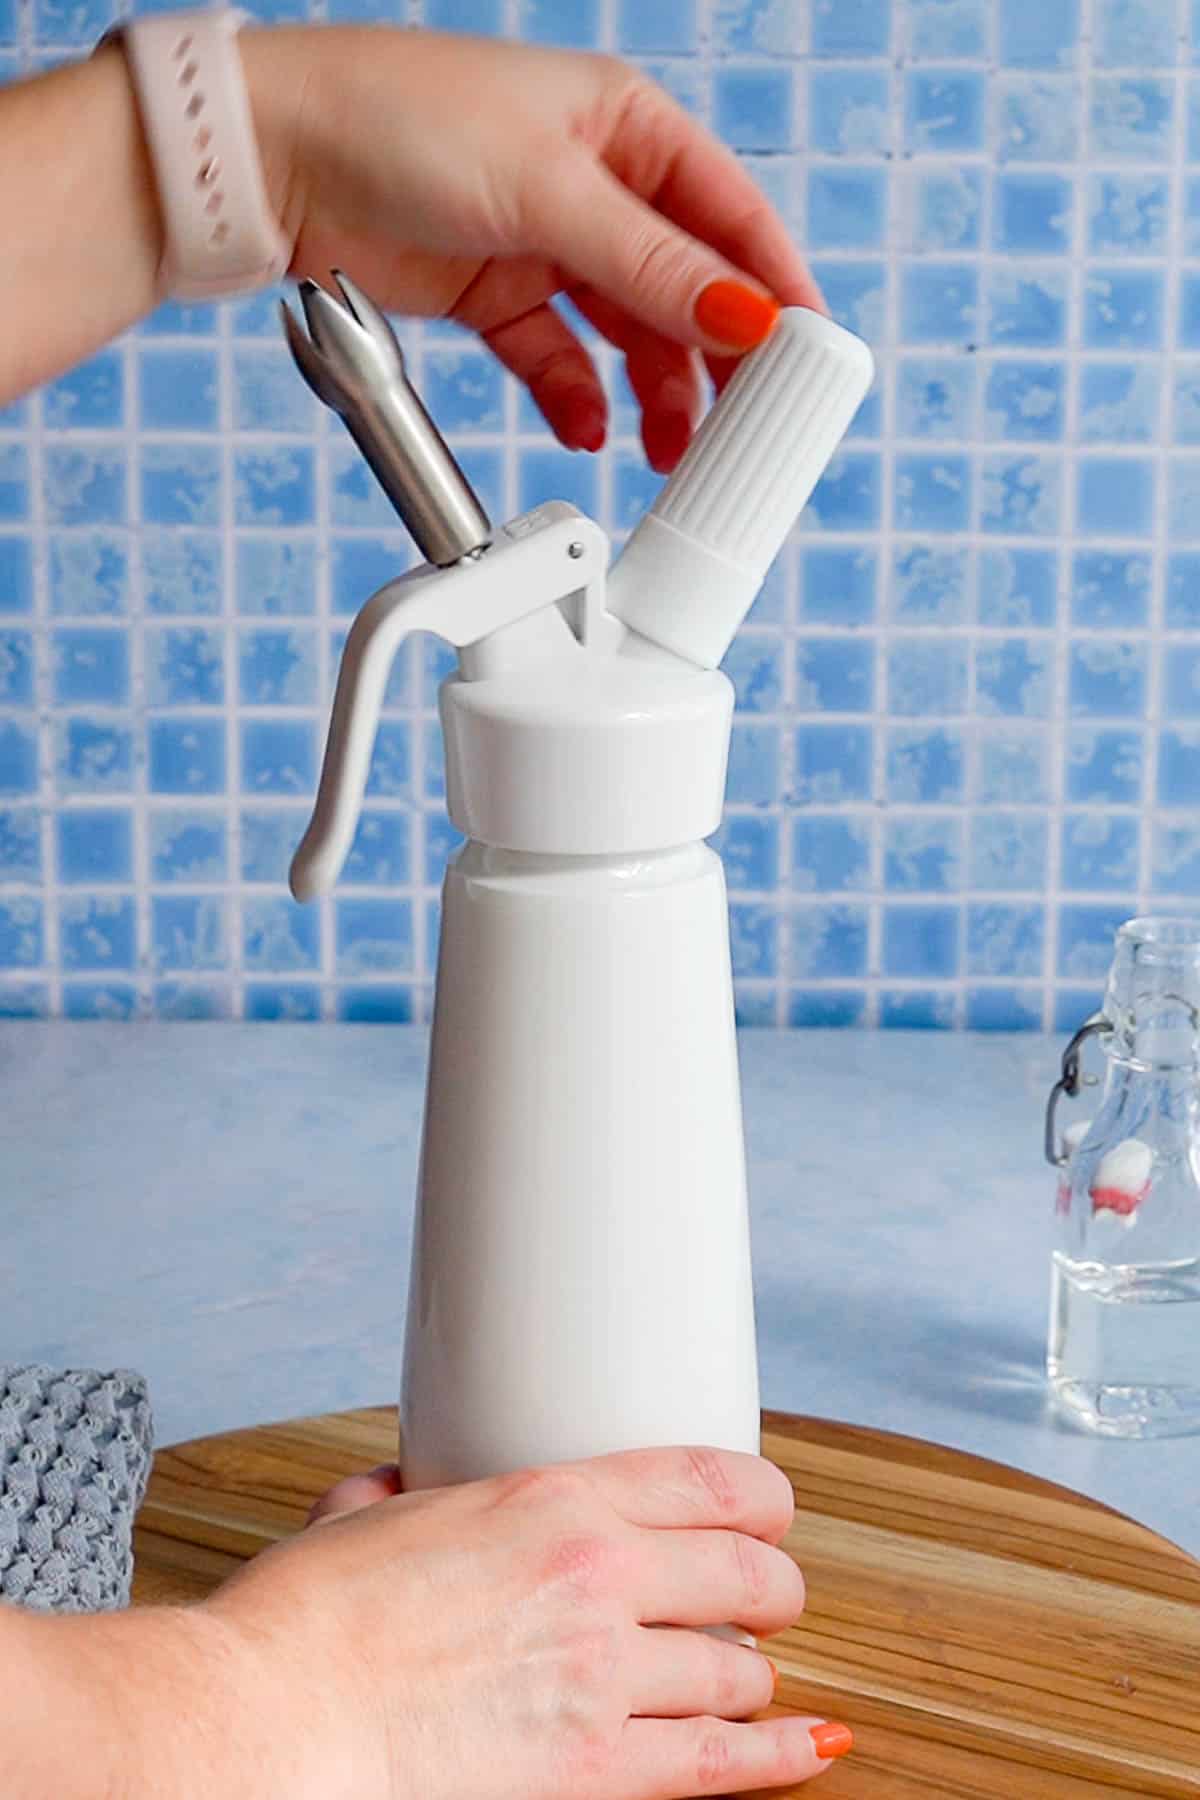
- Pour in syrup mix. Add the syrup mixture to the the whipped cream canister.
- Attach top of canister. Following your manufacturers instructions, screw the top of the dispenser onto the siphon.
- Charge canister. Use an N2O canister to charge the siphon.
- Lay siphon on side. Lay the canister on its side for 1-2 minutes to help the gasses distribute evenly.
- Shake. Shake the whipped cream canister 8-10 times to thoroughly mix and thicken the ingredients.
- Dispense. Dispense your whipped cream at a 90º angle.
- Store. Store any leftover whipped cream in the canister in the fridge for up to 10 days.
powdered sugar whipped cream
- Combine ingredients well. Combine all ingredients in a measuring glass and stir well to mix. If using a whisk, use care to not whip the cream at this point. Give the mix 5 minutes or so to incorporate, then stir it again to ensure there are no clumps at all in the mixture.450 g heavy cream, 38 g powdered sugar, 3 g vanilla extract, pinch kosher salt
- Pour into siphon. Pour the cream mix into the bottle of the whipped cream canister. If you see lumps at the bottom of your measuring glass, you can pour it back into the measuring glass and mix it again! You want to make sure there are NO lumps as these can clog your siphon.
- Attach top of canister. Following your manufacturers instructions, screw the top of the dispenser onto the siphon.
- Charge canister. Use an N2O canister to charge the siphon.
- Lay siphon on side. Lay the canister on its side for 1-2 minutes to help the gasses distribute evenly.
- Shake. Shake the whipped cream canister 8-10 times to thoroughly mix and thicken the ingredients.
- Dispense. Dispense your whipped cream at a 90º angle.
- Store. Store any leftover whipped cream in the canister in the fridge for up to 10 days.
Notes
🦺 safety tips
📖 Read the instructions. Make sure to follow the manufacture’s instructions of your whipper. I recommend the iSi brand of siphons as I have one and have used that brand for over 10 years, not including my time in culinary school and the restaurant industry. I know it’s tempting to cut costs and buy a cheaper model, but in my opinion, it’s not worth the safety risk. 📏 Know the capacity. Refer to the size of your canister to know the volume. It’s important to NOT overfill your canister with liquid.- For a 0.5 L, or 1 pint size, you can fill it with 17 ounces of liquid.
- For a 0.25 L, or 1/2 pint size, you can fill it with 8.5 ounces of liquid.
- For a 1 L, or quart size, you can fill it with 34 ounces of liquid.
ℹ️ troubleshooting tips
💦 nail the texture. Whipped cream too liquidy? Try shaking the canister a bit more. You can give your can a quick shake, similar to a cocktail shaker, to mix up the gas and cream mixture. You’ll feel it start to thicken in the can as you do this. Is your whipped cream too clumpy and breaking? You might have shaken it too much. ❄️ chill out. 9 times outta 10, your whipped cream is not cold enough. Pop the canister back in the fridge to chill your mixture for a minimum of 30 minutes, then give it another try. ⛽️ fill ‘er up. If you didn’t fill your canister to the max liquid fill (17 ounces on a pint, 8.5 ounces on a half pint) chances are you have too much empty space in your canister. You can add another canister of N02 to compensate for this. 🫧 release all the gas. Do NOT open the canister while it is charged with N02. Be sure to fully release any extra gas from the canister before attempting to screw the top off. You can do this by setting the canister upright, then squeezing the lever to release any extra gas. Keep pressing until you don’t hear any more hissing of the gas.Nutrition
💡ideas for using homemade whipped cream

Top seasonal homemade soda with a generous dollop of whipped cream!

Give festive holiday lattes or coffeehouse classics a boost of flavor!
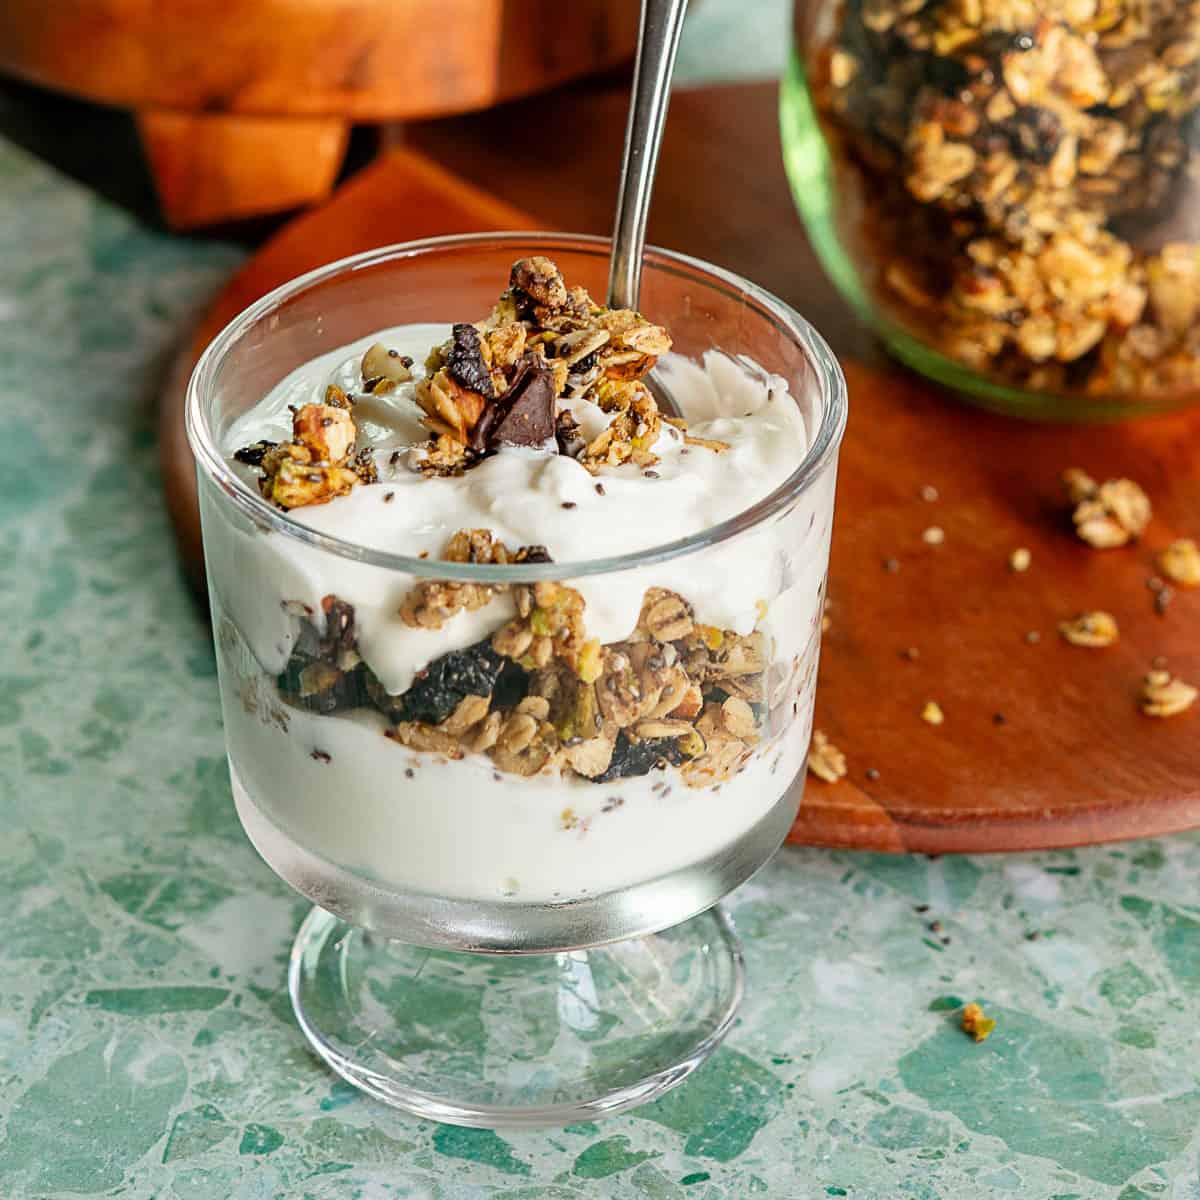
Add some fun to breakfast dishes like homemade granola parfaits or seasonal cinnamon buns!